Staticman for User-Generated Content on a Jekyll Static Website
Who was your favorite superhero as a kid?
Mine was Batman.
(Still is, to be honest.)
The fact that he has no real superpowers, a strict code of values and a dark past all make for a very compelling, complex character.
However, I've just discovered a new hero that might be on par with my childhood idol:
Staticman.


His superpower? Improving static sites with dynamic, user-generated content.
Probably won't get him in the Justice League (that movie sucked anyway), but a real game-changer for web developers out there working with static platforms.
Disclaimer: Snipcart proudly sponsors this open-source tool. <3
Imagine you've chosen to build a website with a static site generator such as Jekyll or Pelican.
You still want user interaction, through comments, product reviews, etc. Right?
That's where Staticman comes to the rescue.
First, let's get a more detailed view of its origin story and its superpowers' inner workings. Then, we'll see how you can easily integrate Staticman in a static site, with our simple Jekyll demo.
Why the need for dynamic content on a static site?
If you've wandered a bit around our blog, you already know that we're fans of static sites and everything JAMstack-related.
What's not to love about them? They're fast, secure, flexible and way cheaper to maintain than their dynamic counterparts.
Perfection then, right?
Well, not exactly. Static sites still have their limitations.
Eduardo Bouças, a cool dev and static development enthusiast, described one of the main headaches caused by them as this:
"If there is no back-end to receive and process forms with user input, how can I add user-generated content?"
Indeed, it's a good cause for concern as you probably want this dynamic, user-generated content on your platform.
Marketing-wise, it plays a big part in the development and strengthening of customer relationships. User interactions are crucial to any community building efforts.
It will also enhance your content's value and improve its SEO results. In the end, this all helps maximize conversions and sales opportunities.
That's why Eduardo came up with Staticman.
What is Staticman?
A free & open source solution, Staticman allows you to cut the dependence on third-party tools when it comes to user-generated content on a static site.
How does it achieve this?
By handling users' interactions and transforming it into data files directly in your GitHub repo. Just like the rest of your content.

Yup, it's as simple as it seems. [Source]
Here are a few examples of user-generated content Staticman will help transform into dynamic content for your static website:
Comments on blog posts
User reviews
Voting results
Staticman currently works like a charm with Jekyll sites hosted on GitHub Pages. That's exactly what we'll be doing in the demo further down. But know that it can still be used with other static site generators such as Hugo, as others have successfully shown.
Files generated by Staticman are either pushed to your main GH branch right away, or placed as a pull request for approval. The latter lets you moderate user-submitted content.
Staticman vs. third-party alternatives
Batman has the Joker.
Staticman has dynamic third-party services.
I admit, well-known external tools like Disqus are not as evil as the criminal mastermind of Gotham City. Disqus is even quite a great tool, but one that static web developers often see as a "necessary evil".
I'm using Disqus here because it's the most popular commenting system out there, but this applies to any external service you might want to use for user-generated content.
Here are the biggest problems they bring--problems Staticman solves.
→ First, they own the user-generated content. Disqus stores all comments in its own backend and you have no control over it. All of that content not hosted on your site means that it won't be crawled by search engines, resulting in a big loss for SEO opportunity. Also, what happens if the service suddenly ceases its operations? You'll lose all that precious users' comments history. Big bummer if you're running a highly engaging blog.
With Staticman all dynamic content coming from your site's visitors is stored with the rest of your content, in your GitHub repository. You own it.
→ Disqus doesn't have a great track record on privacy. It's a known fact that, like many other free services, its profits come from ads. So, yes, it tracks users' activity while they browse websites in order to deliver targeted ads. Maybe it's something you don't care much about, but it sure bothers some of us.
Staticman is a free, open source solution that won't ever try to sell user info. You're the only "owner" of that content.
→ Third-party services are not really flexible when it comes to customization. Comments sections often clash with the rest of a website's design. It can be frustrating for developers looking for seamless user experiences.
A static solution like Staticman gives you the freedom to integrate custom comment section matching your branding.
Before we get to the demo, I think it's important to mention that it's possible to migrate your existing Disqus comments to Staticman, if you're looking to make the switch. This tutorial explains how to do so (at the end).
Jekyll static comments with Staticman
It's really easy to integrate Staticman with Jekyll and GitHub Pages. We'll do it in four simple steps:
Configure Staticman access to the repository
Create a configuration file
Add a simple HTML form to submit user content
Display the submitted content on our website
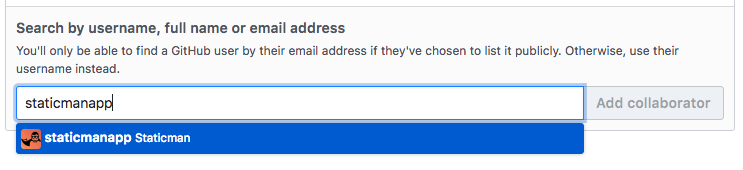
1. Configuring Staticman access to your repository
We first need to give write access to our repository to staticmanapp in the "Collaborators & teams section" of your repository's settings:

To make Staticman accept the invite, visit this URL : https://api.staticman.net/v2/connect/{your username or github org}/snipcart-jekyll-integ{repository name}.
To use the moderation feature and let Staticman clean-up the Pull Request branches for us, we must add a webhook. In the Webhooks section of your repository's settings, add https://api.staticman.net/v1/webhook with application/json for content-type and only the Pull request event selected.
2. Creating a configuration file
For Staticman to know how to handle our content we need to add a configuration file at the root of our repository. In staticman.yml we added this to allow our visitors to add reviews to our products pages:
# a collection of user review
reviews:
  name: "DEMO: snipcart-jekyll-integration"

  # we enable moderation, Pull Request will be created for every review
  moderation: true

  # they contain a name, a review note, a text message and a field to associate the review to a product
  allowedFields: ["name", "message", "review", "product"]
  # message is optional, other fields are required
  requiredFields: ["name", "review", "product"]
  # the content will be commited to the gh-pages branche
  branch: "gh-pages"
  # Staticman will include the name field in the commit message
  commitMessage: "Add Review from {fields.name}"

  # filename and format used for the stored data
  filename: "review-{fields.product}-{@id}"
  format: "yaml"
  # folder where reviews will be stored
  path: "_data/reviews"

  # Staticman can add the submission date for us
  generatedFields:
    date:
      type: date
      options:
        format: "iso8601"
3. Adding a HTML form to submit user content
With the following, Staticman will be able to receive our form. It's a simple HTML form, nothing fancy:
<!-- Notice the action url that tells Staticman where to send the POST data -->
<form method="POST"
      action="https://api.staticman.net/v2/entry/snipcart/snipcart-jekyll-integration/gh-pages/reviews"
      oninput="result.value=parseInt(this['fields[review]'].value)">
  <!-- The review will be associated with the current product -->
  <input name="fields[product]" type="hidden" value="{{ page.slug }}" />
  <!-- with options[redirect], our visitor will come back to our website when submitting a review -->
  <input name="options[redirect]" type="hidden" value="{{site.url}}{{site.baseurl}}{{ page.url }}" />

  <h4>Add a review</h4>
  <!-- and finally the user visible fields -->
  <p><label>Your name: <input type="text" name="fields[name]" /></label></p>
  <p><label>Review: <input type="range" id="fields-review" name="fields[review]" min="0" max="5" step="0.1" value="5" /></label><output for="fields-review" name="result">5</output>/5</p>
  <p><label>Comment: <input type="text" name="fields[message]" /></label></p>
  <p><button type="submit">Save review</button></p>
</form>
Here's a pull request example for a submitted user review.
Staticman created it, we merged the request, and it automatically deleted the branch. Inside _data/reviews we now have a file review-how-google-works-527a9620-110e-11e8-a047-07d296044fde.yml with this yaml data:
_id: 527a9620-110e-11e8-a047-07d296044fde
product: how-google-works
name: JeanSebTr
review: '4.5'
message: An excellent book!
date: '2018-02-13T22:36:24.970Z'
timestamp: 1518561384
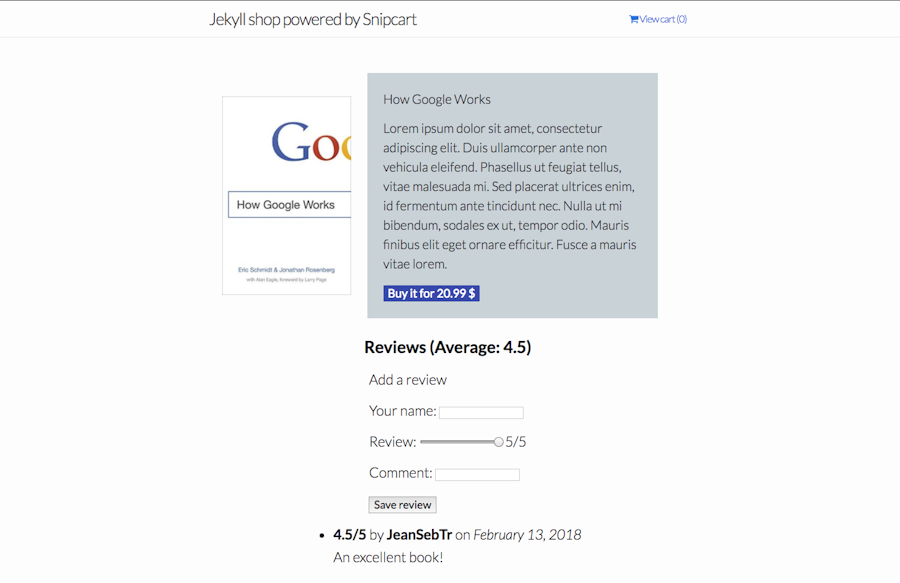
commentDate: '2018-02-13T22:36:24.970Z'4. Displaying user-submitted content
We can then display customer reviews under the products and add some Liquid templating magic to calculate the overall note of products:
{% assign reviews = site.data.reviews | where:'product',page.slug %}
{% assign reviewCount = reviews | size %}
{% assign sum = 0 %}
{% for review in reviews %}
  {% assign sum = sum | plus: review.review %}
{% endfor %}

<h3>Reviews
  {% if reviewCount > 0 %}
    {% assign sum = sum | divide:reviewCount %}
    (Average: {{ sum }})
  {% endif %}
</h3>
<ul>
  {% for review in reviews %}
  <li>
    <p><b>{{ review.review }}/5</b>  by <b>{{ review.name }}</b> on <i>{{ review.date | date: '%B %d, %Y' }}</i></p>
    {% if review.message %}
    <p>
      {{review.message}}
    </p>
    {% endif %}
  </li>
  {% endfor %}
</ul>
As simple as that! You can now leave a review for these great books, with comments and scores. Staticman will also give you an average user score for each product, which is great.
Mission accomplished.


Demo & GitHub repo

Closing thoughts
It took me less than 2 hours to learn the basics of Staticman and have it working with our demo store. I struggled a bit with the options fields (we can still see a slug field somehow cached and being added to my data files) but except for that, it went smoothly.
It's always really cool to see developers crafting new tools to improve the JAMstack ecosystem. I really liked it and I'll definitely use it for future Jekyll projects!
I can't wait for "Staticman: The Movie" now.
Don't forget to take a closer look at Staticman's open source repo and to bring your input if you feel like it! Staticman is also available as a npm package.
You want to follow our footsteps and support Staticman? Go ahead and write to Eduardo Bouças (mail@eduardoboucas.com). You can find him on Twitter too.
What did you think about it? Will you use Staticman in future static projects? If so what use case would like to make of it? Hit the comment section below!
If you've enjoyed this post, please take a second to share it on Twitter.


