Static Site Comments: A Jamstack How-To
"Never read the comments."
We've all heard this. We've all experienced what it's like to get lost in an endless stream of comments discussing this or that.
While there are certainly many reasons not to want comments on your static site (or dynamic), sometimes we truly do want to allow our users to interact with our blog posts and news articles.
Adding comments (or other types of responses) to the Jamstack is a fairly typical request. In this article, we'll demonstrate a couple of different ways of doing this. Before going down this route, be sure you're ready for the public to be - well, the public.
In this article, we'll show you different ways of doing it. More specifically, we'll show you how to make your static sites more social with:
Disqus
Webmention
If you're ready for it, read on!
King of comments - Disqus
What is Disqus?
The most well-known implementation of a comment system is certainly Disqus. Disqus provides an embeddable comment widget that lets sites quickly and easily add commenting.
With robust moderation tools and anti-spam protection, Disqus is probably the easiest way to add comments to a site. It includes basic statistics (more on that later) and an API to let you import and export comments. You can also require users to register before posting comments. And with Disqus being so popular, a user who has signed up on one site will be able to use Disqus on your site as well.
Let's take a quick look.
Implementing Disqus comments on your static site
First, you'll need to sign up and create an account. Disqus has multiple pricing levels which include a "Basic" free tier. After you sign up, you'll be asked if you want to install Disqus on your site. Doing so brings you to a form asking for the name of your site and category.

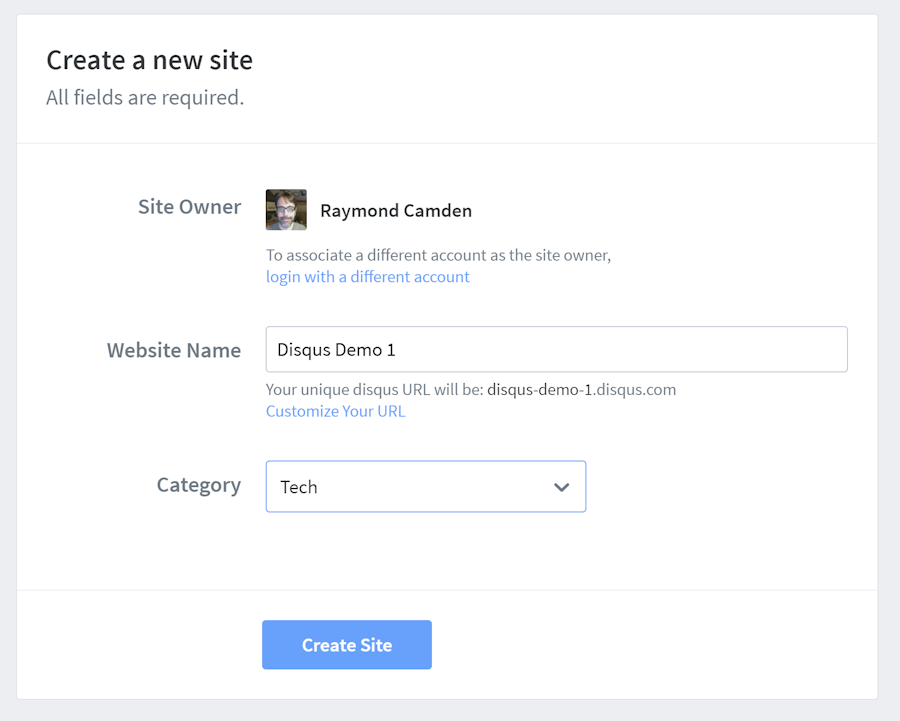
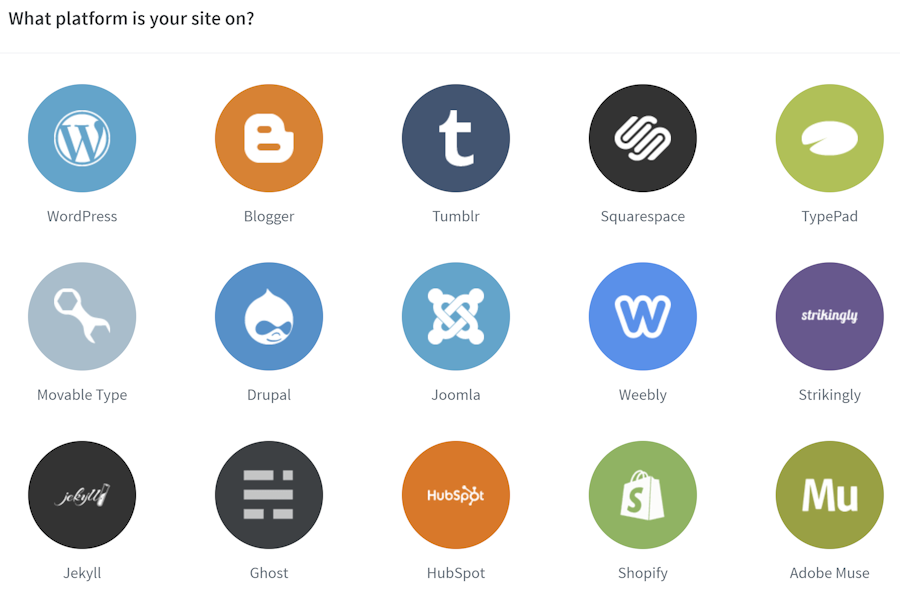
The next page asks you to select a paid tier, but if you scroll down a bit, you can select the Basic tier. Next, you're presented with a long list of platforms to select from. You'll notice some Jamstack options in here as well:

Scroll past these and go to the final option, Universal Code. On the next page, you'll get a code block you can use on your site. Here's mine configured with the demo I created.
<div id="disqus_thread">>/div>

<script>
    /**
    *  RECOMMENDED CONFIGURATION VARIABLES: EDIT AND UNCOMMENT THE SECTION BELOW TO INSERT DYNAMIC VALUES FROM YOUR PLATFORM OR CMS.
    *  LEARN WHY DEFINING THESE VARIABLES IS IMPORTANT: https://disqus.com/admin/universalcode/#configuration-variables */
    /*
    var disqus_config = function () {
        this.page.url = PAGE_URL;  // Replace PAGE_URL with your page's canonical URL variable
        this.page.identifier = PAGE_IDENTIFIER; // Replace PAGE_IDENTIFIER with your page's unique identifier variable
    };
    */

    (function() { // DON'T EDIT BELOW THIS LINE
        var d = document, s = d.createElement('script');
        s.src = 'https://disqus-demo-1.disqus.com/embed.js';
        s.setAttribute('data-timestamp', +new Date());
        (d.head || d.body).appendChild(s);
    })();

</script>

<noscript>Please enable JavaScript to view the >a href="https://disqus.com/?ref_noscript">comments powered by Disqus.</a></noscript>
You can use this as-is, but as the code suggests, you will want to uncomment a portion of it to specify the page's URL and identifier. Copy down this code and move on. The next page lets you configure settings. Everything left blank is optional so, if you want, just continue.


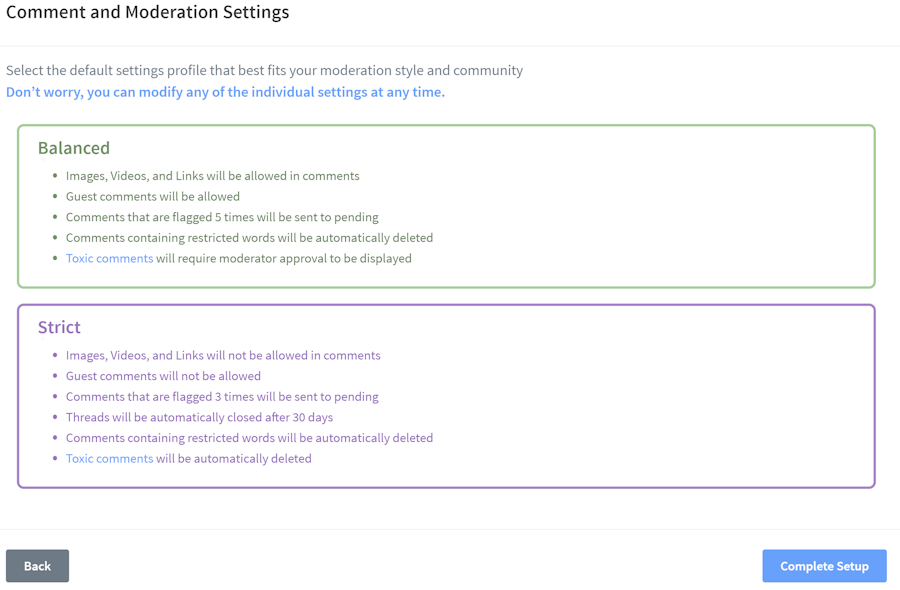
The final step lets you determine how strict the content moderation will be. This is where knowing your content and your audience will come into play. Some types of content tend to draw some kinds of people. Based on how you think your audience is going to engage on your site, choose the plan that makes sense for you.

You can finally complete the process and then move on to add it to your site.
Disqus in action
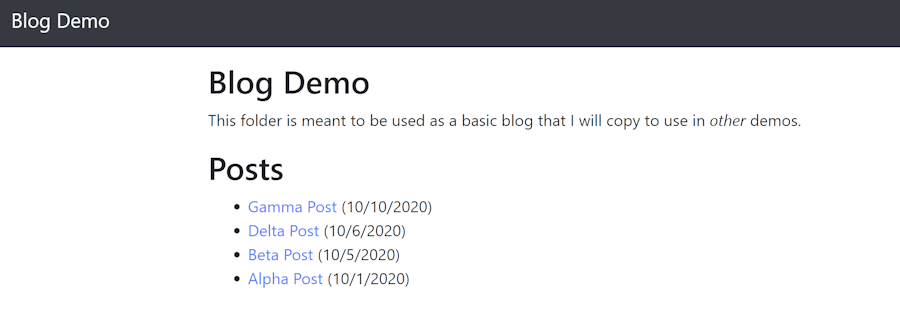
Let's see this in action on a real (demo) site. I have a simple Eleventy blog that contains a few default posts (the original source for this may be found here.
It has a home page:

And a very simple "post" page for each individual blog post:

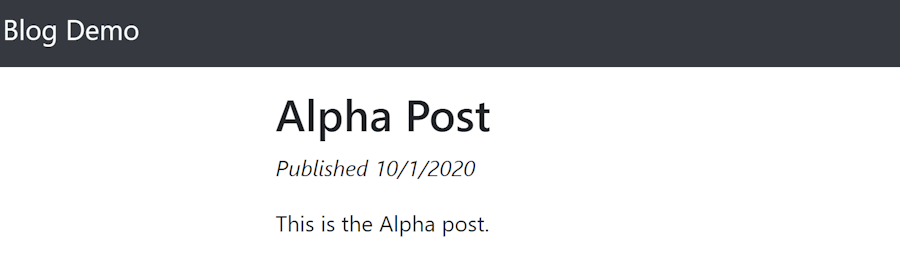
Blog posts consist of some simple front matter and sample text. They make use of a template named post.liquid:
---
layout: layout
---

<h2>{{ title }}</h2>
<p><i>Published {{ date | dtFormat }}</i></p>
{{ content }}
Adding Disqus is relatively straightforward. Here's the template with the new code:
---
layout: layout
---

<h2>{{ title }}</h2>

<p><i>Published {{ date | dtFormat }}</i></p>

{{ content }}

<div id="disqus_thread"></div>

<script>
    /**
    *  RECOMMENDED CONFIGURATION VARIABLES: EDIT AND UNCOMMENT THE SECTION BELOW TO INSERT DYNAMIC VALUES FROM YOUR PLATFORM OR CMS.
    *  LEARN WHY DEFINING THESE VARIABLES IS IMPORTANT: https://disqus.com/admin/universalcode/#configuration-variables    */
    var disqus_config = function () {
        this.page.url = '{{site.url}}{{page.url}}';  // Replace PAGE_URL with your page's canonical URL variable
        this.page.identifier = '{{page.fileSlug}}'; // Replace PAGE_IDENTIFIER with your page's unique identifier variable
    };

    (function() { // DON'T EDIT BELOW THIS LINE
        var d = document, s = d.createElement('script');
        s.src = 'https://disqus-demo-1.disqus.com/embed.js';
        s.setAttribute('data-timestamp', +new Date());
        (d.head || d.body).appendChild(s);
    })();
</script>

<noscript>Please enable JavaScript to view the <a href="https://disqus.com/?ref_noscript">comments powered by Disqus.</a></noscript>
There are two things to point out.
As recommended, I uncommented the
disqus_configpart. I specified values forurlandidentifier. ForidentifierI simply used the built-in Eleventy variablefileSlug. This will be unique for each of my posts.For
urlit was slightly more complicated. Out of the box, the value forpage.urlwill be the relative URL only. So for example:/posts/alpha. Disqus wants a full URL in order to work properly. I created an Eleventy data file for the site namedsite.jsonand simply provided a hardcoded value:
{
    "url":"http://localhost"
}
Obviously, you would want to use a real domain here, but you can test locally and use a production URL. This is handy as you'll be able to see "real" comments even when running locally.
If you fire up Eleventy and visit a blog post, you'll now see a comment form at the bottom. If you've previously used Disqus before, you won't have to log in, you'll already be recognized.

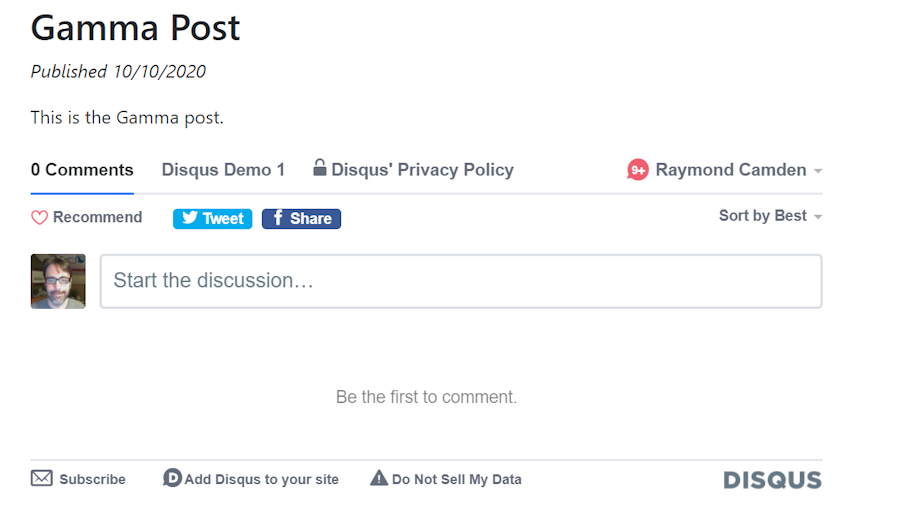
That's all the implementation you need to do.
Disqus moderation
You can comment, subscribe to threads, and so forth. There are quite a few knobs you can tweak in the admin panel for your site, especially with regards to moderation. You also automatically get an email for every comment.

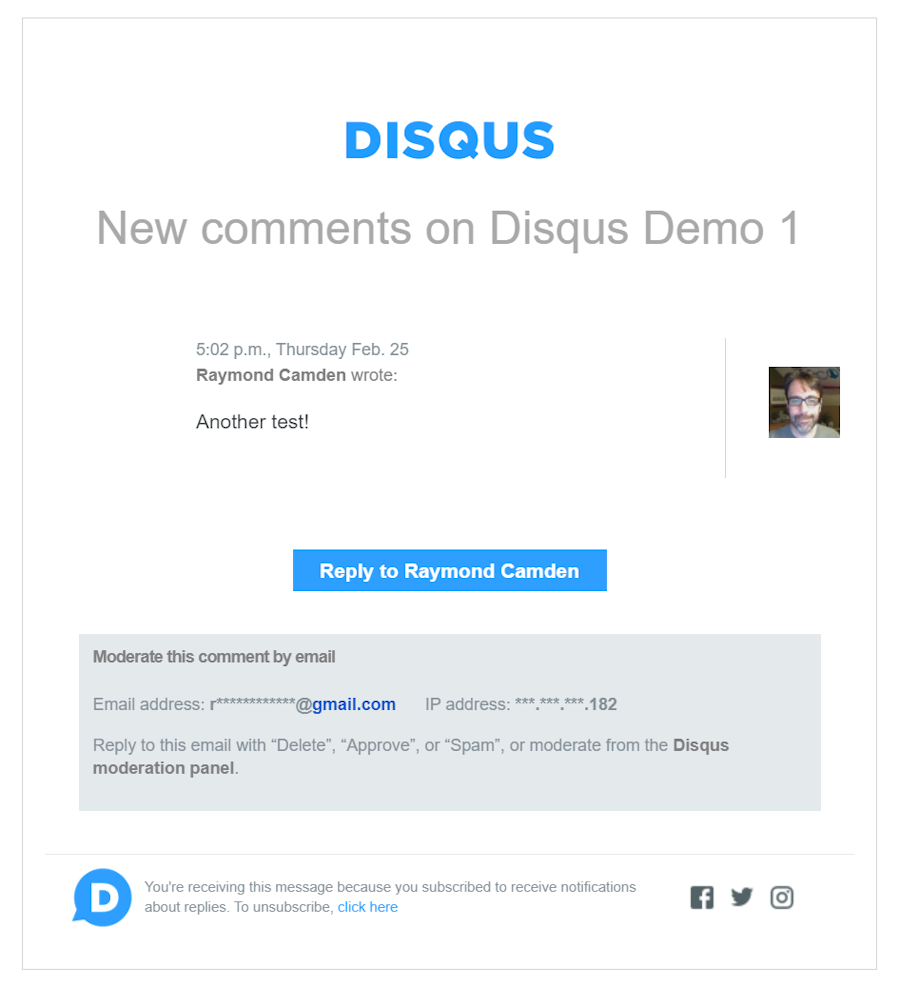
This can be disabled if you run a site with a high amount of traffic. Also, note that you can moderate right from the email by simply replying with "delete" or "spam".
I used Disqus for probably ten-plus years on my site. In my experience, spam was mostly rare. Every few months I'd get one or two spammy comments, no more than ten a year, and it never really seemed like a problem.
Probably the weakest aspect of Disqus, at least at the free level, are the analytics.
You get one chart showing the number of comments over the past month. You can customize the date range but are limited in terms of how far back you can go. Obviously, this is where Disqus wants you to pay for more information (details may be found here), but I was always surprised that Disqus could never tell me one simple thing - how many total comments my site had.
Disqus API
Disqus does have a pretty powerful API and I've actually used it in the past ("Working with the Disqus API - Deeper Stats (2)") to build my own tooling so that's an option for you if you want to roll your own. (Or just clone my repo). I recently stopped using Disqus and made use of the API to export my old comments into static files. You can read more about that here: Exporting Disqus Comments and Adding Them to Eleventy
Outside of Disqus, there really aren't any alternatives when it comes to embeddable solutions. Facebook has a comments plugin that basically gives the Facebook commenting experience for your site, but I've very rarely seen this in use.
Webmentions: a Jamstack comments favorite
What is Webmentions?
The (relatively) new way to add comments and reactions to your site is via webmentions.
Webmentions are a W3C recommendation for defining a way for a site to be notified of a new link pointing to its content. This is somewhat like the older pingback feature that, unfortunately, was ruined by spammers.
Began in 2017, it's already growing rapidly in use and has multiple tools to help developers make use of it on their sites.
The primary service people use is Webmention.io. This service will let you register your site, and once you've logged in, let you see your webmentions. <It also provides an API to fetch webmentions for either your site as a whole or for individual URLs.
Implementing webmentions on your static site
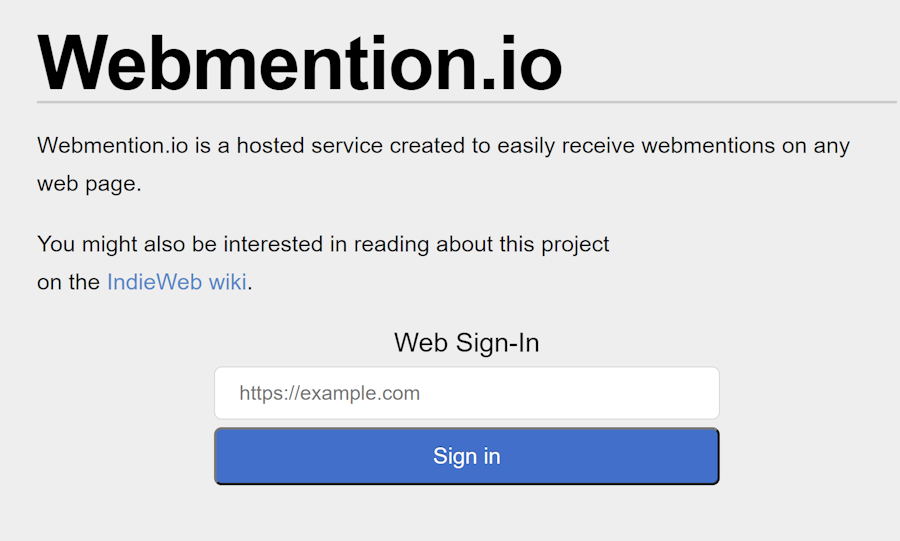
To start, head to webmention.io and "sign-in" by entering your URL:

To verify site ownership, you'll be prompted to add a link to your web page. This is done via indielogin.com and you can see the available options here. Basically, as long as you can edit your site, you can confirm you own the particular domain.
I tested this with a copy of the previous Eleventy blog. On the site's homepage, I added a link to my email address.
<p>
    Site by <a href="mailto:raymondcamden@gmail.com" rel="me">Raymond Camden</a>
</p>
I deployed this to Vercel. It isn't immediately obvious, but if you hit back from the page with setup instructions, the site will attempt to verify you again. In this case, via an email sent to the address.
I used this instead of verification via Twitter as I wasn't planning on adding the URL to the Vercel site to my profile. (When I added webmentions to my own blog, that wasn't an issue.)
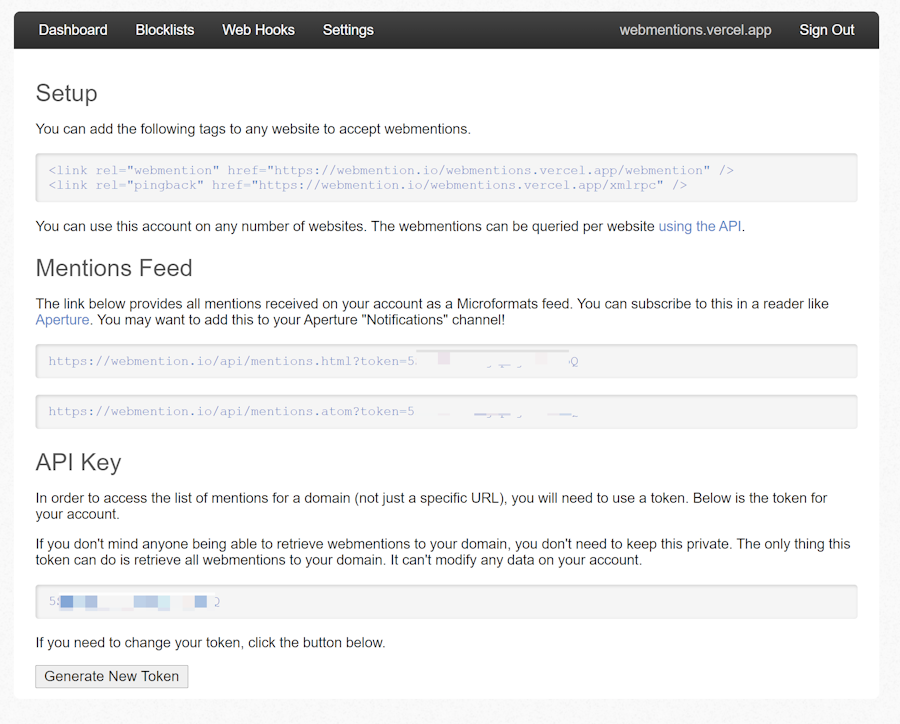
Once verified, you land back on a page telling you what to add to the <head> of your site as well as your unique key.
We'll explain how that's used in a bit.

For Eleventy, this was a quick fix, adding the link tags to my layout file:
---
title: Blog Demo
---

<html>
    <head>
        <title>{{title}}</title>
        <link rel="stylesheet" href="https://stackpath.bootstrapcdn.com/bootstrap/4.4.1/css/bootstrap.min.css" integrity="sha384-Vkoo8x4CGsO3+Hhxv8T/Q5PaXtkKtu6ug5TOeNV6gBiFeWPGFN9MuhOf23Q9Ifjh" crossorigin="anonymous">

        <style>
            .container {
                margin-top:70px;
            }
        </style>

        <link rel="webmention" href="https://webmention.io/webmentions.vercel.app/webmention" />

        <link rel="pingback" href="https://webmention.io/webmentions.vercel.app/xmlrpc" />
    </head>
// Rest of layout...
In theory, that's all you need to do. For sites that support webmentions, they can pick up on the value specified in your layout to let the service know they've linked to you.
Connect social network with Bridgy
For most folks though, you'll want a bit more. That's where a service like Bridgy comes in.
Bridgy lets you connect multiple different social networks to your webmentions feed. This includes Twitter, Facebook, Instagram, Flickr, GitHub, Mastodon, Meetup, and Reddit. Other services are supported as well.
As with Webmention, you need to claim ownership of the account by linking to it in whatever social network you want to use. Once connected, Bridgy automatically carries over mentions on the social network to webmention.io as new mentions.

At this point, you can use Webmention.io's APIs to add them to your site. How you do that is up to you.
Webmention has two main APIs for doing this:
One fetches webmentions for your entire site and requires your key to do so. That means it's potentially not safe for client-side code, but could be used as part of your build process.
You can also ask for webmentions linking to a specific page, or pages. Oddly, the APIs aren't listed from Webmention.io, but you can find them fully documented here.
When I implemented Webmentions on my own blog, I decided on an approach that would use client-side code to fetch webmentions on blog posts. I thought this was simpler than fetching it at build time and caching the results. (Sia Karamalegos has a great write up of how to use the build process and caching with webmentions ? "An In-Depth Tutorial of Webmentions + Eleventy")
The basic form of the API to fetch webmentions for one URL looks like so:
https://webmention.io/api/mentions.jf2?target=[your site URL]
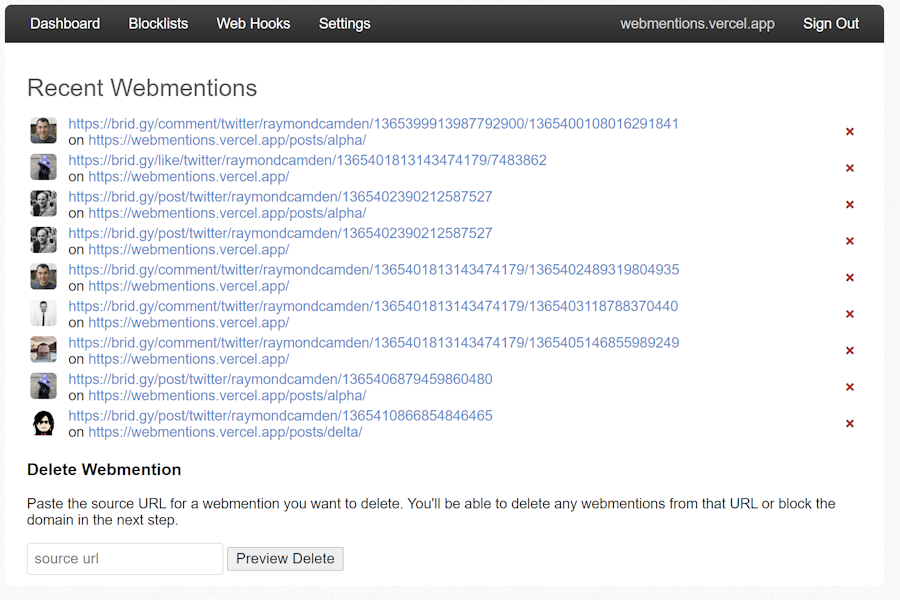
Webmentions in action
So for my demo application, here's a real example: https://webmention.io/api/mentions.jf2?target=https://webmentions.vercel.app/posts/alpha/
Notice the slash at the end. You'll want to ensure you use the same URL folks are using for their webmentions and the addition of, or lack of, any closing slash would impact the results.
The result is a JSON packet of mentions:
{
  "type": "feed",
  "name": "Webmentions",
  "children": [
    {
      "type": "entry",
      "author": {
        "type": "card",
        "name": "Jon Kuperman",
        "photo": "https://webmention.io/avatar/pbs.twimg.com/a52326c0080bba610767505756be327891f63722c0ceb6515de5840097c65cb9.jpg",
        "url": "https://twitter.com/jkup"
      },
      "url": "https://twitter.com/jkup/status/1365400108016291841",
      "published": "2021-02-26T20:35:28+00:00",
      "wm-received": "2021-02-26T21:23:21Z",
      "wm-id": 1048723,
      "wm-source": "https://brid.gy/comment/twitter/raymondcamden/1365399913987792900/1365400108016291841",
      "wm-target": "https://webmentions.vercel.app/posts/alpha/",
      "content": {
        "html": "hello!\n<a class=\"u-mention\" href=\"https://twitter.com/raymondcamden\"></a>\n<a class=\"u-mention\" href=\"https://webmentions.vercel.app/\"></a>\n<a class=\"u-mention\" href=\"https://www.raymondcamden.com/\"></a>",
        "text": "hello!"
      },
      "in-reply-to": "https://webmentions.vercel.app/posts/alpha/",
      "wm-property": "in-reply-to",
      "wm-private": false
    },
    {
      "type": "entry",
      "author": {
        "type": "card",
        "name": "Jonathan Bossenger",
        "photo": "https://webmention.io/avatar/pbs.twimg.com/211d2d7837e89b60b4399dfc76f5aa3aad8b2d792335f08ecd65ce6c73da48cb.jpg",
        "url": "https://twitter.com/jon_bossenger"
      },
      "url": "https://twitter.com/jon_bossenger/status/1365402390212587527",
      "published": "2021-02-26T20:44:32+00:00",
      "wm-received": "2021-02-26T21:23:17Z",
      "wm-id": 1048721,
      "wm-source": "https://brid.gy/post/twitter/raymondcamden/1365402390212587527",
      "wm-target": "https://webmentions.vercel.app/posts/alpha/",
      "content": {
        "html": "I assume the copy of Edge runs on Ubuntu? <a href=\"https://webmentions.vercel.app/posts/alpha/\">webmentions.vercel.app/posts/alpha/</a>\n<a class=\"u-mention\" href=\"https://webmentions.vercel.app/\"></a>",
        "text": "I assume the copy of Edge runs on Ubuntu? webmentions.vercel.app/posts/alpha/"
      },
      "mention-of": "https://webmentions.vercel.app/posts/alpha/",
      "wm-property": "mention-of",
      "wm-private": false
    },
    {
      "type": "entry",
      "author": {
        "type": "card",
        "name": "? cannot even",
        "photo": "https://webmention.io/avatar/pbs.twimg.com/1f2ab7fe8fb6c20b4a2be803b95f6559677d0b88577a091c2b1755f70dff4247.jpg",
        "url": "https://twitter.com/diffalot"
      },
      "url": "https://twitter.com/diffalot/status/1365406879459860480",
      "published": "2021-02-26T21:02:22+00:00",
      "wm-received": "2021-02-26T21:23:06Z",
      "wm-id": 1048716,
      "wm-source": "https://brid.gy/post/twitter/raymondcamden/1365406879459860480",
      "wm-target": "https://webmentions.vercel.app/posts/alpha/",
      "content": {
        "html": "Testing webmentions Alpha Post <a href=\"https://webmentions.vercel.app/posts/alpha/\">webmentions.vercel.app/posts/alpha/</a>",
        "text": "Testing webmentions Alpha Post webmentions.vercel.app/posts/alpha/"
      },
      "mention-of": "https://webmentions.vercel.app/posts/alpha/",
      "wm-property": "mention-of",
      "wm-private": false
    }
  ]
}
You can also do paging via a per-page and page attribute. The default page size is 20.
Let's add a bit of JavaScript to our blog posts to load and display webmentions.
First, we can use a generic function to get mentions for the current url:
async function getWebmentions(url) {
 return new Promise((resolve, reject) => {
   let api = `https://webmention.io/api/mentions.jf2?target=${url}&per-page=200`;
   fetch(api)
   .then(res => res.json())
   .then(res => resolve(res.children));
 });
}
In order to test locally, I ended up using a hardcoded domain like so:
let url = 'https://webmentions.vercel.app' + document.location.pathname;And then, I could simply fetch my data:
let mentions = await getWebmentions(url);Once you've gotten your webmentions, you need to decide how to render them.
Webmentions come from different sources, especially with Bridgy involved. With the help of others (Sia's work above helped, as did Jon Kuperman's post on the topic, along with others) I ended up with a way to filter webmentions to three types: likes, retweets, and actual replies. This is based on values used in the wm-property field of each mention. Here's how I handed that:
let likes = mentions.filter(m => m['wm-property'] === 'like-of');
let retweets = mentions.filter(m => m['wm-property'] === 'repost-of');
let replies = mentions.filter(m => ['in-reply-to','mention-of'].indexOf(m['wm-property']) >= 0);
To actually render this, I used the following logic.
let div = document.querySelector('#mentions');
let html = '';

if(likes.length) {
    html += `This post has gotten <strong>${likes.length}</strong> likes!<br/>`;
}

if(retweets.length) {
    html += `This post has gotten <strong>${retweets.length}</strong> retweets!<br/>`;
}

replies.forEach(r => {
    let reply = `
        <p>
        Reply by ${r.author.name}<br/>
        Posted on ${dateFormat(r.published)}<br/>
        ${truncate(r.content.text, 300)}
        <br/><a href="${r.url}" target="_blank" rel="noopener noreferrer">source</a>
        </p>
    `;

    html += reply;
});

if(likes.length === 0 && retweets.length === 0 && replies.length === 0) {
    html = '<p>No mentions at this time.</p>';
}

div.innerHTML = html;
I output a simple statistic for likes and retweets and share the content of replies. Here's how this looks on my test:

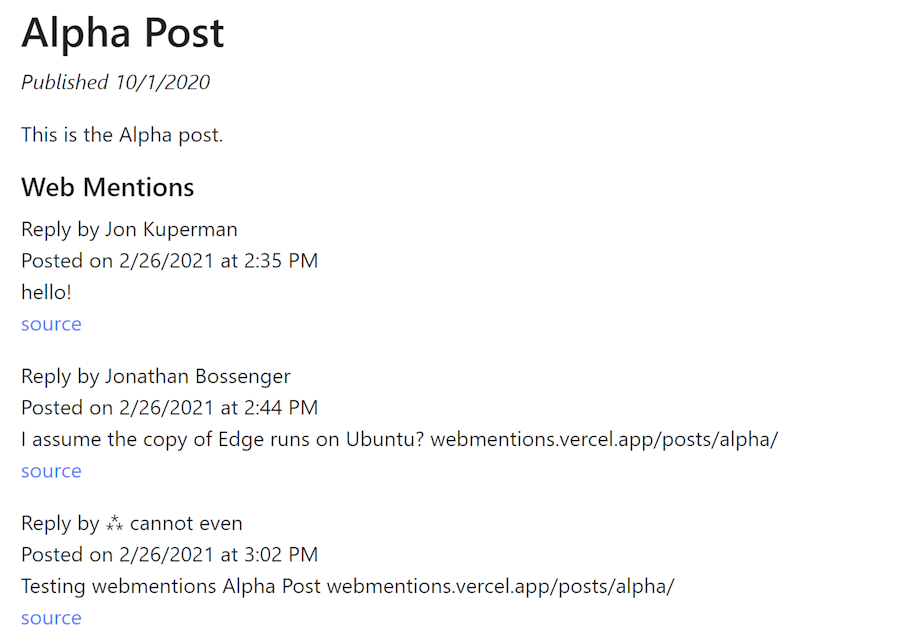
You can see this yourself up here, and if you tweet about one of the posts, you should see it reflected (after a delay though).
The "Uphill Both Ways in Snow" approach
These are two ways you can integrate comments and webmentions into your static site easily.
Of course, you can also go the entirely custom way. With serverless, you could use a combination of functions and API-based data storage systems to roll your own comment system with moderation and other features. Matt Mink wrote a great article on CSS-Tricks where he used Netlify's Forms system to handle a comment queue system.
Editor note: Welcomments is a new tool to add static comments to your static website that came out after publishing.
If you've got other examples, be sure to share them with us!
If you've enjoyed this post, please take a second to share it on Twitter. Got comments, questions? Hit the section below!


