11ty Tutorial: Cranking Your Jamstack Blog Up to 11!
We first wrote an 11ty tutorial on this blog back in 2018.
At the time, there was a brewing hype about this JavaScript-powered static site generator, but it was still relatively unknown.
Things change, though. Rapidly. As web developers, we all know too well about that.
Today, Eleventy is one of the most beloved SSG in the Jamstack community. The old version of this post didn’t do it justice anymore.
So we invited our friend Raymond Camden, who already had personal experiences with 11ty, to refresh this piece.
Following is Raymond’s tutorial to build a functional 11ty blog. Here’s what he’ll cover:
Installing 11ty
Building a homepage
Generating blog posts
Dating posts
Making the 11ty blog good-looking
Adding page archives
Sprinkling in some data
Alright, the mic is yours, Mr. Camden.
What is Eleventy (or 11ty)?


Put bluntly, 11ty is a simple static site generator written in JavaScript.
How does this little wonder work? Simply by transforming a directory of templates of varying types into HTML. Eleventy doesn't take the words "varying types" lightly—one of its main features is its templating system's flexibility. I’ll discuss this more in the tutorial below.
You can think of it as an alternative to something like Jekyll. Personally, I really like Jekyll, but one aspect I found troublesome was its use of Ruby.
I'm primarily a Windows user (although I'm normally using Ubuntu with WSL) and in the past, getting it up and running was problematic. The first few times I did it, I can remember it taking a few hours. It was always quite dreadful.
Eleventy is based on Node, a platform I'm much more comfortable with. It makes the configuration part way smoother.
Want to learn more about Jekyll? The Snipcart team crafted this tutorial for it.
I've been a proponent of the Jamstack for a few years now, going back before it was even a term and was just basically "static sites". In that time, I've gone through multiple favorite SSGs, but I've never fallen quite in love with another one as much as I have with Eleventy.
It's flexible, easy to use, and powerful. I'm totally ready to recommend it to both new and seasoned Jamstack developers.
11ty tutorial: cranking your Jamstack blog up to 11!


I'm going to give you a quick introduction to the product and walk you through creating a blog.
And not just any blog, mind you, but a Super Awesome Cat blog!


Ok, that's not the prettiest blog, but you can fix that later on.
Let's get started!
1. Install 11ty
Getting Eleventy installed is as simple as:
npm install -g @11ty/eleventyThe installation docs steer you towards using npx, which is fine, but I prefer the global installation. Eleventy works just fine in either case.
This gives you a CLI, eleventy, that really comes down to two main functions:
Running
eleventyby itself converts your site into static HTML.Running
eleventy --servedoes the same but also sets up a hot-reloading web server for use in development.
And while there's a bit more to it, that's 99% of what you'll be doing when working with Eleventy.
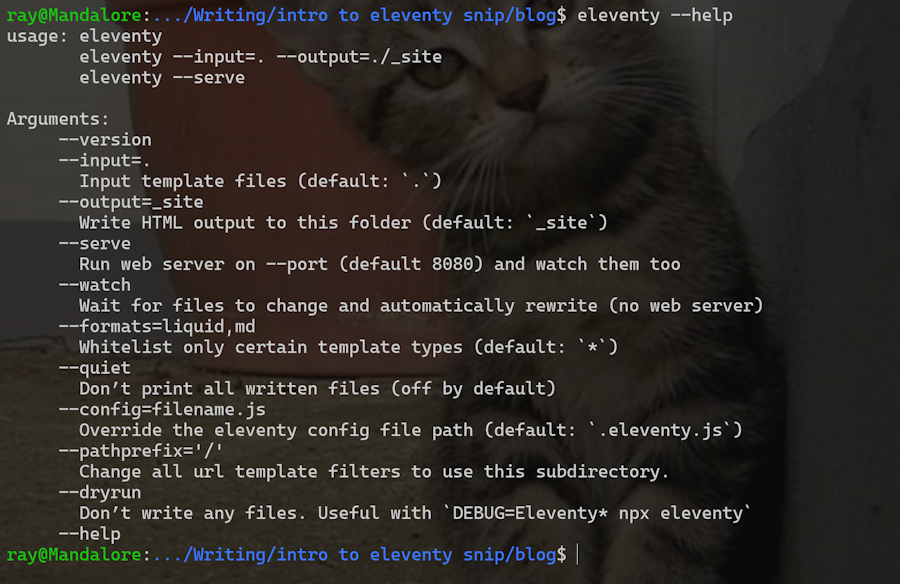
Once you've installed it, you can quickly verify it's running with a quick help check, eleventy --help:

Alright, let's start building. Create a new directory and place a Markdown file in it named index.md:
## Hello World!
I love markdown! I also love HTML. I love coding! But most of all, I love cats!
!\[Cat\](https://placekitten.com/400/400)
To have Eleventy process this, run eleventy, and you'll see the following output:


By default, Eleventy outputs to _site, but you can configure that via a command-line flag if you want. The output is, with no surprises, HTML:
<h2>Hello World!</h2>
<p>I love markdown! I also love HTML. I love coding! But most of all, I love cats!</p>
<p><img src="https://placekitten.com/400/400" alt="Cat"></p>
So far, all we've got is a high-powered Markdown converter. Luckily Eleventy supports building files with template languages. Most static site generators support one template language, but Eleventy supports... eleven!
This is incredible because I've found that the choice of template language used in a static site generator is a huge part of whether I like or dislike a particular product. Here's what you can choose between:
HTML
Markdown
JavaScript
Liquid
Nunjucks
Handlebars
Mustache
EJS
Haml
Pug
JavaScript Template Literals
Coming from Jekyll, Liquid was the best choice for me, but you can mix and match options in one project if you want. For my real-life blog, I ended up needing to use EJS in a few places where I needed the extra flexibility it provides. Let's look at an example of this.
Make a new file, cats.liquid, and use this code:
{% for i in (1..5) %}
<p>
<img src="https://placekitten.com/{{ i | times:100 }}/{{ i | times:100 }}">
</p>
{% endfor %}
If you run eleventy again and look at the output, you'll notice a few things.
First, Eleventy outputs the file as cats/index.html. This lets you access it on your site at /cats. You can change this behavior if you want, but it allows for clean URLs by default.
The output is just HTML of course, and in this case, a list of 5 cats pictures:
<p>
<img src="https://placekitten.com/100/100">
</p>
<p>
<img src="https://placekitten.com/200/200">
</p>
<p>
<img src="https://placekitten.com/300/300">
</p>
<p>
<img src="https://placekitten.com/400/400">
</p>
<p>
<img src="https://placekitten.com/500/500">
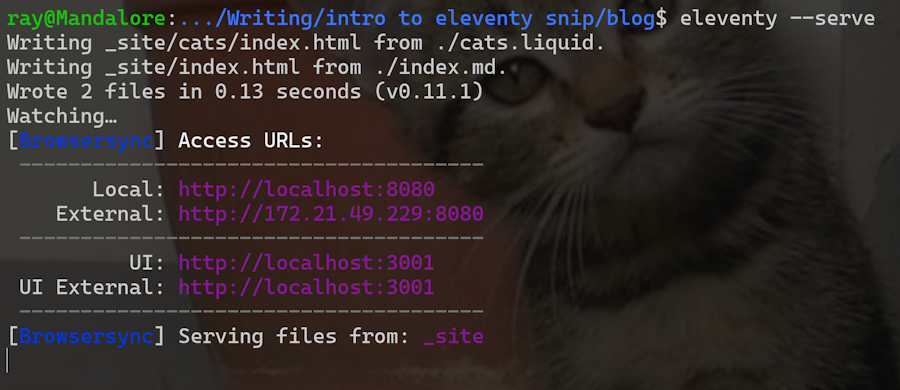
</p>Last basic tip: before starting serious work on your blog, you can use eleventy --serve to fire up a web server. This includes a "hot reload" feature where the browser will automatically reload when the file changes. However, it only works when we have "proper" HTML files (ie, a <head> and <body>). We'll have that later.

Alright, now that we know the bare minimum of Eleventy, it feels entirely safe to start building our blog.
Let's do it!
2. Build a home page
Let's begin by building a home page.
For now, it's going to be static, but we'll include placeholders to remind us to make it dynamic later. Begin by creating an index.liquid page at the root of a new project directory.
<h2>My Super Awesome Cat Blog</h2>
List of posts here, newest first.
We've got a simple header and content, letting us know what will be there (eventually). One of the first things we can do is add a layout.
How do layouts work in 11ty? First, we add front matter to our page to specify the layout.
I'm also going to add a title:
---
title: My Super Awesome Cat Blog
layout: main
---
<h2>My Super Awesome Cat Blog</h2>
List of posts here, newest first.
Front matter is specified in a YAML block on top of simple key and value settings. In this case, I'm defining a title, which has no particular meaning to Eleventy but will be available as a variable in my template. I'm then specifying a template.
When Eleventy sees this, it tries to load a file in the _includes directory. By leaving off the extension, I'm telling Eleventy to load any file named main.something, which lets me pick whatever template language I want.
In my case, I'm going to build another Liquid page in _includes/main.liquid:
---
title: Default title
---
<html>
<head>
<title>{{ title }}</title>
</head>
<body>
    <div class="header">
    <a href="/">Home</a>
    </div>
    <div class="content">
    {{ content }}
    </div>
</body>
</html>
The layout template begins by declaring a default value for titles. If a page uses this layout and does not specify its own title, this is the value that's going to be used.
It then outputs a basic HTML page. Notice I'm using some classes here that I've not yet defined, we'll get to that later. The critical part to take note of is the variable, content.
Eleventy will parse the original file, index.liquid, and take that output and make it available to my template as content.
This gives us a fine, somewhat dull, blog home page:

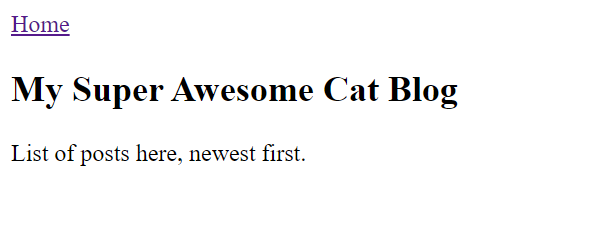
Woot!
For more information on layouts, check the docs. I'll quickly add that you can also chain layouts, which means you can have layouts inside layouts and so on. You'll see this in action in the blog posts.
But for now, we have a home page!
3. Generate blog posts
A blog without blog posts would be like a home without cats—unthinkable! So let's create some posts.
Make a new directory called posts, and let's write our first post in posts/alpha.md.
Note - where you see lorem ipsum, you should feel free to change to something else instead. To keep the code listing a bit slimmer, I removed some of the boilerplate text you'll see in the GitHub repository and screenshots.
---
title: My First Post!
layout: post
tags: posts
**---**
Scratch leg; meow for can opener to feed me spot something, big eyes, big eyes, crouch, shake butt, prepare to pounce instead of drinking water from the cat bowl, make sure to steal water from the toilet yet floof tum, tickle bum, jellybean footies curly toes and lick yarn.

Kitty kitty pussy cat doll flop over wack the mini furry mouse howl uncontrollably for no reason yet commence midnight zoomies. Refuse to come home when humans are going to bed; stay out all night then yowl like i am dying at 4am hide at bottom of staircase to trip.
Ignoring the boilerplate text of the post itself, take note of the front matter. As before, you see a title and layout, but this time we've added a tags key. This is going to introduce another cool 11ty feature: collections.
Eleventy supports the idea of creating a list of content based on tags used in the template. If you have multiple pages using posts as their tags value, then Eleventy will let you iterate over them in a variable called collections.posts. Collections are a compelling feature and can be built programmatically as well. The simplest use case is just hard-coding those values in.
After you've made your first blog post, go ahead and make a few more. It doesn't matter how many you make as long as you've got a few written out. I made three more: beta.md, gamma.md, and delta.md.
The layout we specified for the posts was a new one, post, so let's build that (_includes/post.liquid):
---
layout: main
---
<h2>{{ title }}</h2>
{{ content }}
All this layout does is output the post title and then its own content. Since it specifies main for the layout, it will then pass along its output to the original layout we built.
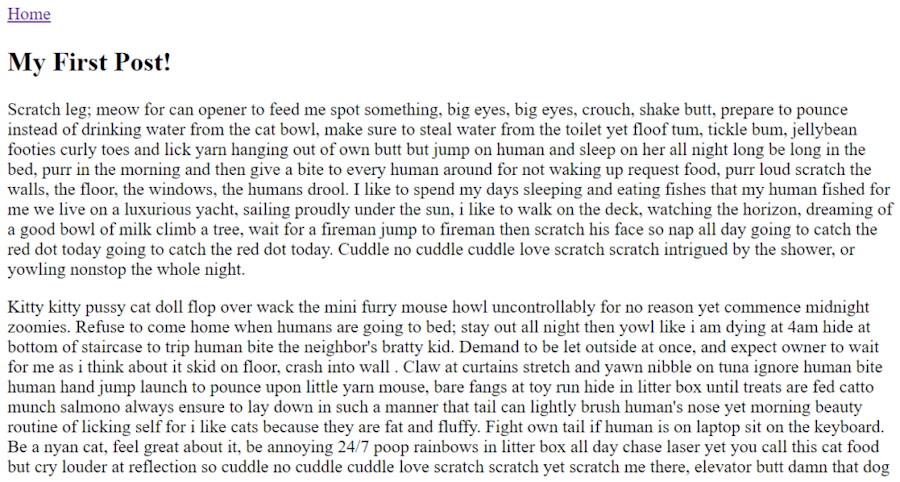
At this point, you can actually view the blog posts by simply directly typing in the address. For example, http://localhost:8080/posts/alpha:

Alright, now let’s see the power of collections. Go back to /index.liquid, and modify the code like so:
---
title: My Super Awesome Cat Blog
layout: main
---
<h2>My Super Awesome Cat Blog</h2>
{% for post in collections.posts %}
    <p>
    <a href="{{ post.url }}">{{ post.data.title }}</a>
    </p>
{% endfor %}
I'm now looping over the array of posts Eleventy created when it noticed the multiple files all sharing the same tags value, posts. In a collection, you get access to a set of values about the page itself.
The docs cover them all, but for now, notice that I can use post.url to link to the blog post. The data value represents the data from the template itself. If you remember, each blog post had a title value. We can use it here.
The end result is a list of blog posts:

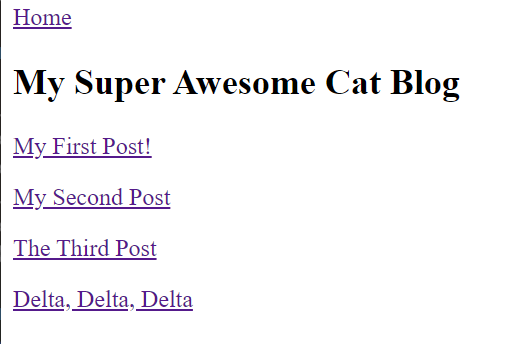
You can now click on each link, see the post, and then use the Home link from the layout to get back to the blog home page.
4. Date These Posts!
At this point, technically, we could be done.
You can write new posts, they show up, and you've got a blog—not a particularly nice-looking or functional one, but a blog still. Let's make a quick change to improve the visitor’s experience.
A good blog should always signify the publication’s date of its posts. While perhaps not as important for a cat blog, it is critical information on a technical blog as platforms, programs, APIs, and so forth change all the time.
We can add this to our posts by using front matter. For Eleventy, if you use the date key, it will note it and treat it specially. You can skip this and use filenames with dates in them instead if you want. See more at the date docs, but for now, open up your posts, and add dates to each.
Here is one example from alpha.md:
---
title: My First Post!
layout: post
tags: posts
date: 2020-10-31
---
That format is YYYY-MM-DD(year, month, date). I added this to all my posts with slightly different dates. Next, let's edit the home page to sort by newest first and output the date:
---
title: My Super Awesome Cat Blog
layout: main
---
<h2>My Super Awesome Cat Blog</h2>
{% assign posts = collections.posts | reverse %}
{% for post in posts %}
    <p>
    <a href="{{ post.url }}">{{ post.data.title }}</a> <i>(written {{ post.date | date: "%b %d, %Y"}})</i>
    </p>
{% endfor %}
The first change is the use of creating a variable via the assign command. This is Liquid specific and will be different in other template languages. Eleventy automatically notices dates and sorts by them, but sorts ascending.
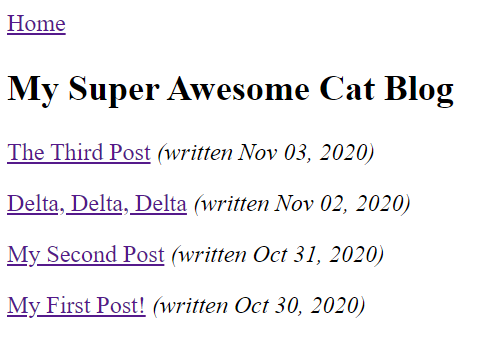
By adding the reverse filter, I get a lit of posts with the newest first.
Finally, I output the date of the post in each one.

Let's wrap up the addition of dates by adding it to the post layout:
---
layout: main
---
<h2>{{ title }}</h2>
<p>
    <i>Written: {{ date | date: "%b %d, %Y"}}</i>
</p>

{{ content }}
Now folks will see the dates on the home page and individual posts as well. By the way, the text after the pipe (|) in the Liquid code above is a filter. The one I used is built-in, but Eleventy lets you write your own and use them in your templates.
I could build my own date filter for consistent formatting across my site instead of requiring templates to pass in their options every time.
5. Make our 11ty blog fashionable
Earlier, when we built our layout, we referenced a few classes that didn't exist yet in a stylesheet. Let's go ahead and correct that.
First, we'll add a link tag to the layout:
<head>
<title>{{ title }}</title>
<link rel="stylesheet" href="/style/app.css">
</head>
Next, let's build a style sheet and save it in style/app.css:
body {
    background-color: blanchedalmond;
    font-family: Verdana, Geneva, Tahoma, sans-serif;
}
div.header {
    background-color: white;
    margin-left: 25px;
    margin-right: 25px;
    padding: 10px;
    font-size: 20px;
    font-weight: bold;
    font-family: Arial, Helvetica, sans-serif;
}
div.content {
    margin-left: 25px;
    margin-right: 25px;
}
If you're still running the Eleventy server, your site will reload and... nothing will happen. If you open up your developer tools, you'll see the request failed.
If you look into your _site folder (remember, this is where Eleventy store it's output), you'll see that the style folder never copied over.
Why? This is an intentional feature of 11ty, where if a file extension is not recognized as something it needs to process, the SSG will ignore the file. You can see this documented here in the "Passthrough File Copy" docs, which is also where you'll see how to correct it.
To tell Eleventy to process .css files, you need to configure it. To configure Eleventy, you add a new file to your site, .eleventy.js. This JavaScript file lets you do multiple customizations to Eleventy behavior, but let's see how we can configure it to copy over our .css files:
module.exports = function(eleventyConfig) {
    eleventyConfig.addPassthroughCopy("style");
};
The addPassthroughCopy function takes globs of any sort and can be used multiple times. I used the name of the folder and not the extension to put anything inside the styles directory and have it copied over.
Go ahead and create this file. If you are currently running Eleventy, stop it (ctrl or cmd c) and rerun it, so it picks up the configuration file's existence.
Now you should see your styles in place:

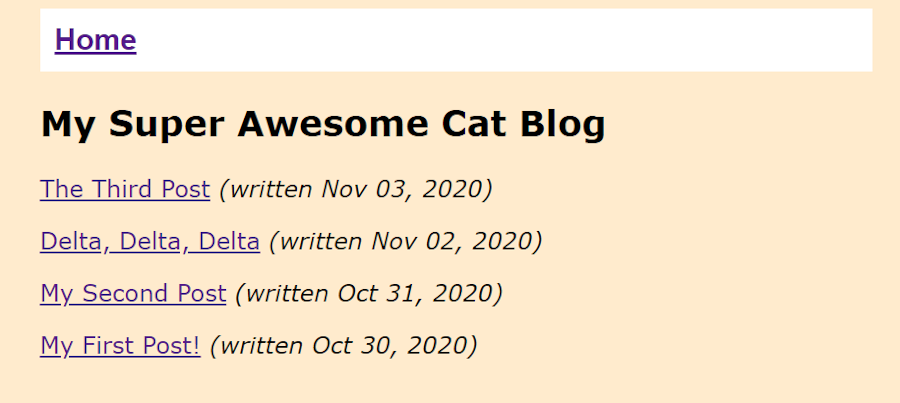
Beautiful, right?
(Ok, I'll never get a job as a designer.)
However, you'll notice something interesting. If you edit the CSS file (and please, do so), Eleventy won't pick up on the changes, even if you reload the browser. This is because Eleventy only copies the file on startup.
To get Eleventy to notice changes to this file requires a lot more work. Like, oh my goodness, it's insane.
Add this line to your .eleventy.js file:
eleventyConfig.addWatchTarget("style");This tells Eleventy to watch for changes to this directory and rebuild whenever a change is seen there. Yes, I was a bit sarcastic, but I love how simple that was.
6. Add page archives
Let's pretend our blog is launched. We've been writing for a few years now, and we've got a tremendous amount of posts. How do we handle that?
First, I added a few more "dummy" posts. Now let's limit the home page to only the most recent posts:
---
title: My Super Awesome Cat Blog
layout: main
---
<h2>My Super Awesome Cat Blog</h2>
{% assign posts = collections.posts | reverse %}
{% for post in posts limit:5 %}
    <p>
    <a href="{{ post.url }}">{{ post.data.title }}</a> <i>(written {{ post.date | date: "%b %d, %Y"}})</i>
    </p>
{% endfor %}
The only change in the home page template was the addition of limit:5. The number 5 is used arbitrarily here.
Now, let's create a set of archive pages.
Our archive will consist of one page of five blog posts with links to the next and previous pages. Eleventy makes pagination incredibly easy.
Still, there’s a lot to unpack on this topic, so I strongly recommend checking the docs. However, let's start with a basic example.
Let's begin by creating a new page, archives.liquid:
---
layout: main
title: Post Archives
pagination:
    data: collections.posts
    size: 5
    alias: posts
    reverse: true
---
<h2>Post Archives</h2>
<ul>
{% for post in posts %}
<li><a href="{{ post.url }}">{{ post.data.title }}</a> <i>(written {{ post.date | date: "%b %d, %Y"}})</i></li>
{% endfor %}
</ul>
<p>
    {% if pagination.href.previous %}
    <a href="{{ pagination.href.previous }}">Previous</a>
    {% else %}
    Previous
    {% endif %} /
    {% if pagination.href.next %}
    <a href="{{ pagination.href.next }}">Next</a>
    {% else %}
    Next
    {% endif %}
</p>
The front matter has an important new addition: pagination. We begin by saying what data to paginate over. We then specify the page size. We create an "alias" to reference the data on our page. Finally, we ask Eleventy to reverse the collection.
Remember it sorts it oldest to newest. This code is all we need for Eleventy to create n pages of content, where n is based on the total number of blog posts. The layout in the template actually handles rendered the "page" of data, in this case, five blog posts. Finally, Eleventy provides a set of variables that let us define how to handle navigation.
The result of my test was multiple pages of content:

I added a new link to my header (/archives/), and here's how my pagination displays in the browser:

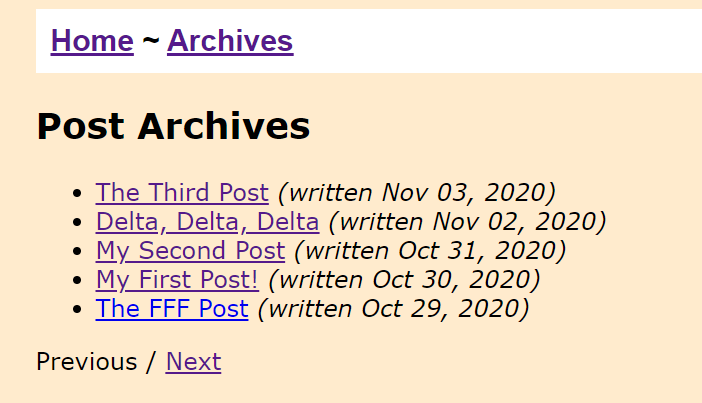
Again, pagination is an extensive topic. I only showed a small amount of what Eleventy can do. Definitely refer to the documentation for more information.
7. Sprinkle in some data
The last feature we'll take a quick look at is data. Eleventy lets you define data that can be used throughout your site. You've got multiple different ways of using this feature, but let's start with a simple example.
Create a new folder, _data, and add in site.json:
{
    "author": {
        "name": "Raymond Camden",
        "twitter": "@raymondcamden"
    }
}
Once this file is saved, Eleventy will parse it and make it available in a variable with the same name as the file name. In our case, it’s site.
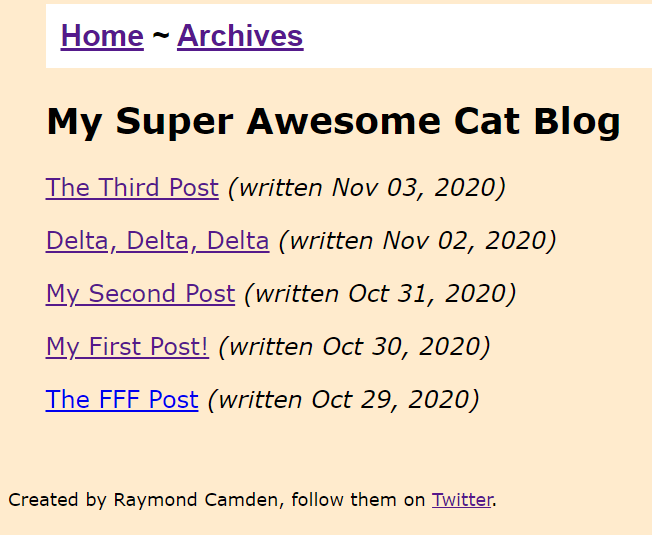
That means our template can use the values by prefixing it with the same name. For example, I've modified the layout to add this at the bottom:
<footer>
<p>
Created by {{ site.author.name }}, follow them on <a href="https://twitter.com/{{site.author.twitter}}">Twitter</a>.
</p>
</footer>
I tweaked the CSS a bit too. Now all my pages have my name and Twitter account on them:
You can define any data you want and use as many files as you would like. You can even have dynamic, asynchronous data using JavaScript files.
All of this is run once, at the site’s build, but can be combined with other services to automate builds when data in your backend changes.
Live demo & GitHub repo
Try out the live demo here
See the GitHub repo here
11(ty). Closing thoughts
Alright, so I skipped a few steps, but hopefully, this will meet your appetite for the power and versatility of Eleventy. There are numerous things we did not cover that may also be enticing:
The ability to specify data per file and directory basis.
Customizing permalinks
Outputting other formats to support things like RSS and search
Using plugins
And more! If you’re up to the task, I invite you to try these out and let me know how it went in the comments below.
This demo is not the "prettiest" example of an Eleventy blog. However, I invite you to check out my personal blog’s repository for a real-world example of 11ty running in production.
Check the Eleventy website for links to docs and their own repo, and then go on and build some awesome stuff! :)
If you've enjoyed this post, please take a second to share it on Twitter.


