Jekyll Tutorial: Building a Static E-Commerce Website
Online merchants need many specific services to manage product indexes, customer accounts, and orders, which can bloat e-commerce sites and make them slower. For customers, a longer load time translates to a higher bounce rate. Compounding this, Google is prioritizing sites with better site performance in search results. Merchants, then, need a site that performs well, ranks highly, and is easy to maintain, making it often hard to get together.


Static sites are the way forward. They offer many advantages, and the most compelling for many site owners is quicker load times. Faster page loads mean increased conversions, as well as higher search engine ranking.
The user experience, too, is all-important — customers will benefit from a responsive and customizable shopping cart. At the same time, site owners, marketers, and content editors need a user-friendly CMS to add and adjust items, pages, posts, and prices.
With a proven high-performance SSG like Jekyll and an intuitive CMS like CloudCannon a new e-commerce site powered by Snipcart is only a few minutes away.
In this Jekyll tutorial, we will:
Create a Jekyll static site
Add e-commerce functionality with Snipcart
Upload the site to CloudCannon
Deploy the site
What is Jekyll?

Jekyll is a flexible, lightweight, and blog-aware static site generator and powers GitHub Pages. Despite its age (it was first released in 2008), Jekyll is still one of the most popular SSGs available. Jekyll is built on Ruby with excellent documentation and an active (and responsive) community, so you’ll be able to find plenty of examples of Jekyll websites doing almost anything.
By design, Jekyll is relatively stripped back out-of-the-box by design. Still, when you’re configuring your static site’s custom domain, you’ll find an extensive theme and plugin library available. Jekyll’s Liquid templating engine will be straightforward to pick up for anyone familiar with developing for WordPress.
Jekyll static websites can be hosted anywhere — self-hosted or alongside your CMS on a global content delivery network (CDN). In this example, we'll host alongside our CMS, CloudCannon.
It’s worth pointing out that Jekyll will perform better with small- to medium-sized projects — if you have thousands of products or pages on your site, then SSGs like Next.js, Hugo, 11ty, or Gatsby would likely be your best bet. But for a boutique e-commerce experience with the option of plugins serving advanced functions, Jekyll is perfect.
Advantages of Jekyll as an e-commerce solution:
Security and SEO
These are more of a Jamstack’s feature overall than they are specific to Jekyll. Still, the static files generated by Jekyll limit the potential for attacks — there’s no database, and the pages aren’t running code as they load. These static files are also readily available to search engines, meaning sites will rank higher, faster.
Blog-aware
This isn’t as trivial as it might seem, but Jekyll is fully prepared for permalinks, categories, pages, posts, and customized layouts, meaning your e-commerce site can easily support a blog in addition to your store. This means vendors can build and inform their communities on the same platform they’re using to sell.
Active community
Are you looking to add something different to your Jekyll site? There’s likely a plugin for that. And if you have a question, it’s probably already been answered — just one of the benefits of using a tried and true static site generators.
Ok, so we’re set with Jekyll as our SSG. It’s popular, proven, and for small to medium sites, it’s a great solution. But let’s also look at the rest of our stack.
Jekyll pairs remarkably well with CloudCannon’s Git-based content management system. Jekyll is, after all, the first SSG that CloudCannon supported, so it’s not surprising that the two work so well together. With features like an intuitive interface for developers and content editors, helpful documentation, version control, and a commitment to the Jamstack ecosystem, CloudCannon is an ideal service for setting up a new e-commerce site.
What is CloudCannon?
CloudCannon is a static, headless, and Git-based CMS that is focused on users’ ownership of their own content and code. The CMS acts as a smart layer between your Git repo and your site and automatically rebuilds the site on every new change. It has a robust feature set, including a Visual Editing mode for non-technical content editors, page-building capabilities via structured content components ("structures"), and free site previews on temporary testing domains built into the core CMS.
Multiple users — content editors, merchants, marketers, and developers — can work simultaneously on separate branches of a single project. CloudCannon will merge and build your production site in a cohesive publishing workflow, with complete version control via Git (GitHub, GitLab, or Bitbucket).
It currently supports Jekyll as well as Hugo, Eleventy, Next.js, and SvelteKit sites, with new SSG support coming in future months.
Finally, CloudCannon sites can be hosted anywhere — or, if you’d prefer, CloudCannon offers hosting solutions via a global CDN.
Jekyll tutorial: static e-commerce site with CloudCannon
Now that we’ve introduced our stack let’s jump into the fun part — building!
In this tutorial, we'll create a simple e-commerce store with the help of Jekyll. We'll create the site locally, and with the help of GitHub, we'll use CloudCannon to do all the building, editing, and hosting.
Prerequisites:
Basic JavaScript, HTML & CSS knowledge
A Snipcart account (free in test mode)
1. Installing Ruby
How you install Ruby will depend on your operating system. We will be using MacOS for this tutorial. If you use a different OS, you can find the correct command to use here.
To check whether Ruby is installed, or to check which version you have, run the following command in your terminal:
ruby -vIf information about your Ruby version appears, you are ready to proceed. If not, you will need to install brew (if you’ve not already) and run:
brew install rubyThis will install Ruby on your machine.
2. Installing Jekyll
After we have installed Ruby, we can install Jekyll and Bundler with this command:
gem install jekyll bundler3. Create and serve your Jekyll project
Now that our development environment is up and running, we can create our site. Navigate to the folder in which you want to create your site and run Jekyll build with the following command:
jekyll new snipcart-jekyll-project
The init will create your project file directory in the folder you specified from your command prompt. Your file structure should look like this:
├── index.markdown
├── Gemfile.lock
├── Gemfile
├── about.markdown
├── 404.html
├── _site
├── _posts
└── config.yml
Now you will need to navigate into the directory you created:
cd snipcart-jekyll-projectWe can go live with our project by running:
bundle exec jekyll serveA link should appear in your command line:


You should be able to Ctrl + click this address, and it will open your site on your browser. Alternatively, you can just type it into the URL bar or go to the local web server at http://localhost:4000. Your site should look like this:

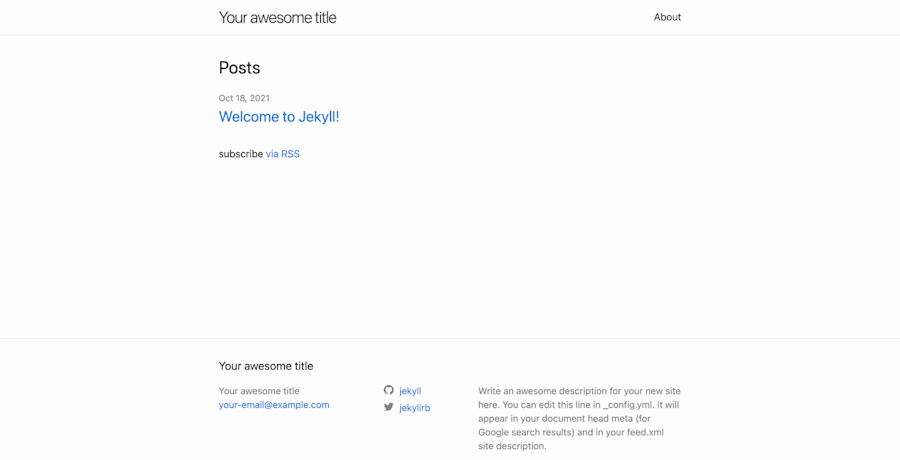
It looks a bit bare right now, but we will fix that!
4. Create Git repository (Optional)
Let's turn our newly created site into a Git repository.
In your terminal, navigate to your projects parent folder, and run:
git initgit checkout -b mainThis will initialize the folder as a Git repository and set the default branch to main. We now need to hook this site up to a provider. Add your repository to GitHub, GitLab, or Bitbucket, then commit and push your files.
5. Configuring CloudCannon
At this point, we will get our site live on CloudCannon. Navigate to app.cloudcannon.com and either log in or sign up for a free Developer account.
Log into your CloudCannon account, and select your organization if prompted. On the left of your browser, click the tab called 'Sites'.


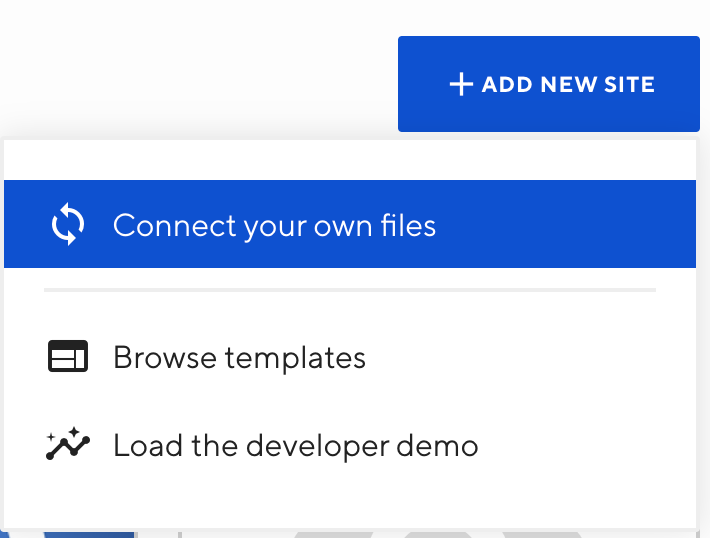
Click the "Add New Site" button, and select "Connect your own files" from the dropdown:

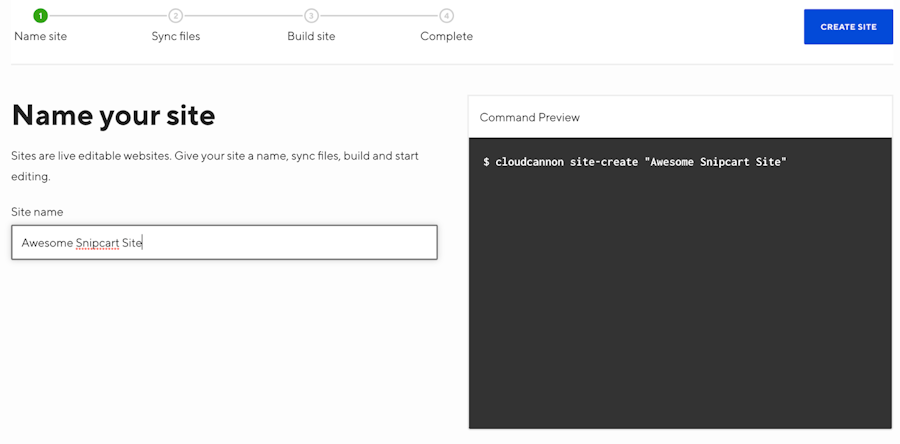
Give your site a name. This is purely for identification within CloudCannon and can be changed later:

Choose the file source. If your site is connected to a Git provider, select your provider from the dropdown, and authenticate your account. Once logged in, select your repository from the dropdown. We'll need to choose our branch, so click the 'Use Existing' tab, and select main from the dropdown.
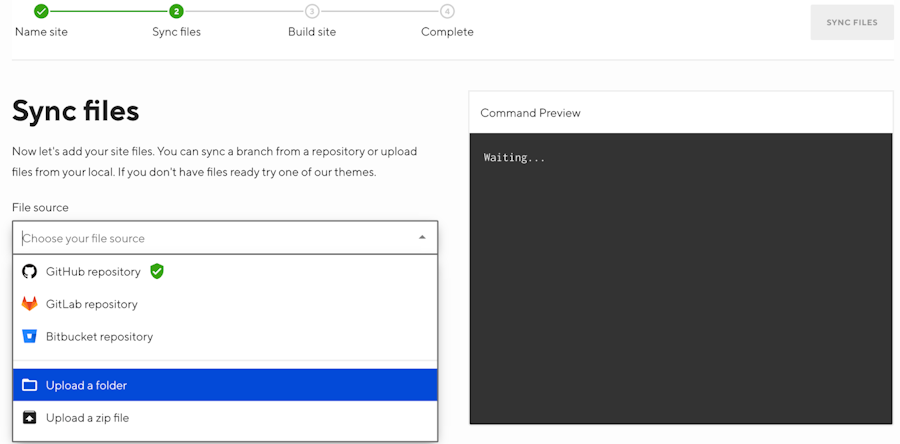
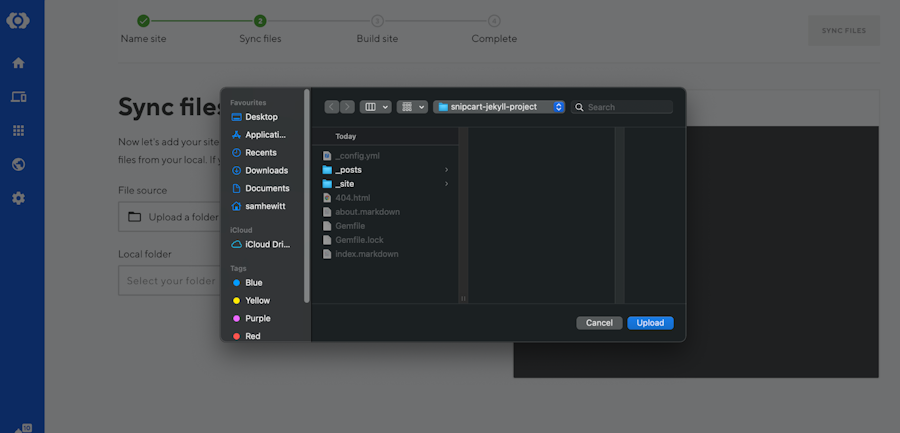
If you aren't using Git, select "Upload your files" and upload the folder containing your site. Select your folder and click Confirm Selection and Sync Files in the top right corner:

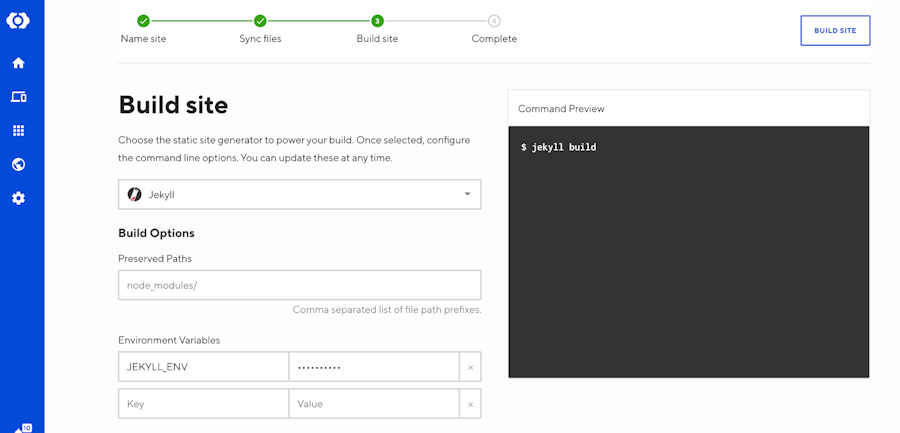
Finally, we will click the “Build Site” button:
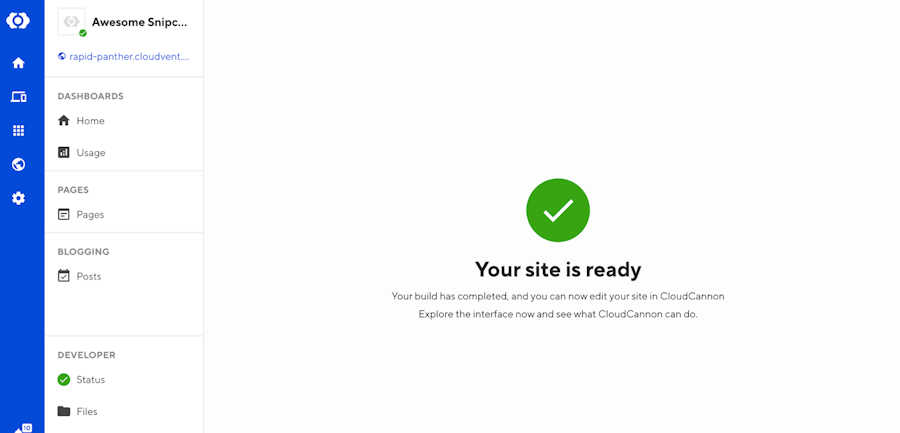
At the top left of your screen, you'll see a link that looks like [adjective]-[noun].cloudvent.net. This is a secure testing domain generated by CloudCannon and hosts your site’s most recently built version. We can open this link in any browser, on any device, and it’s prepared with a robots.txt that prevents search engines from indexing it while you’re still testing. Your site is now live!
6. Creating a new collection
Let's start by creating a collection for your site that will contain all of your products. A collection is simply a type of content that is available in Jekyll.

To create this collection, navigate to Files > _config.yml and paste the following code snippet at the end of your YAML file:
collections:
 - products
Your file should look like this:
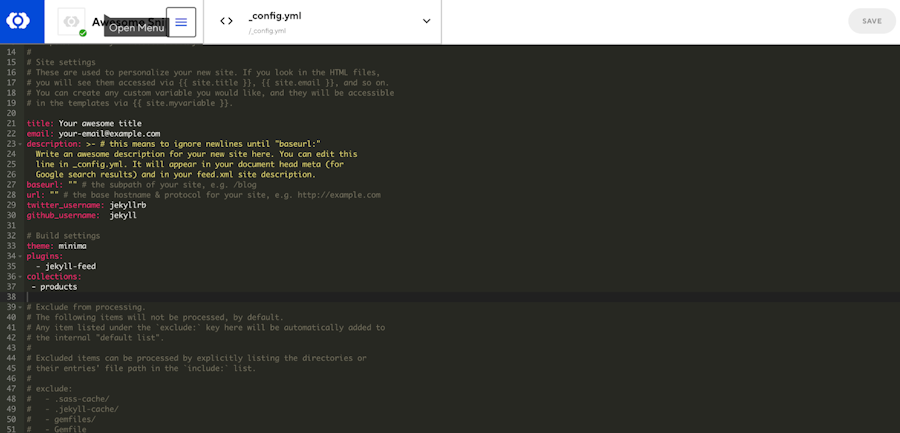
Click Save and navigate back out to the file explorer.
7. Adding content to a collection
Now that your collection is registered in your project's configuration, you can create a new directory at the root of your project named _products. This directory will store all the content of your collection.

For this example, let’s create a store that sells something completely ephemeral, like good ideas. (If only!) To get started, we need to create a new markdown file named product1.md inside the _products folder with the following front matter:
---
identifier: jekyll-idea-1
name: Concept
price: 9.99
image: /assets/images/concept.jpg
---
A thought conceived in the mind and organised around a main theme of your choice. Now on sale for a limited time.
Make sure the names of your custom variables aren't sharing the same namespace as Jekyll's predefined variables. This is the reason we used the term identifier rather than id.
Create as many of these files as you like.
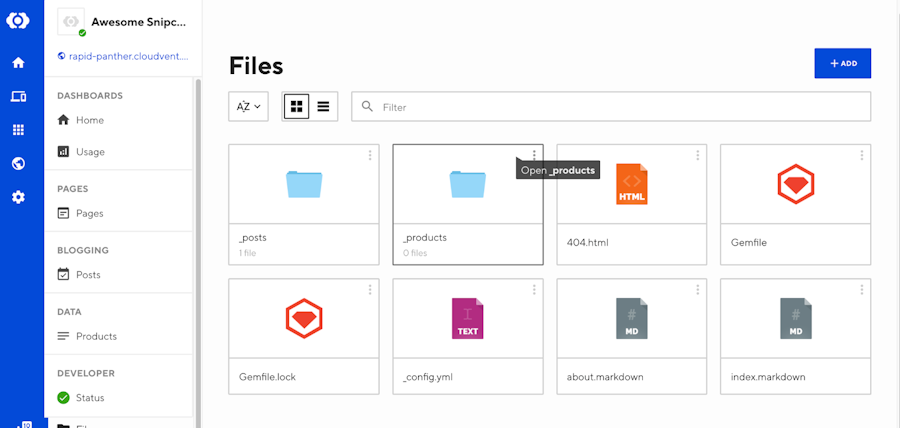
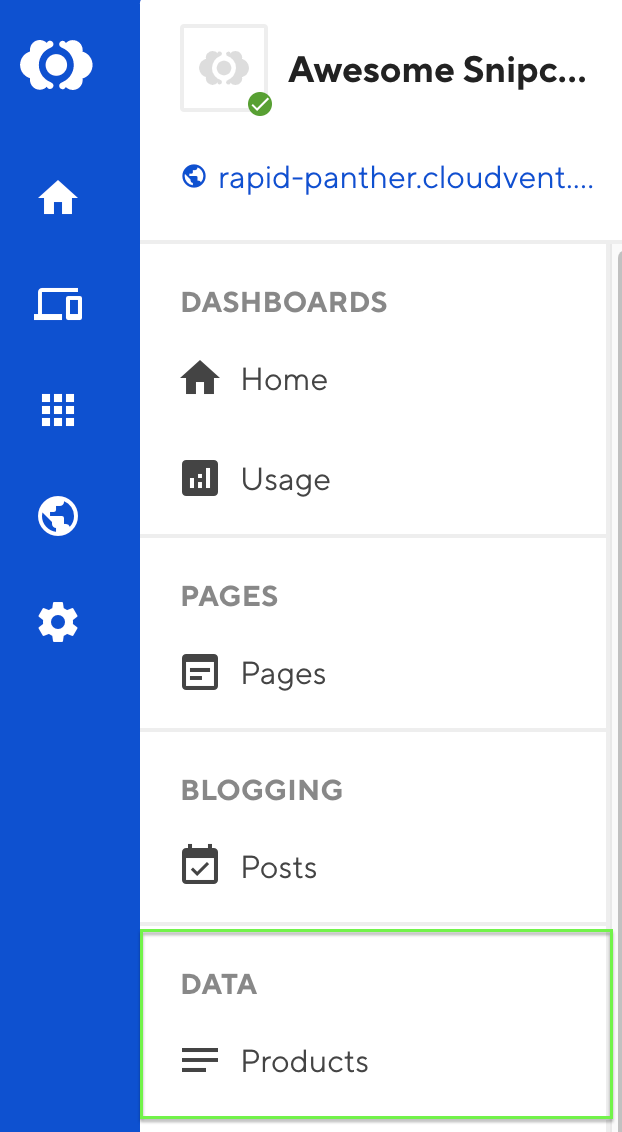
You will see that we now have the products collection in the sidebar:

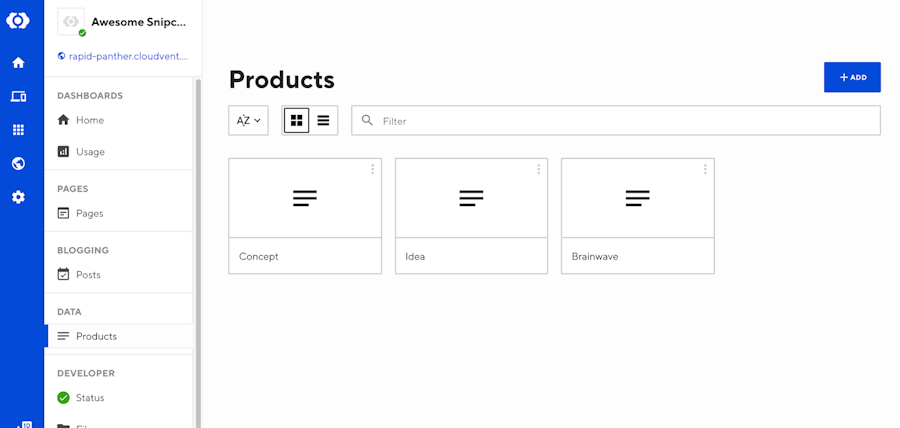
Once we’ve added a couple more, our collection should now look like this:
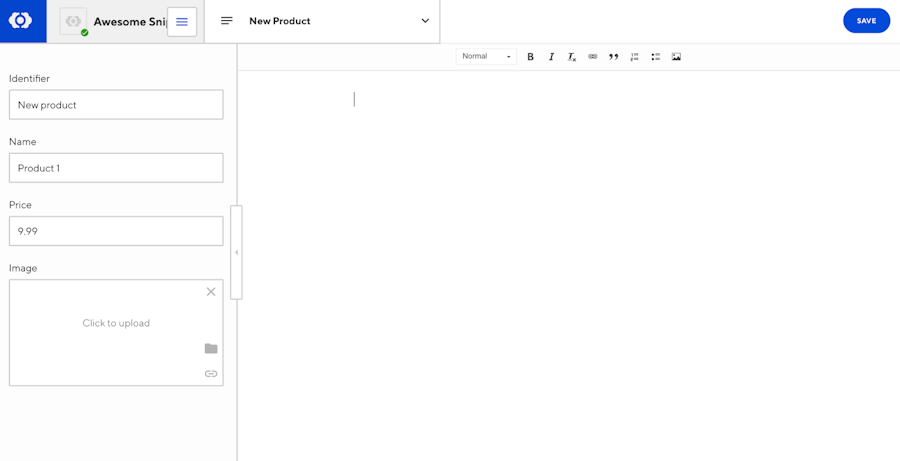
From now on, we can create products straight from the collection itself:

8. Adding e-commerce functionality to our Jekyll site
We now need to create an _includes folder and create a file called header.html inside of it.

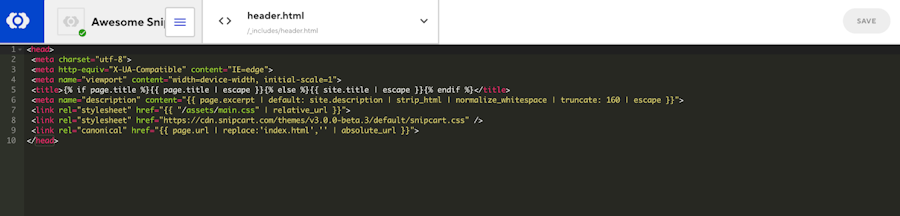
Add the following code snippet into header.html:
<head>
 <meta charset="utf-8">
 <meta http-equiv="X-UA-Compatible" content="IE=edge">
 <meta name="viewport" content="width=device-width, initial-scale=1">
 <title>{% if page.title %}{{ page.title | escape }}{% else %}{{ site.title | escape }}{% endif %}</title>
 <meta name="description" content="{{ page.excerpt | default: site.description | strip_html | normalize_whitespace | truncate: 160 | escape }}">
 <link rel="stylesheet" href="{{ "/assets/main.css" | relative_url }}">
<link rel="stylesheet" href="https://cdn.snipcart.com/themes/v3.2.2/default/snipcart.css" />
 <link rel="canonical" href="{{ page.url | replace:'index.html','' | absolute_url }}">
</head>
Now we are going to create a layout folder. Create a folder called _layouts in your root directory and create a file in that folder called default.html. This will give our page some default styling.
Add the following code to default.html:
<!DOCTYPE html>
<html lang="{{ page.lang | default: site.lang | default: "en" }}">
<body>
 {% include header.html %}
 <main class="main">
 <div class="products">
 {{ content }}
 </div>
 </main>
</body>
<link rel="stylesheet" href="https://cdn.snipcart.com/themes/v3.2.2/default/snipcart.css" />
<script async src="https://cdn.snipcart.com/themes/v3.2.2/default/snipcart.js"></script>
<div id="snipcart" data-api-key="Your snipcart API token here" hidden></div>
</html>
Don't forget to change the data-api-key attribute with your own API key, provided in your Snipcart dashboard.
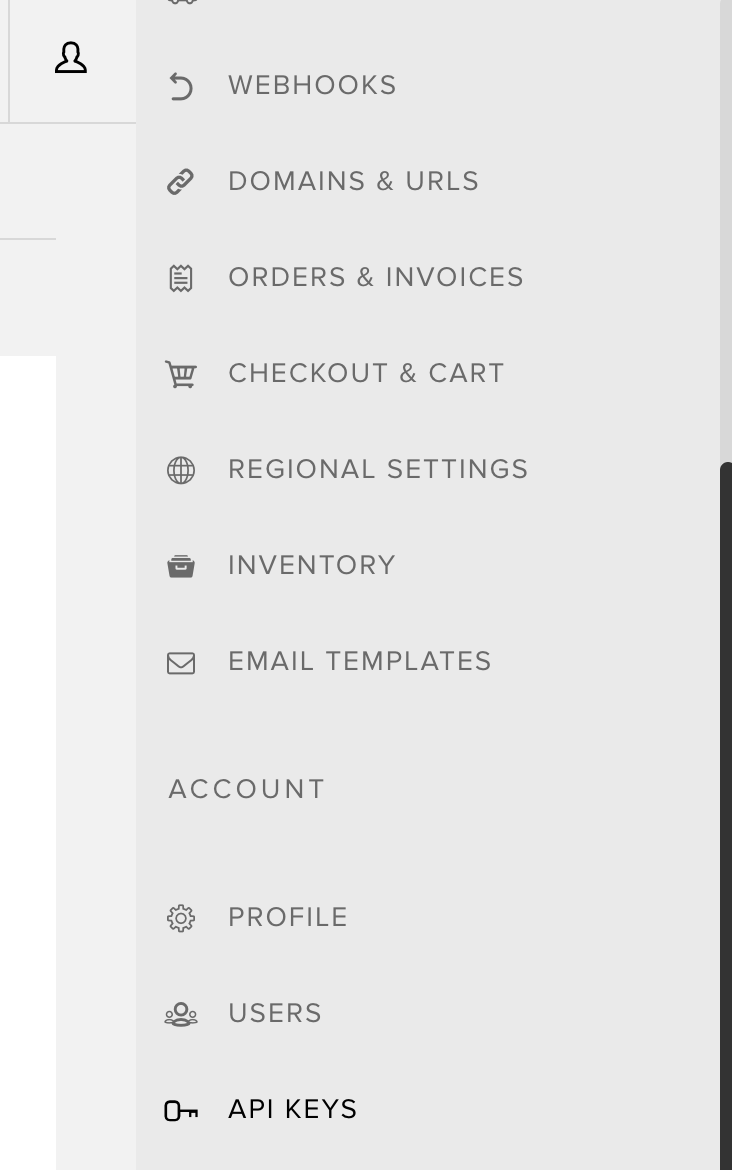
You can find the API key in Account > API Keys in the Snipcart dashboard. Copy/paste your test key.

At this point, we can get rid of the minima theme.
Head over to your _config.yml and comment out or remove the line referring to the Jekyll theme:
theme: minimaAlso, comment out or remove any minima reference in your Gemfile:
gem "minima", "~> 2.0"9. Creating templates for products and adding the buy button
Create a product-definition.html file inside the _includes directory that will display Snipcart's product definition.
Let’s add Snipcart buy button into our website. To do so, copy/paste the following code snippet into product-definition.html:
<button
 class="buy-button snipcart-add-item"
 data-item-id="{{ product.identifier }}"
 data-item-name="{{ product.name }}"
 data-item-price="{{ product.price }}"
 data-item-image="{{ product.image }}"
 data-item-description="{{ product.content | remove: '<p>' | remove: '</p>' }}">
 Add to cart (${{ product.price }})
</button>
We’ll also create a product.html file inside the same directory. It will display the relevant information about our products and include the products’ definition.
<div class="product">
 <div class="product__information">
    <h2 class="product__title">{{ product.name }}</h2>
    <p class="product__description">{{ product.content }}</p>
    {% include product-definition.html %}
 </div>
 <img src="{{ product.image }}" alt="{{ product.name }} product image" class="product__image">
</div>
We are going to make use of these templates in the next step when displaying the products on the homepage. You can customize these to your liking.
10. Displaying products on the homepage
Now that Snipcart is installed on your website and ready to go, you can replace the content of the index.markdown file with the following code snippet.
---
layout: default
---
{% for product in site.products %}
 {% include product.html %}
{% endfor %}
Since the default.html page displays the content of the markdown page using {{ content }}, you can loop through your collection using the site variable and include the product.html template for each product.
Now our site is looking good with Snipcart working:

Now we just need a little bit of style to make it look better: Add the following code to the bottom of /_includes/product.html:
<style>
  body {
      font-family: Arial, sans-serif;
  }
.buy-button {
        color: #fff;
        background-color: #008CBA;
        font-weight: 700;
        border-radius: 99px;
        padding: 10px;
        padding-left: 20px;
        padding-right: 20px;
        outline: none;
        border: none;
        white-space: nowrap;
        transition: .2s transform ease-in-out,.2s box-shadow ease-in-out;
        box-shadow: 0 0 0 rgba(181,8,8,.2)
}
.buy-button:hover {
                transform: translate(0px,-4px);
        box-shadow: 0 4px 6px rgba(181,8,8,.2)
}
.product__image {
        grid-area: image;
        object-fit: cover;
        border-radius: 4px;
        box-shadow: 0 18.025px 43.775px rgba(0,0,0,.25)
}
</style>
Add the following code to the top of /_includes/header.html:
<header class="header">
  <h1 style="display:table; margin: right; color:#008CBA">My Awesome Shop</h1>
    <a href="#" class="snipcart-checkout" style="text-decoration: none;">
      <div class="snipcart-summary" style="display:table; margin:right;">
        <span style="text-decoration: none;">Cart 🛒</span>
        <span class="snipcart-total-price"></span>
      </div>
    </a>
</header>
11. Deploying our Jekyll site
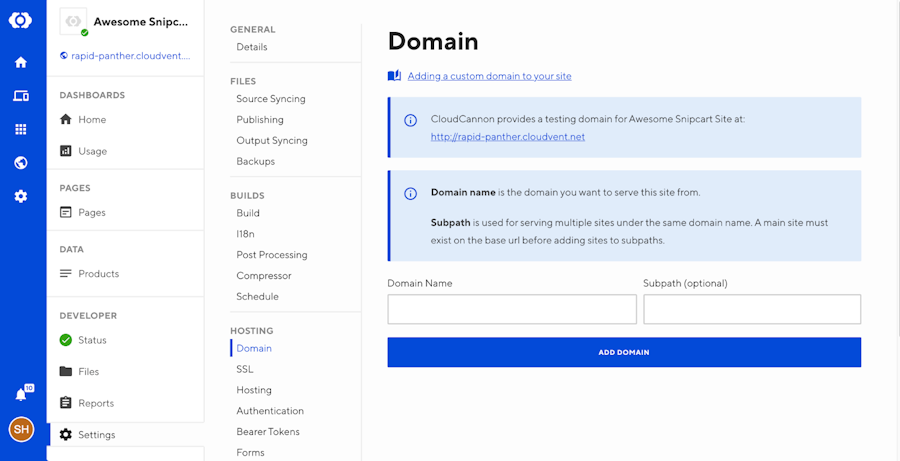
First, we need a domain name. If you don’t already have one, you can buy one from a registrar like GoDaddy, Namecheap, or Google Domains.
Then in CloudCannon, go to your site's settings. Under Hosting, click 'domain'. Add your domain to the field labeled 'Domain Name', and click 'Add Domain'.
Your new Snipcart-powered store will now be live on CloudCannon. Time to start selling!
Live demo & GitHub repository


See the live demo here
See the GitHub repo here
Closing thoughts
Building a Snipcart-powered e-commerce store with Jekyll on CloudCannon was really straightforward — the majority of my time was spent playing with the CSS to give the store the right look and feel. Snipcart’s integration was a breeze, and I’m confident that an interested beginner to static sites would be able to take on this task.
I’m admittedly biased in favor of CloudCannon’s CMS, geared as it is towards a user-friendly interface for non-technical users. But it really is remarkably intuitive — even a complete beginner would be able to add subsequent products once a developer had set up the first one, as CloudCannon infers the relevant fields from a single entry. Together with Jekyll’s amazing community support and Snipcart's customizable shopping solutions, a site like this would be easy to maintain for developers and merchants alike.
If creating your site locally isn’t your preferred method of site creation, or you’d rather test out client or site workflows from an existing example. In that case, CloudCannon offers a free Jekyll e-commerce template with Snipcart integrated by default. You can set up a new site from this template with a free CloudCannon Developer account in less than two minutes, so there’s nothing to lose!
Let us know in the comments below your experience building a site with Jekyll & CloudCanon.


