A Guide to Node.js for E-Commerce [With Koa.js Tutorial]
I know, another post about a JavaScript framework. At this point, I'm pretty sure we have more client-side frameworks than use cases to apply them.
If we focused solely on Node.js, the list could be long.
We've already played with Express, and Strapi, but there's also Meteor, Sails.js, Nest, Hapi, & many others.
This time, let's focus on Koa.js & e-commerce.
It's described as the future of Node.js, so you might understand why we got curious!

Node.js for e-commerce uses can be a powerful tool; we've seen it. But what about Koa.js? We've tried it, loved it, and now we're going to show you how to use it yourself.
It was built by the same team behind Express in 2013, the difference being that it's a smaller, more expressive, and more robust foundation for web applications and APIs.
The least I can say about it is that it's minimalistic. I mean, for real.
To prove it, here's my use case for this demo:
Your friend Roe Jogan is launching his first podcast, and he needs external financing to get started. He wants a fundraiser website where people can donate by either buying products or giving the amount they want.
The specs for this project are:
It has to go live soon.
There is no need for a CMS to manage products.
Your goal is to put the basics online, so your friend can get going in record time.
Oh and, you'll be selling stuff, so Snipcart's zero friction setup will serve you well.
Now, if that isn't minimalist, I wonder what is.


Technical tutorial: Node.js e-commerce with Koa.js

Here are the steps we'll cover:
Pre-requisites:
A Snipcart account. (Forever free in test mode)
Basic knowledge of Node.js. (You can start here)
1. Initializing the Koa.js app directory
Let's get started by creating your project's directory:
mkdir snipcart-koajs
cd snipcart-koajs
Afterward, generate a package.json file with the following content:
{
  "name": "snipcart-koajs",
  "version": "2.0.0",
  "description": "Minimalistic/low-ceremony ecommerce store built on Koa.js using Snipcart",
  "scripts": {
    "start": "node index.js",
    "dev": "nodemon index.js"
  },
  "dependencies": {
    "config": "^3.3.3",
    "fs-extra": "^9.1.0",
    "koa": "^2.13.1",
    "koa-router": "^10.0.0",
    "koa-static": "^5.0.0",
    "koa-views": "^7.0.0"
  },
  "devDependencies": {
    "nodemon": "^2.0.7"
  }
}
Then run npm install in your terminal to integrate the listed dependencies above. We'll go through what each of them does later in this tutorial.
Let's also create a config folder with a default.json file to isolate all of our app's configuration for easy modification afterward:
{
    "server": {
        "port": 3000
    },
    "views": {
        "path": "app/views",
        "options": {
            "map": {
                "pug": "pug"
            },
            "extension": "pug"
        }
    },
    "static":{
        "path":"app/static"
    },
    "data": {
        "path": "app/data"
    },
    "settings": {
        "siteName": "Roe Jogan's podcast fundraiser",
        "snipcartApiKey": "YOURSNIPCARTAPI_KEY",
        "defaultDonation" : 25
    }
}
We will see how each configuration parameter will be used in the demo's upcoming code snippets.
2. Creating the app's entry point
So we have our basic environment setup. Now, when clients make a request to our website URL, how can we use Koa.js to send them a fully functional e-commerce page?
To answer that, let's quickly look at how Koa works. It is a middleware pipeline.
This means that when a client requests an API route, Koa.js will make a context object comprised of the API request and its future response. It will then make it go through a chain of functions performing some manipulations on it, then wait for the result of the next function in the chain.
When the chain's last function is called, the stack will unwind, and the context object will be passed back to the top of the function chain.

Hence, to send a fully functional e-commerce page to our customers, we'll need to add relevant middleware for all of our needs.
Let's go through each of them - and its corresponding middleware, step by step.
2.1 Rendering html
First of all, we need to render HTML.
To do so, let's add a template rendering middleware called koa-views in index.js.
//in index.js
const Koa = require('koa')
const app = new Koa()
const views = require('koa-views')
const serve = require('koa-static')
const path = require('path')
const config = require('config') // file where we will add all of our app's configuration
// Views setup, adds render() function to ctx object
app.use(views(
  path.join(__dirname, config.get('views.path')),
  config.get('views.options')
))
We're now ready to render HTML!
2.2 Rendering CSS, scripts and images
While minimal website design can go a long way, it would be nice to add some logic to our e-commerce store.
In index.js Let's use the koa-static middleware to statically serve those assets:
//in index.js
app.use(serve(config.get('static.path')))
We are now almost ready to create our actual view templates.
2.3 Hydrate ctx with global settings
One last thing we need to do before being ready to make our actual view templates is to inject our configuration settings into Koa.js' context object.
As a reminder, this object is composed of the API request and API response.
Amongst other things, it will allow us to add our Snipcart public API key in our views from the configuration file.
And as a bonus, this will show you how to create your own custom middlewares!
// in index.js
app.use(async (ctx, next) => {
  ctx.state.settings = config.get('settings')
  ctx.state.urlWithoutQuery = ctx.origin + ctx.path
  await next()
})
The above is a great example of Koa.js adding value to our app.
See that async keyword in the function signature? It's precisely where this framework shines.
Its support for promises allows you to write middlewares as async functions, thus getting rid of callback hell.
This makes for much cleaner and readable code.
2.4 Configuring app startup
We are now ready to start the app. Let's use the following code:
// in index.js
const port = process.env.PORT || config.get('server.port')
app.listen(port, () => { console.log(`Application started - listening on port ${port}`) })
Then, in your command line, type npm run dev.
In package.json, we configured that script to use nodemon, which will watch your files and restarts the app when changes are detected.
// First, we declare the middleware we will use
const config = require('config')
const path = require('path')
const Koa = require('koa')
const Router = require('koa-router')
const loadRoutes = require("./app/routes")
const DataLoader = require('./app/dataLoader')
const views = require('koa-views')
const serve = require('koa-static')
const app = new Koa()
const router = new Router()
// Views setup, adds render() function to ctx object
app.use(views(
  path.join(__dirname, config.get('views.path')),
  config.get('views.options')
))
// Serve static files (scripts, css, images)
app.use(serve(config.get('static.path')))
// Hydrate ctx.state with global settings, so they are available in views
app.use(async (ctx, next) => {
  ctx.state.settings = config.get('settings')
  ctx.state.urlWithoutQuery = ctx.origin + ctx.path
  await next() // Pass control to the next middleware
})
// Start the app
const port = process.env.PORT || config.get('server.port')
app.listen(port, () => { console.log(Application started - listening on port ${port}) })
If you go to port 3000 right now, you should get a "Not Found" blank page.
3. Adding products data
We now need to set up our product information.
We could have gone for a simpler route, but to demonstrate how Koa.js plays well with promises, let's build a simple DataLoader component that reads JSON files' content in a directory and parses them into an array of objects.
In the project's root directory, let's create an app subdirectory and then a dataLoader javascript file.
const path = require('path')
const fs = require('fs-extra')
function fileInfo(fileName, dir) {
    return {
        slug: fileName.substr(0, fileName.indexOf('.json')),
        name: fileName,
        path: path.join(dir, fileName)
    }
}
function readFile(fileInfo) {
    return fs
        .readJson(fileInfo.path)
        .then(content => Object.assign(content, { _slug: fileInfo.slug }))
}
class DataLoader {
    constructor(dir) {
        this.dir = dir;
    }
    async all() {
        const fileInfos = (await fs.readdir(this.dir)).map(fileName => fileInfo(fileName, this.dir))
        return Promise.all(fileInfos.map(readFile))
    }
    async single(slug) {
        const fileInfos = (await fs.readdir(this.dir)).map(fileName => fileInfo(fileName, this.dir))
        var found = fileInfos.find(file => file.slug === slug)
        return found ? readFile(found) : null
    }
}
module.exports = DataLoader
The code above makes use of fs-extra module, providing us with the function that will complete node's default file system module, fs with additional functions.
In index.js, let's add our product loader:
// index.js
// Then, we will add a custom script that will read our products JSON files
const productsLoader = new DataLoader(
  path.join(
    __dirname,
    config.get('data.path'),
    'products')
)
Now that our data loader is set, we are ready to add our product data.
Since we do not have many products to sell and do not need a CMS, we will use JSON objects stored in memory.
If we ever need a database in the future, some great middleware such as koa-mongoose can easily be added.
In our app folder, we can now create our home.pug template displaying our products.
Please refer to the repo at the end of the GitHub models to see an example of product models.
// app/views/home.pug
each product in model.products
  h3=product.name
  p=product.description
  p
    span $#{product.price}
  a(href=/buy/${product._slug}) More details
Notice how I'm accessing the products array via model.products?
That's because, by default, koa-views pass the entire ctx.state object to your views. Nifty!
4. Creating our routes
Our template is now created and populated with products. All we need to do now is to configure our routes.
Since Koa.js does not come with a router by default, we will use the middleware koa-router.
Let's first set it up in index.js.
// in index.js
const Router = require('koa-router')
const router = new Router()
loadRoutes(router, productsLoader)
app.use(router.routes())
Now that our router is ready, let's add our home route to our application by connecting it to the home template we just designed:
// app/routes/home.js
module.exports = (router, productsLoader) => {
  router.get('/', async ctx => {
    const products = await productsLoader.all()
    ctx.state.model = {
      title: 'Hey there,',
      products: products
    }
    await ctx.render('home');
  })
}
Simple, isn't it?
We're simply loading all of our products and passing them down to the view via Koa's context object.
5. Enabling e-commerce on your Node.js app
How about selling these products? Let's first add Snipcart to our layout:
// app/views/_layout.pug
head
  link(rel="preconnect", href="https://app.snipcart.com")
  link(rel="preconnect", href="https://cdn.snipcart.com")
  link(rel="stylesheet", href="https://cdn.snipcart.com/themes/v3.0.30/default/snipcart.css")
// (...)
script(id="snipcart",
      src='https://cdn.snipcart.com/themes/v3.0.30/default/snipcart.js',
      data-api-key=settings.snipcartApiKey,
      data-config-modal-style="side"
    )
Add a link with the .snipcart-checkout CSS class somewhere in your layout. By clicking on the link, you should see the cart opening!
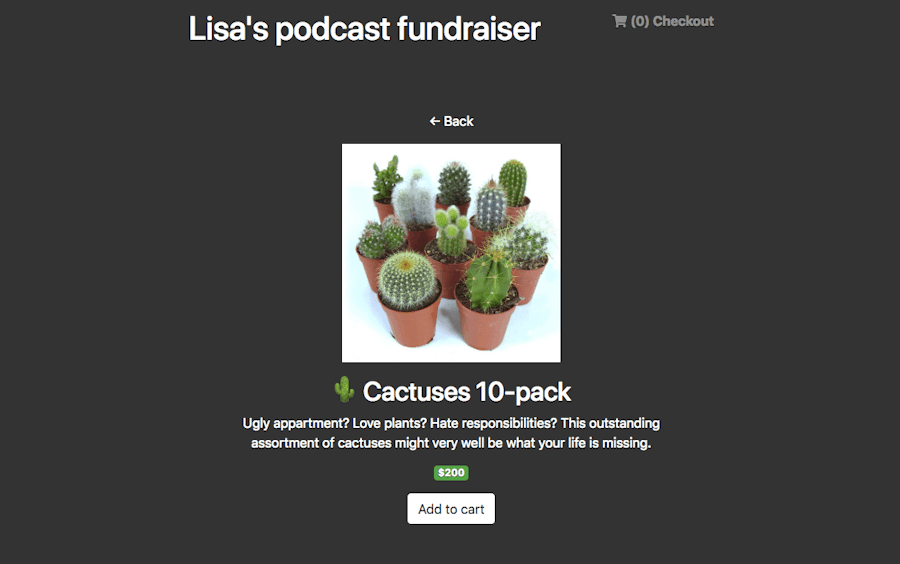
5.1 Creating the "buy" route
We are now ready to add the buy route. The code looks pretty similar to the home route, except that we're loading a single product:
// app/routes/buy.js
module.exports = (router, productsLoader) => {
  router.get("/buy/:slug", async ctx => {
    const product = await productsLoader.single(ctx.params.slug)
    if (product) {
      ctx.state.model = {
        title: product.name,
        product: product
      }
      await ctx.render('product')
    }
  })
}
In product.pug, add this button to hook your product definition to Snipcart:
// app/views/product.pug
button.snipcart-add-item(
  data-item-id=model.product.id
  data-item-name=model.product.name
  data-item-url=urlWithoutQuery
  data-item-price=model.product.price
  data-item-description=model.product.description
  data-item-image=model.product.image
) Add to cart
Well done, you can now sell your products!

5.2 Creating the "donate" route
Let's now make a page where users, rather than buying anything, will be able to donate an amount of their choosing.
We will have to use a trick to make it work.
When confirming an order, Snipcart crawls all the product URLs and validates items price to make sure nothing fishy happened to your cart.
To do that, Snipcart looks at the data-item-price attribute of your buy buttons.
Since donation amounts are customer-driven, we will have to add the number as a query parameter in the data-item-url buy button's attribute. Then, we will need to make sure that the value is rendered in the data-item-price attribute.
// app/routes/donate.js
const config = require('config')
module.exports = router => {
  router.get("/donate", async ctx => {
    ctx.state.model = {
      title: "Donate",
      amount: ctx.query.amount || config.get("settings.defaultDonation")
    }
    await ctx.render('donate')
  })
}
We have added an amount property to the model object and assign the query parameter to it.
Notice how we also used the settings.defaultDonation config value as a fallback when no query parameter is set.
Now, what about donate.pug? Define your elements as follows:
// app/view/donate.pug
label(for="amount") Please enter your donation amount below
input#amount.(type="number", value=model.amount)
button#donate.snipcart-add-item(
data-item-id="donation"
data-item-url=${urlWithoutQuery}?amount=${model.amount}
data-item-name="Donation"
data-item-description="Can't thank you enough!"
data-item-price=model.amount
data-item-shippable="false"
data-item-categories="donations"
data-item-max-quantity="1"
data-item-taxable=false
) Add to cart
Two things to note here:
data-item-url is fully generated using urlWithoutQuery and model.amount
data-base-url will be used in the script below to recompute data-item-url dynamically at runtime.
Finally, write a script that will use a javscript anonymous function to hook up the donation amount input to your buy button:
// app/static/scripts/donate.js
// mention integrating mongoose
const getUrl = window.location;
const baseUrl = getUrl.protocol + "//" + getUrl.host + "/" + getUrl.pathname.split('/')[1];
(function () {
  document
    .querySelector('#amount')
    .addEventListener('change', function (evt) {
      const amount = evt.target.value
      let buyButton = document.querySelector('#donate')
      buyButton.dataset.itemPrice = amount
      buyButton.dataset.itemId = donation
      buyButton.dataset.itemUrl = ${baseUrl}?amount=${amount}
    })
})();
With that in place, any change made to the #amount field value will update the product URL.
6. Handling inventory
Obviously, our store does not have an unlimited amount of cactuses and milk caps. Plus, we currently do not use a CMS, let alone a database. So how will we manage our product inventory?
Snipcart will do it for us.
To do so, go to the products section of your Snipcart account and enter your website URL. Then, on the products page, select your products in the inventory section and add the available number of items for the given product.
At every completed transaction, Snipcart will reduce the number of the given product.
And you're all set!
Live demo & GitHub repo

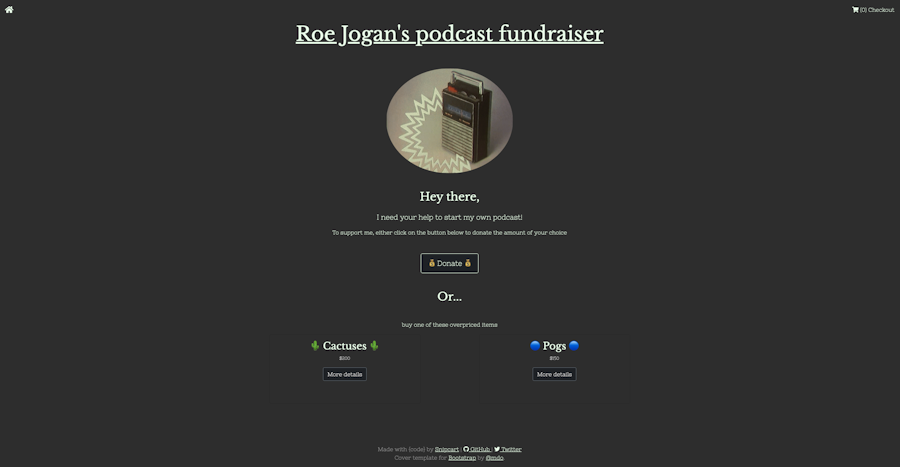
See the live demo here
See GitHub repo here
Closing thoughts
Koa.js is a great minimalist Node.js framework. I enjoyed working with it very much.
Its API and API system are elegant and easy to learn yet allows for so much control with middleware extension. I definitely recommend this approach for any Node.js developer dealing with e-commerce.
To push it further, I could've used some cool community middlewares to make it look like a real production app (i.e., request caching, logging, a database connector, a sass preprocessor).
But what I take away from my experience with Koa.js is that it's a killer tool to build lean, performant, and maintainable web APIs.
Let me know what your thoughts are about this framework in the comments below!
If you've enjoyed this post, please take a second to share it on Twitter. Got comments, questions? Hit the section below!


