Webflow eCommerce: Creating a Full-Featured Store
Choosing an eCommerce solution for your online store can be a real hassle these days.
There are lots of different options, each responding to specific needs. However, in the last few years, we’ve seen the rise of a new kind of tool: the no-code solutions.
Webflow is one of the pioneers here.
It’s a designer-centric website builder. People use it to create beautiful websites without writing a single line of code.
Webflow recently released an eCommerce feature for its platform, and in some ways, it now overlaps with Snipcart's functionalities.
Let’s explore the Webflow eCommerce solution to see if it’s a good fit for you.
What is Webflow eCommerce?
Webflow eCommerce is a feature of Webflow all-in-one no-code website building platform to build an eCommerce site. It provides a visual editor oriented toward web designers to create custom web pages. The editor gives you full control over the website design.
The platform enables you to create a website from scratch or choose an eCommerce template from their library. Depending on the plan you choose, it can also act as your CMS and hosting provider. The code is automatically generated while you design your site. Some of their tiers also let you export the rendered HTML, CSS, and JavaScript code if you wish to use your own CMS and hosting platform.
Their offer is similar to Shopify, in the way that their solutions provide an all-in-one package. Content management, design, admin functions, and eCommerce features; everything is managed within Webflow.
The main difference between the Shopify and Webflow eCommerce solutions is that Webflow focuses more on the website building functionalities to offer true customization and design freedom. You can genuinely craft a unique website as opposed to the rigid templates offered by traditional eCommerce platforms.
Everything from the homepage, product pages, shopping cart, and checkout page can be designed to match your brand. You can also customize the checkout experience to be in tune with your whole website. However, this design freedom comes with the cost of losing some advanced eCommerce features like abandoned cart recovery, subscription and recurring payments, and multi-currency support.
The process of creating an online store with Webflow is relatively simple:
Create an account on Webflow
Choose a template OR start from scratch
Create your products inside the platform UI
Webflow eCommerce features
Webflow eCommerce offers a full custom shopping cart and checkout experience. Here are the main features:
Customize the checkout process to fit with your whole site and brand
Offer discounts
Have on-site checkout
Sell physical and digital goods
Handle tax management
Manage your inventory
Support multiple languages
Have product variations
Process secure online transactions
Manage eCommerce operations in a hosted merchant dashboard
Get a custom store up and running easily
Integrated webhooks and APIs
These features are pretty standard in the eCommerce space. But you also get more features like access to Instagram and Facebook sales channels. Apple Pay, Google Pay, and PayPal are also integrated into the checkout payment options.
Webflow eCommerce also features out-of-the-box integration with shipping software for automatization. This enables you to synchronize your orders to create the shipping labels and automates the tracking.
Webflow eCommerce features might be limited depending on your need. They will certainly answer all the needs a basic online store might have, but if your business needs advanced features, you might want to consider using an alternative like Snipcart for the eCommerce part.
Webflow eCommerce pricing
Webflow eCommerce plans are different from their standard pricing tier. Here’s a rundown of their eCommerce pricing:
Each plan includes all the features we’ve seen earlier. However, with the standard plan, transaction emails are branded with a Webflow footer. The prices shown above don’t include the payment processing fees. You’ll generally need to add 2.9% + 30¢/transaction. The two payment gateways supported by Webflow are Stripe and Paypal.
Snipcart: An eCommerce alternative
Snipcart is a flexible shopping cart that developers can easily integrate into any site in minutes to turn it into an eCommerce website. You add Snipcart to a site like you'd do with Google Analytics: by copy-pasting a simple script. Products are added pretty much in the same way.
With basic CSS skills, you can change the look and feel of your whole checkout flow. Snipcart makes for a particularly flexible development experience. It also offers a merchant back office to manage all of your eCommerce operations.
Snipcart features
Snipcart offers the same main set of features as Webflow eCommerce. However, it has advanced features that Webflow doesn’t offer.
Customer dashboard where your customers can access their order history.
Abandoned carts recovery and personalized recovery email campaigns.
Subscription and recurring payment
Multi-currency support
Broader range of payment gateways:
Stripe (also offered by Webflow)
PayPal (also offered by Webflow)
Authorize.Net
Braintree Payments
Mollie
Square
Another thing Snipcart has is the ability to be integrated into any setup you already have. No need to rebuild your website.
Snipcart pricing
Snipcart offers simple pricing, 2%/transaction with a minimum of 10$/month. Just like with Webflow, you’ll also need to add the payment gateway fees. Snipcart is free while in test mode, so you don’t have to pay anything while in development.
Tutorial: eCommerce with Webflow & Snipcart
If you only need basic eCommerce functionalities, Webflow eCommerce might be a good solution for you. However, if you need more features this tutorial on how to integrate Snipcart into a Webflow website might be useful.
Here’s how to quickly add Snipcart into a Webflow project.
Prerequisites
Here’s a list of what you’ll need to get started:
A Snipcart account (free forever in test mode)
A Webflow account (you’ll need the CMS site plan or higher)
1. Add Snipcart to your Webflow website
Open up your Webflow project settings and click on the “Custom Code” tab.
If you don’t have a project already, you can create a new site from scratch or by selecting a template (it doesn’t need to be an eCommerce template).
In the custom code tab, scroll down to “Footer Code” and paste the following code:
<script>
  window.SnipcartSettings = {
    publicApiKey: "YOUR_API_KEY",
    loadingStrategy: "on-user-interaction",
  };

  (()=>{var a,d;(d=(a=window.SnipcartSettings).version)!=null||(a.version="3.0");var s,S;(S=(s=window.SnipcartSettings).currency)!=null||(s.currency="usd");var l,p;(p=(l=window.SnipcartSettings).timeoutDuration)!=null||(l.timeoutDuration=2750);var w,u;(u=(w=window.SnipcartSettings).domain)!=null||(w.domain="cdn.snipcart.com");var m,g;(g=(m=window.SnipcartSettings).protocol)!=null||(m.protocol="https");var y=window.SnipcartSettings.version.includes("v3.0.0-ci")||window.SnipcartSettings.version!="3.0"&&window.SnipcartSettings.version.localeCompare("3.4.0",void 0,{numeric:!0,sensitivity:"base"})===-1,f=["focus","mouseover","touchmove","scroll","keydown"];window.LoadSnipcart=o;document.readyState==="loading"?document.addEventListener("DOMContentLoaded",r):r();function r(){window.SnipcartSettings.loadStrategy?window.SnipcartSettings.loadStrategy==="on-user-interaction"&&(f.forEach(t=>document.addEventListener(t,o)),setTimeout(o,window.SnipcartSettings.timeoutDuration)):o()}var c=!1;function o(){if(c)return;c=!0;let t=document.getElementsByTagName("head")[0],e=document.querySelector("#snipcart"),i=document.querySelector(`src[src^="${window.SnipcartSettings.protocol}://${window.SnipcartSettings.domain}"][src$="snipcart.js"]`),n=document.querySelector(`link[href^="${window.SnipcartSettings.protocol}://${window.SnipcartSettings.domain}"][href$="snipcart.css"]`);e||(e=document.createElement("div"),e.id="snipcart",e.setAttribute("hidden","true"),document.body.appendChild(e)),h(e),i||(i=document.createElement("script"),i.src=`${window.SnipcartSettings.protocol}://${window.SnipcartSettings.domain}/themes/v${window.SnipcartSettings.version}/default/snipcart.js`,i.async=!0,t.appendChild(i)),n||(n=document.createElement("link"),n.rel="stylesheet",n.type="text/css",n.href=`${window.SnipcartSettings.protocol}://${window.SnipcartSettings.domain}/themes/v${window.SnipcartSettings.version}/default/snipcart.css`,t.prepend(n)),f.forEach(v=>document.removeEventListener(v,o))}function h(t){!y||(t.dataset.apiKey=window.SnipcartSettings.publicApiKey,window.SnipcartSettings.addProductBehavior&&(t.dataset.configAddProductBehavior=window.SnipcartSettings.addProductBehavior),window.SnipcartSettings.modalStyle&&(t.dataset.configModalStyle=window.SnipcartSettings.modalStyle),window.SnipcartSettings.currency&&(t.dataset.currency=window.SnipcartSettings.currency),window.SnipcartSettings.templatesUrl&&(t.dataset.templatesUrl=window.SnipcartSettings.templatesUrl))}})();
</script>
Remember to replace YOUR_API_KEY with your Snipcart public API key. You can find it here. This script will install the latest version of Snipcart throughout the whole Webflow project.
2. Add products
To add our products to Webflow, we’ll take advantage of the CMS Collections. To do so, head to your project Designer and select the CMS Collections on the left panel. From there, create a new collection called “Products” with the following custom fields:

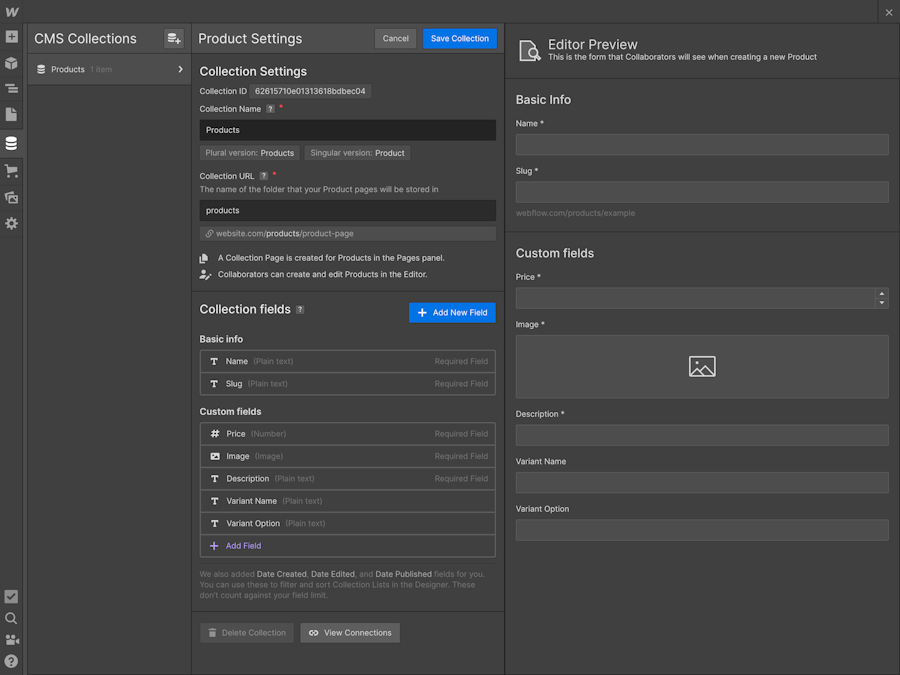
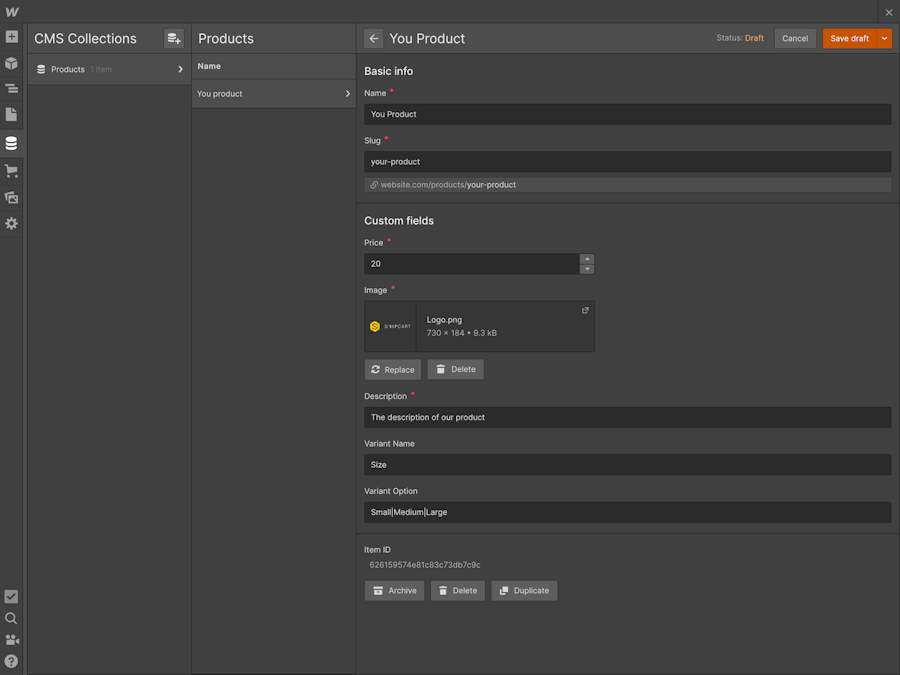
Once you’re done save the collection. In this collection, create all your products by filling the fields you previously created.
The variant name and option fields are facultative. You can use them if your product is available in multiple variations. Once you have created your products we’ll take advantage of the fields we’ve created to add our Snipcart buy button.
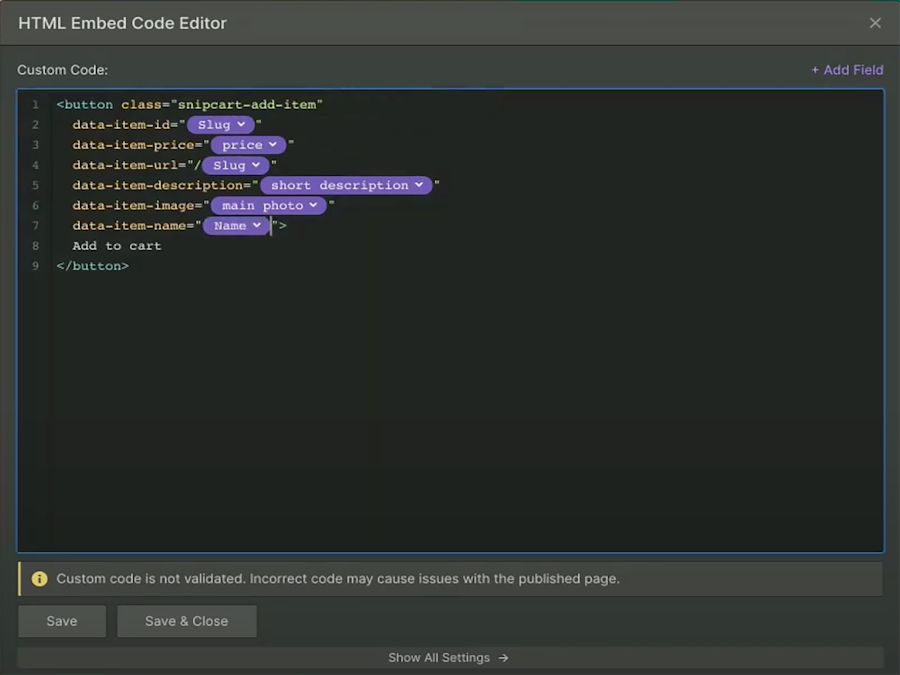
3. Adding an add to cart button
With the products created, let’s add our Snipcart button to our product page. For this, in our product page add a collection list block and in it, we’ll add an embed component where we want to add our button. In the code editor, we’ll paste the following code to create our add to cart button:
<button class=""
  data-item-id=""
  data-item-price=""
  data-item-url=""
  data-item-description=""
  data-item-image=""
  data-item-name="">
  Add to cart
</button>
Inside the “ ” add the appropriated custom fields we created earlier just like below.
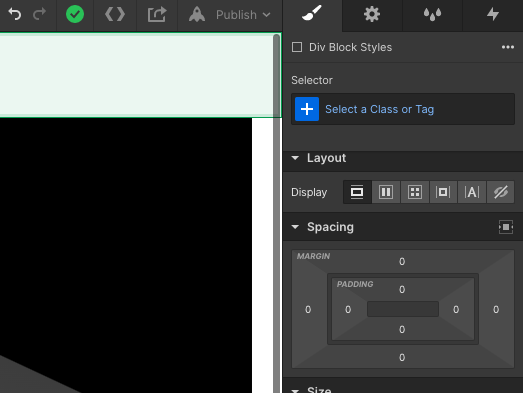
You can add styling to the button by adding another class to the button and styling a div block with the same class by selecting it in the Selector panel.

4. Adding a view cart button
The last thing we’ll want to do is to add a button in the header to view the cart. To do this, we’ll add another embed component to the header element of our website. In it, we’ll paste the following to create our cart summary button:
<button class="snipcart-checkout">Click here to checkout</button>You can style this button the same way we styled the add to cart button.
You now have an up and running eCommerce site using Webflow and Snipcart. You can also expand the functionalities by referring to our documentation.
If you prefer a more thorough tutorial, our friend Pixel Geek made a great tutorial on how to integrate Snipcart into your Webflow website. He’s covering:
How to install Snipcart in your Webflow project
How to create a buy button & define products in the Webflow platform
How to manage products dynamically using Webflow collections
How to add product variants
How to insert an “Open cart” link & cart summary at the top of a page
How to enable Snipcart’s customer dashboard
You can have a look here.
Please note that he’s using an older Snipcart version, hence the different installation method. You can simply use our new installation script instead while following his tutorial.
Conclusion
The best eCommerce solution always depends on your specific needs. When choosing, it’s also important to think about the features you’ll likely need in the future as your eCommerce store grows.
Webflow eCommerce is a design first/no-code website builder including eCommerce features. Everything is managed on their platform. It’s an all-in-one solution for people looking to get full customization without entering code territory. However, you're leaving flexibility and eCommerce features behind since it really focuses on design.
If you want to take advantage of the design first approach of Webflow but want a complete eCommerce solution, adding Snipcart’s to your Webflow website is fast and simple.
What do you think about Webflow? Let us know in the comments.


