Add a Shopping Cart to a Website in 4 Simple Steps
If you have a website where you want to sell products, there are two options. You can either rebuild your website from scratch with an all-in-one platform, for example, or you can add a shopping cart to your existing website.
With the first option, not only rebuilding your website on an eCommerce platform can be an inconvenience, but it’s also a waste of your prior investment, and it comes with its limitations.


Today, I will show you how to go with the second option: add a shopping cart to an existing website.
You will have all you need to start selling online at the end of this article.
Choosing a shopping cart software
Shopping cart solutions range a lot in their features offering, but a few are shared among all of them. The key components you'll find are:
A checkout page to collect essential customers' information
Payment processing through a payment gateway like Stripe or PayPal
An add to cart button, buy button, and a cart to buy multiple items
If you only need these basic features, one option is to build it yourself with HTML and JavaScript. However, it requires advanced web development skills and time.
On the other hand, a paid option like Snipcart will include additional features like inventory management, tax management, shipping management, and coupon codes.
Not only do these features make the user experience better, but they also help increase your sales.
What is Snipcart?
Snipcart is a powerful, easy-to-install shopping cart platform. You can use it to transform any site or web application into an eCommerce website in minutes. It also includes a full suite of features making it a complete solution.
How to add a shopping cart to your website
Snipcart can be added to any website with two simple lines of code. Whether if it was built with a site builder, a CMS like WordPress, or a new Jamstack framework like Next.js, it will work. Best of all, you don’t need any plugins.
This tutorial shows you how to add a shopping cart to a static HTML website. However, the steps are essentially the same on websites built with other languages.
Prerequisites
To get started, you’ll first need to have a Snipcart account, if you don’t already have one you can create one here. Once you have verified your email, log in to the dashboard to start configuring your new eCommerce store.
1. Configuring your account
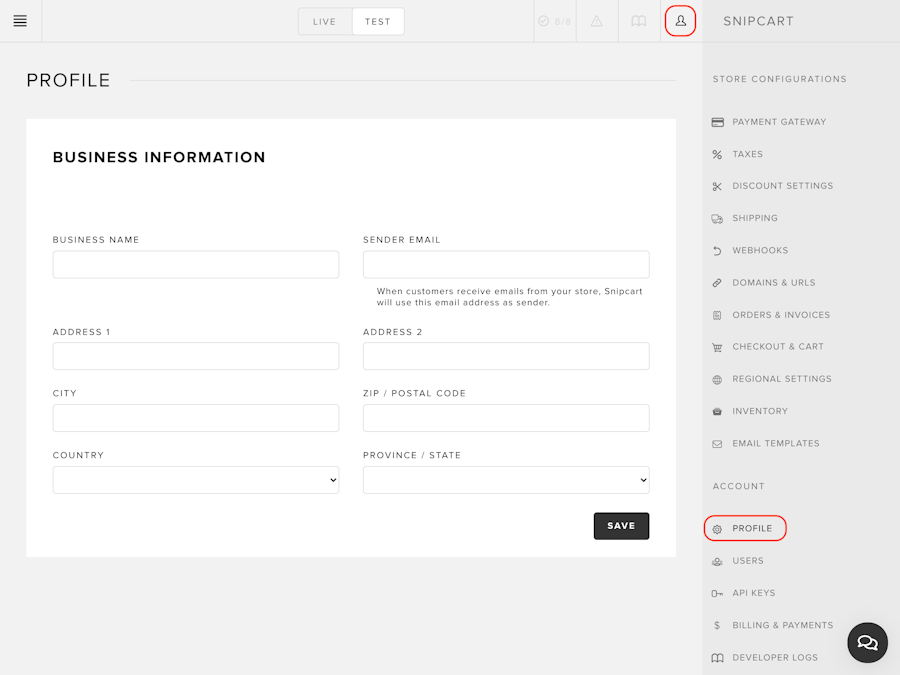
Once logged in to your merchant dashboard, go to the account menu and select "PROFILE". Fill in your business details, and save.

Then, enter your domain in the dashboard so that Snipcart can fetch the information it needs on your website. To do so, head to the account menu and click on “DOMAINS & URLS”. Add your website domain URL under "DEFAULT WEBSITE DOMAIN".
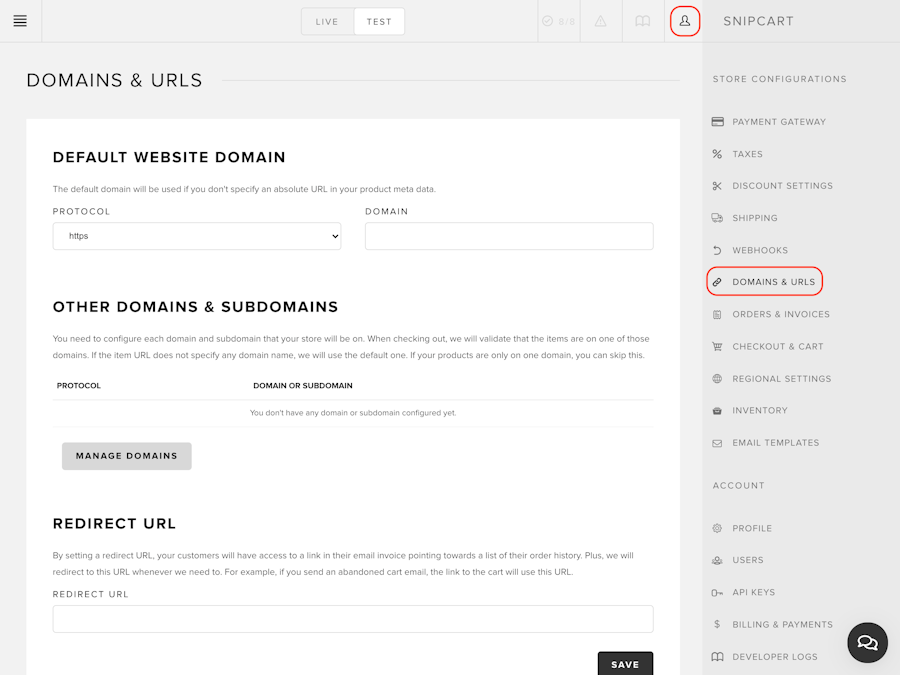
If you have a staging domain for test purposes, you'll need to enter this one.
2. Adding the shopping cart to your website
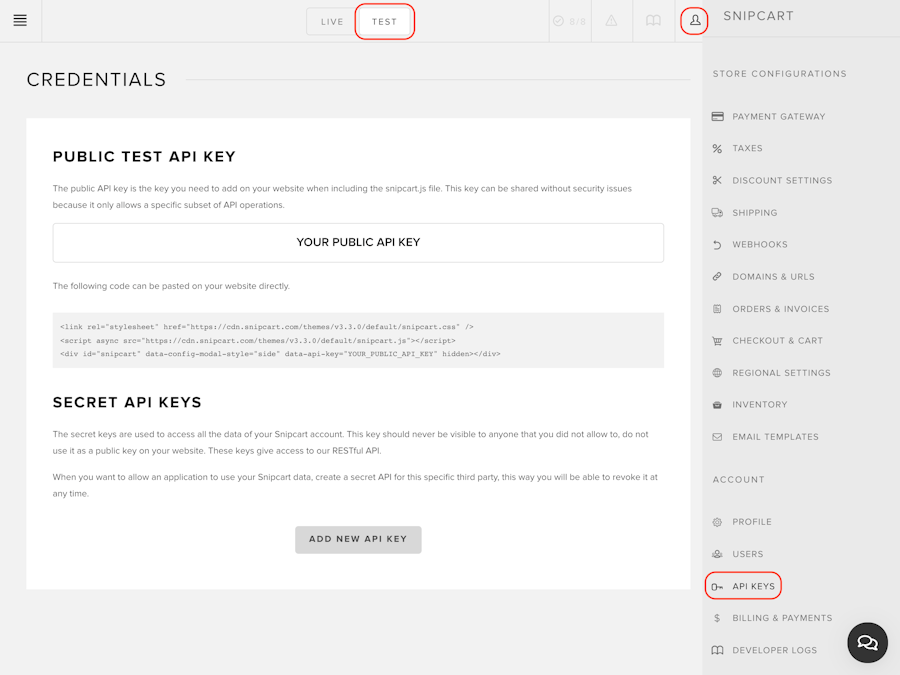
It's now time to add the code snippet to your website. For this, select "API KEYS" in the account menu. There you'll be able to see your public test API key and the code snippet you need to use.
Add this line in the <header>, it refers to the CSS template used by the cart.
<link rel="preconnect" href="<https://app.snipcart.com>" />
<link rel="preconnect" href="<https://cdn.snipcart.com>" />
<link rel="stylesheet" href="https://cdn.snipcart.com/themes/v3.3.0/default/snipcart.css" />
Snipcart uses preconnect hints, so the browser knows that the user will most probably need the Snipcart resources when loading your site. This will improve the overall user experience by initiating a connection to Snipcart in advance.
Add these lines before the </body> closing tag
<script async src="https://cdn.snipcart.com/themes/v3.3.0/default/snipcart.js"></script>
<div id="snipcart" data-config-modal-style="side" data-api-key="YOUR_TEST_API_KEY" hidden></div>
As a best practice, we recommend you add the <link> element to the head of your file and the <script> and <div> element just before the end of the <body>.
3. Defining your products
Now that the shopping cart is installed on your website, you'll need to define your products. With Snipcart, products are defined directly in the HTML code.
To do so, simply add the `snipcart-add-item` class and product attributes to your button element.
<button class="snipcart-add-item"
  data-item-id="yellow-sticker"
  data-item-price="1.99"
  data-item-description="High-quality yellow Snipcart stickers (pack of 3)"
  data-item-image="assets/images/yellow-stickers.png"
  data-item-name="Yellow Snipcart Stickers">
  Add to cart
</button>
Typically, the products are fetched from a server, but I kept things simple. It is also possible to generate the HTML markup for the products server-side. You can see an example here.
View an example on GitHub for this tutorial here.
Here’s the list of product’s attributes you need to specify:
| Name | Description | Attribute | Type |
|---|---|---|---|
| Name | Product's name | data-item-name |
string |
| ID | Product's unique ID | data-item-id |
string |
| Price |
Product's price. You must use a . as decimal separator.
|
data-item-price |
number |
4. Start selling online
Your online store is now ready, you can add products and use the cart to make sure it works as you want.
In order to go live, you need to connect a payment gateway to process payments from your customers.
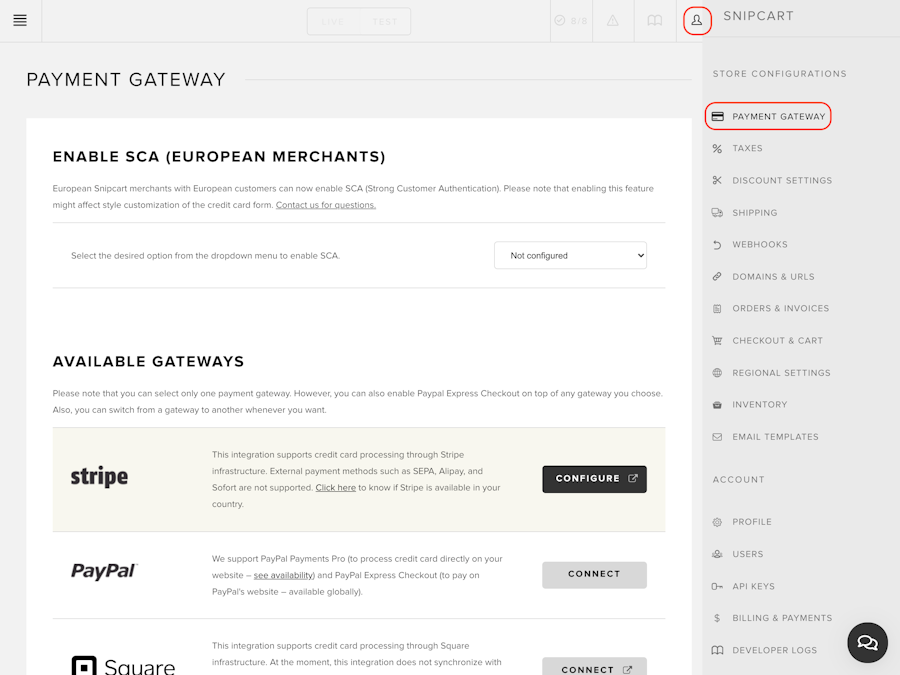
For this, simply go to “PAYMENT GATEWAY” setting located in the account menu. Once there, select the payment option you would like to connect to accept your clients’ payments and follow the instructions.
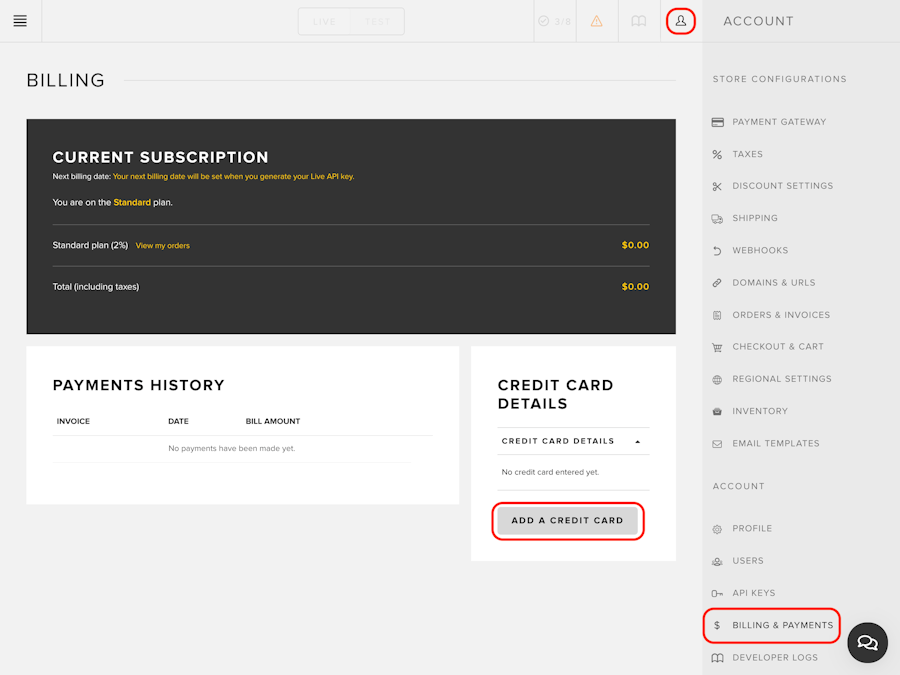
Now that everything is working and configured, it's time to go live. For this, simply head to the “BILLING & PAYMENT” section and add your credit card information. You can learn more about Snipcart’s pricing here.
Once this is done, simply change the test API key you entered earlier by your live API key.
<div id="snipcart" data-config-modal-style="side" data-api-key="YOUR_LIVE_API_KEY" hidden></div>Remember to change the URL of your domain if you entered a staging domain earlier.
You have successfully added a shopping cart to your website and turned it into an online store. Snipcart offers a lot of functionalities we have not covered in this tutorial, if you wish to configure more features refer to the documentation for more details.
More advanced configurations
You can quickly change some configurations of the shopping cart to customize it to your needs. Here are the most commonly used.
Change the cart view
The <div> element of the Snipcart installation snippet contains an attribute named data-config-modal-style. When this attribute has a value set to side, it will make the cart open in a side modal. Feel free to change it if you want the cart to open in full screen.
You can also add data-config-add-product-behavior="none" if you wish not to open the cart when an item is added to it.
Adding product variations
You can also use custom fields to define product variations. The most commonly used is the dropdown options selector, In this dropdown, you can add product color variation, size, etc. Simply add these attributes to your product:
<button class="snipcart-add-item"
  data-item-id="yellow-sticker"
  data-item-price="1.99"
  data-item-description="High-quality yellow Snipcart stickers (pack of 3)"
  data-item-image="assets/images/yellow-stickers.png"
  data-item-name="Yellow Snipcart Stickers"
  data-item-custom1-name="Stickers Size"
  data-item-custom1-options="Small|Medium|Large">
  Add to cart
</button>
Refer to the documentation for more details.
Adding more product information in the cart
You can also add more attributes like a description and products' images that will be displayed directly in the cart.
| Name | Description | Attribute | Type |
|---|---|---|---|
| Description | Product description. | data-item-description |
string |
| Image | Product's image URL. Avoid linking to a large image; try to use an optimized one. | data-item-image |
string |
Conclusion
There you have it! A shopping cart added to your existing website with all the functionalities to run your online business. Now it’s time to market your site and start getting sales.
Let us know if you have any questions in the comments section.


