Going "Flat File": Kirby CMS Tutorial & E-Commerce on a Lightweight PHP CMS
In a rush? Skip to tutorial steps or GitHub repo & live demo.
Do you dream of blowing your WordPress install to pieces?
Or round-house kicking Drupal & Joomla! into oblivion?
Aching friends, look no further. We might just have the cure you need: flat file CMS.
You probably heard about them. They're simple, no database CMS that could save you a couple of headaches.
In this post, we're going to provide:
A definition of what a file-based CMS is + a comparison with database-driven CMS.
A Kirby CMS tutorial, for an e-commerce site with a lightweight flat file PHP CMS.
Oh, I almost forgot to mention: we're going to be building a Rebel Alliance supply store. Because who doesn't like Star Wars, huh?
(Fans of Star Trek will prefer the demo in our post with Hugo, a fast static site generator)
Let's first see when and why you should pick these lean, modern content management systems.
Flat file CMS: a definition
So what do we mean by "flat file" or "file-based"? What is a flat file CMS exactly?
The answer is pretty simple:
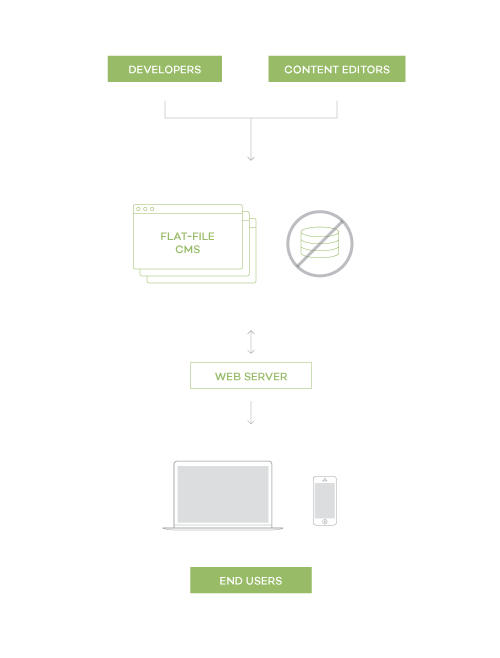
A flat file CMS is a "database-less" content management system that stores site data directly into files and folder.
Content is still coupled with page templates, but not through a relational database. No MySQL, PostgreSQL, or MS SQL Server involved.
While flat file CMS still depend on server-side rendering, their lack of a database management system is what really sets them apart from traditional CMS.

Flat file CMS vs database-driven CMS
As we'll see below, file-based CMS share many benefits with static site generators like Jekyll & Middleman. Unlike these, however, flat file systems come with a built-in admin for content managers, thus removing the need for something like a headless CMS.
Flat file advantages & potential drawbacks
A not so long time ago (~2014), in our own galaxy, flat file CMS started gaining lots of traction among web developers. Today, from tiny open-source projects to apps supported by big communities, there are quite a few of them.
Why have they become such popular CMS? Mostly because their database-driven counterparts are now often overkill: they're heavy, costly, and risky. File-based CMS offer a simpler, faster and more secure alternative to legacy content management systems. Especially for small to medium projects focused more on content than functionality.
A few points highlighting their benefits:
→ Flat file CMS are performant and secure.
The absence of constant, vulnerable database queries makes for quicker, hermetic content delivery. You trade multiple dependencies for more security & performance, which can improve UX & SEO.
→ Flat file CMS are simple to work with.
No time spent setting up, maintaining, and tweaking a database. By managing fewer dependencies, you gain more portability. Migrating your site is as easy as moving your root folder to a new hosting. Site backups are also simpler to handle: basic Git-based version control does the trick.
→ Flat file CMS are cost-effective.
The applications themselves are small files with minimal hosting requirements. File-based CMS are often open source, or available through affordable licenses. All this & reduced maintenance costs save client budget.
Now for potential drawbacks:
Functional limits. The lack of advanced database features may force you to rely on 3rd party services for certain use cases. This fosters a modular approach, which isn't necessarily a con! If content needs to be re-organized in various views, tagged under different categories, and so on, a database can sometimes help.
Templating engines familiarity. Most flat file CMS employ templating languages like Liquid or Twig. Might be a slight learning curve if you're not used to them.
Some of the best flat file CMS
Feel like "going flat" for your next project? Check out some of the top file-based CMS out there:
You'll also find a repository of flat file CMS here.
And to better understand how easy it is to develop a site with a file-based CMS, let's actually start playing with one.
Kirby—a flat file PHP CMS

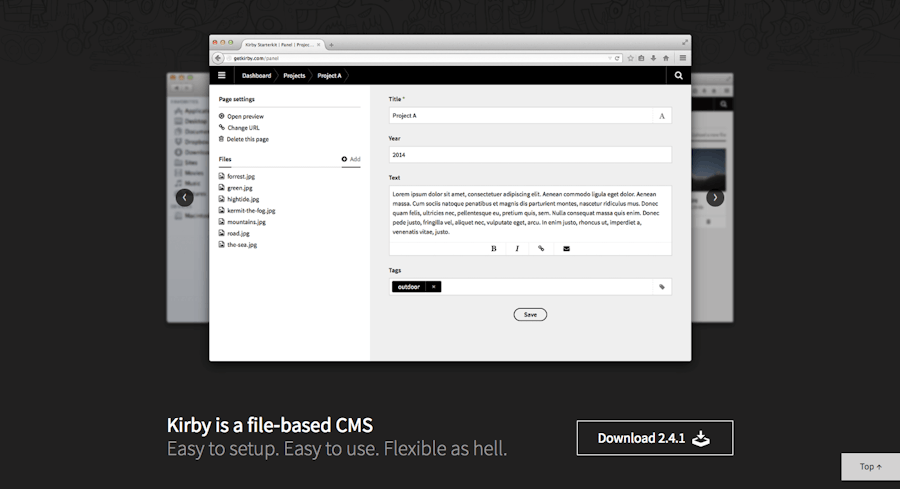
If you first thought of a cute/badass pink character, think again. Kirby also happens to be a lean, flat file PHP CMS.
Why did we pick it for this tutorial?
A while ago, our lead developer Charles spotted quite a few mentions of Snipcart in e-commerce threads on their forum. We've played with it a bit since, and can confirm it's as easy and flexible as advertised. It's hands-down one of the best flat file CMS out there. We've chatted a few times with its creator, a super nice fella from Germany.
Kirby CMS tutorial: a step by step e-commerce site
This section will show you how to build a simple e-commerce site using Kirby & Snipcart's HTML/JS shopping cart platform.
Pre-requisites
Snipcart account (free in Test mode)
Kirby Starterkit installed (instructions)
Basic understanding of PHP
Note: Check out this old but in-depth Kirby CMS review & intro if you're not familiar at all with the tool.
1. Getting started with Kirby
Let's go over some Kirby basics first.
The most important thing to know about this CMS is its folder structure, explained in the documentation. Once you get that, things should be pretty straightforward.
A quick look at the folders we'll use to build our demo site:
assets/
content/
panel/
site/
The assets folder is where we store...drum roll... the assets: from stylesheets & fonts to site-wide images.
The content folder contains the data to organize our website. The simple way it works: you create a folder for each page of your website containing a text file—the data—and, if needed, related resources—videos, files, etc.
The panel folder is quite useful for bigger teams. It's where you can declare an interface to manage website content. If you're keeping content editing strictly in a code editor, this is optional.
The site folder is where we get our hands dirty with developer stuff. It's where you tell Kirby how it should process your content. So our templates will be in this folder.
Other useful resources
Kirby CMS themes (we'll be using the base theme for this demo)
Once you have a simple instance of Kirby running, you can proceed to the Snipcart integration.
2. Configuring the Kirby panel to handle products
Let's hop in the site/blueprints folder containing the files describing how to build the Kirby interface. We'll put a product.yaml file in there that'll generate an interface for us to add products. Here's the content:
title: Product
pages: true
fields:
name:
label: Name
type: text
Price:
label: Price
type: number
Identifier:
label: Identifier
type: text
Description:
label: Description
type: text
Weight:
label: Weight
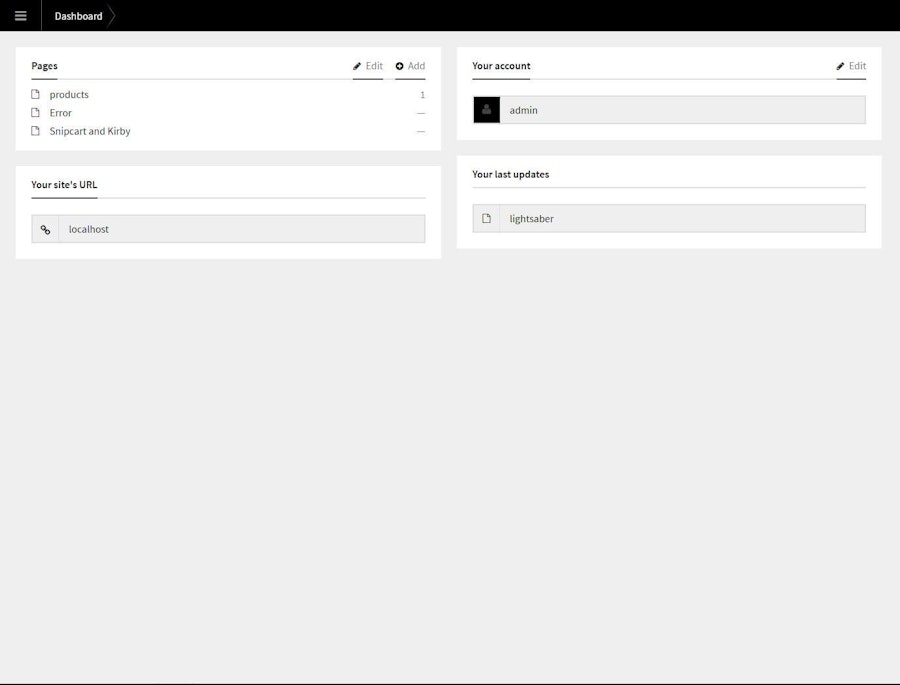
type: numberWe can now add "/panel" to our site URL to access the Kirby admin (the first visit will require an account creation).
Our dashboard look at the moment:

3. Generating templates for our products
Let's put together templates that we can render later on. We'll do an individual page for each product, and a products listing on the homepage.
3.1 Individual views
Create a product.php file in the site/templates folder. It'll be used for every product:
<?php snippet('header') ?>

<main class="main grid" role="main">
  <a href="./../../">Back to products</a>
  <div class="product-details">
    <div class="product-description">
      <h1><?php echo $page->name() ?></h1>

      <img width="200" src="<?php echo $page->image()->url() ?>" />

      <p>
        <?php echo $page->description() ?>
      </p>

      <a href="#" class="snipcart-add-item"
        data-item-name="<?php echo $page->name() ?>"
        data-item-id="<?php echo $page->Identifier() ?>"
        data-item-url="<?php echo $page->url() ?>"
        data-item-image="<?php echo $page->image()->url() ?>"
        data-item-price="<?php echo $page->price() ?>">
        Buy it for <?php echo $page->price() ?> $
      </a>
    </div>
  </div>

</main>

<?php snippet('footer') ?>
3.2 Partial view
This partial view will display all of our products. Create a products.php file in the site/snippets folder:
<h2>Kirby CMS Tutorial: Flat File E-Commerce on a Simple PHP CMS</h2>
<ul class="teaser cf products">
  <?php foreach(page('products')->children()->visible() as $product): ?>
    <a href="<?php echo $product->url() ?>" class="product">
      <h3><?php echo $product->name()->html() ?></h3>
       <?php if($image = $product->images()->first()): ?>
        <p>
          <img width="200" src="<?php echo $image->url() ?>" />
        </p>
      <?php endif ?>
    </a>
  <?php endforeach ?>
</ul>
Note how we're linking to our individual pages with $product->url().
And now to render products on the homepage with this partial view: <?php snippet('products') ?>
4. Setting up the config field for our Snipcart API key
Only thing left to handle is Snipcart's required scripts (JS, CSS, API key). Include them only where necessary, either directly in the footer, or by creating a partial view in the site/snippets folder:
<script
  src="//ajax.googleapis.com/ajax/libs/jquery/1.9.1/jquery.min.js"
  type="text/javascript"></script>

<script type="text/javascript"
    id="snipcart"
    src="https://cdn.snipcart.com/scripts/2.0/snipcart.js"
    data-api-key="{YOUR_API_KEY}"></script>

<link id="snipcart-theme" type="text/css"
    href="https://cdn.snipcart.com/themes/2.0/base/snipcart.min.css"
    rel="stylesheet">
After, we can simply add it to the product.php file, with the previous snippet function: <?php snippet('snipcart') ?>
But we don't want to hardcode the API key directly in our views. So we'll set up a config field for that. Open the site/config/config.php file and use the following method: c::set('snipcart_api_key', '{YOUR_API_KEY}');
This way, you can access it globally through: c::get('snipcart_api_key');
5. Creating the products for our Kirby shop
Let's head back to the panel again and click the add button beside the pages tab.
This is how we want to define products. First, choose the name, URL, and template. It should look like:

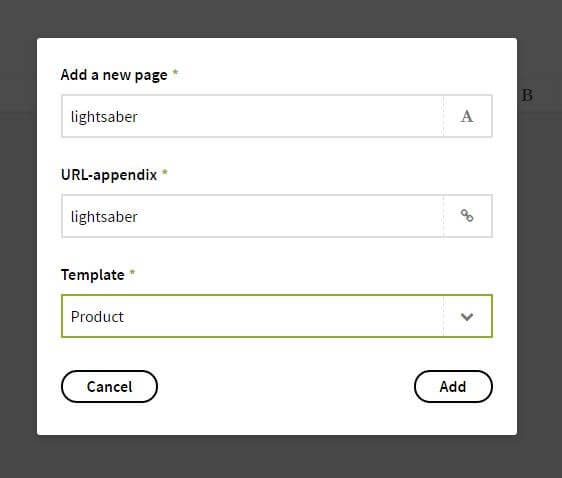
A page to enter the actual data for products will appear. Ours:

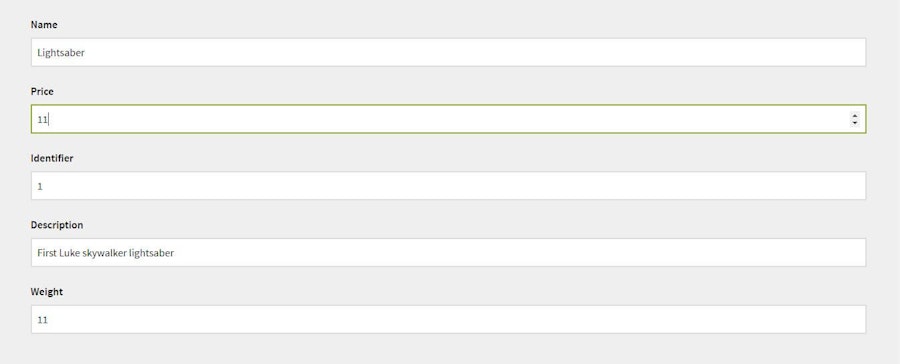
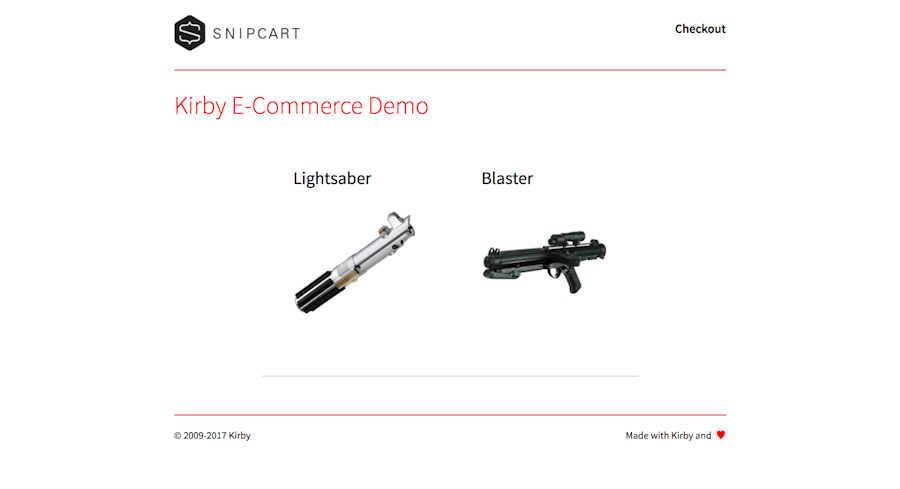
If you created your template correctly, products will render directly on your homepage and individual pages.
And we're done. :)
GitHub repo & live demo
Time to check out our live demo & code repo for this integration!
Closing thoughts
Developing with Kirby's been both fast & fun, especially since there was no steep learning curve. It made me enjoy working with PHP (just like Laravel-powered PyroCMS did), which isn't usually my cup of tea. I really liked the Kirbytext formatting too.
With more time, I'd have liked to integrate product variants in the admin, which could easily be done.
If you like working with languages like PHP & coupled CMS, you should definitely consider "going flat". Flat file CMS will bring a breath of fresh air to your workflow. Most of them offer everything you need for personal/client projects, especially if it can run without a database.
Last but not least: I know it's easy to criticize traditional CMS (we've done it many times) and praise new shiny tools. But neither hype nor ennui should guide your tech stack choices. There's more to consider, especially client needs & sustainability.
If you're interested in developing a more official Kirby/Snipcart plugin, reach out. We'd love to talk.
Snipcart with other neat, flat file PHP CMS
Was this article valuable to you? If so, take a sec to share it on Twitter. You'd like to share thoughts on flat file CMS, Kirby, or our integration? Hit the comments!


