How to Easily Manage Your Products Through WordPress
We don't use WordPress, or any other popular PHP CMS like Processwire. But we're no fools: like most of you, we know WordPress and PHP are the most popular development tools out there. So when Snipcart launched, we developed an easy-to-use WordPress plugin in order to appeal to a larger audience. At the time it seemed like a smart move, but as months passed, we realized it wasn't working out.
Still, the song remains the same: millions of websites are running on WordPress, with more of them going live every day. Lots of web development agencies are now using it to create quality websites for a wide array of customers. Unik Media, a Québec agency using Snipcart to enable e-commerce on a few of their clients' websites, has been working with WordPress for a while now. One of their developers, Mike, was kind enough to drop by and show us how he sets up Snipcart with WordPress sites in order to give more autonomy to clients when it comes to product management.
Writing the following post, we assume that you already have a WordPress site installed and that you know the basics such as installing plugins and working with custom post types. We are far from being WordPress experts, so feel free to leave a comment if you have suggestions!
Step 1: Creating a custom post type
Okay, first step will be to create a custom post type. More specifically, you'll want to create a Products post type. To do so, we will use the excellent Custom Post Type UI plugin.
In the WordPress admin, install the Custom Post Type UI plugin and activate it.
CPT UI will then pop up in your dashboard menu. Click on it and hit Add New.
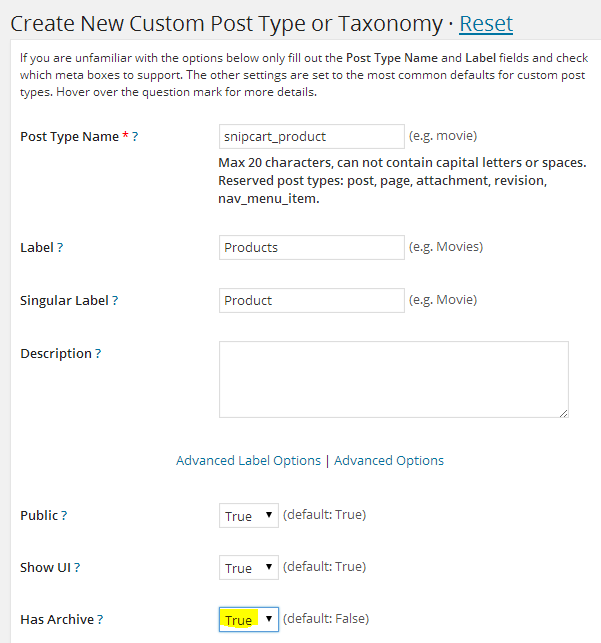
One important thing when creating the post type is to enable archiving (which is set to False by default). If you want to create a products listing, you will need to set it to True. To do so, click on the Advanced Options link and set the Has Archive field to True before creating the post.
For this example we chose to create a snipcart_product custom post type:

Step 2: Adding custom fields to the custom post type
All right. Next step will be to add fields allowing us to define our product, such as Price, Name, Weight, etc. For this part, we'll use another neat WordPress plugin called Advanced Custom Fields. Search for this plugin in the WordPress dashboard, install it and activate it.
Once it's done, you will able to see Custom Fields in the menu. Click on it and hit Add New Field Group.
Before adding custom fields, we need to set configuration values such as location rules. We want these custom fields to affect only the custom post type we created earlier. So in the Location box, select the rule: Post Type > is equal to > snipcart_product


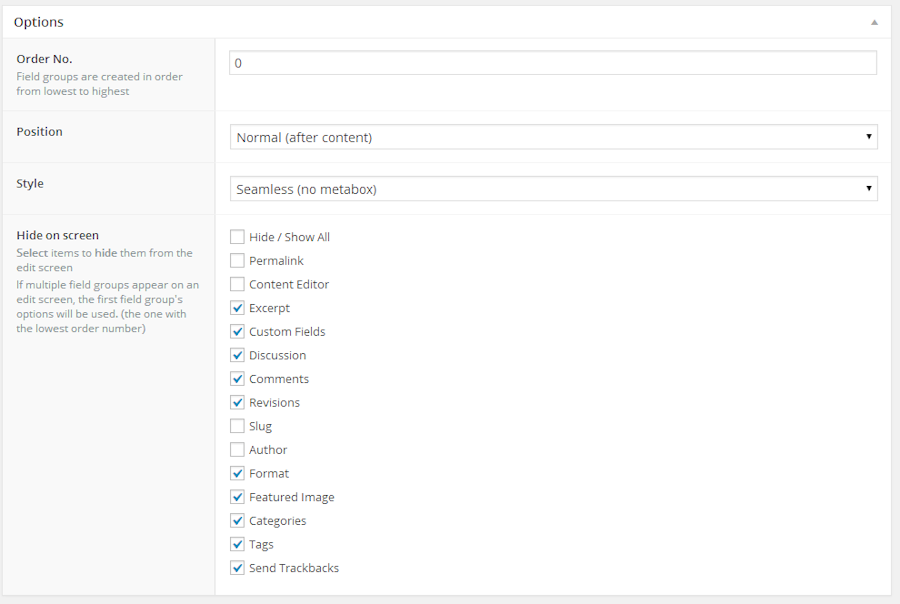
We suggest you remove a few of the default WordPress fields. While this step isn't mandatory, we choose to do it because we want to keep our work as simple and straightforward as possible.

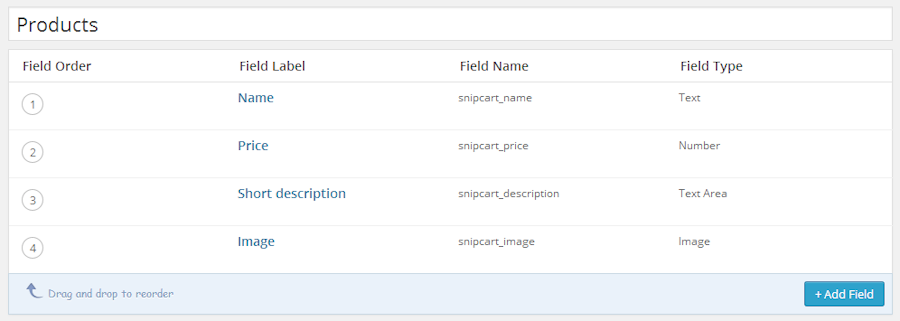
Now time to create the Snipcart fields. We will create a field for Name, Price, Short Description and product Image.

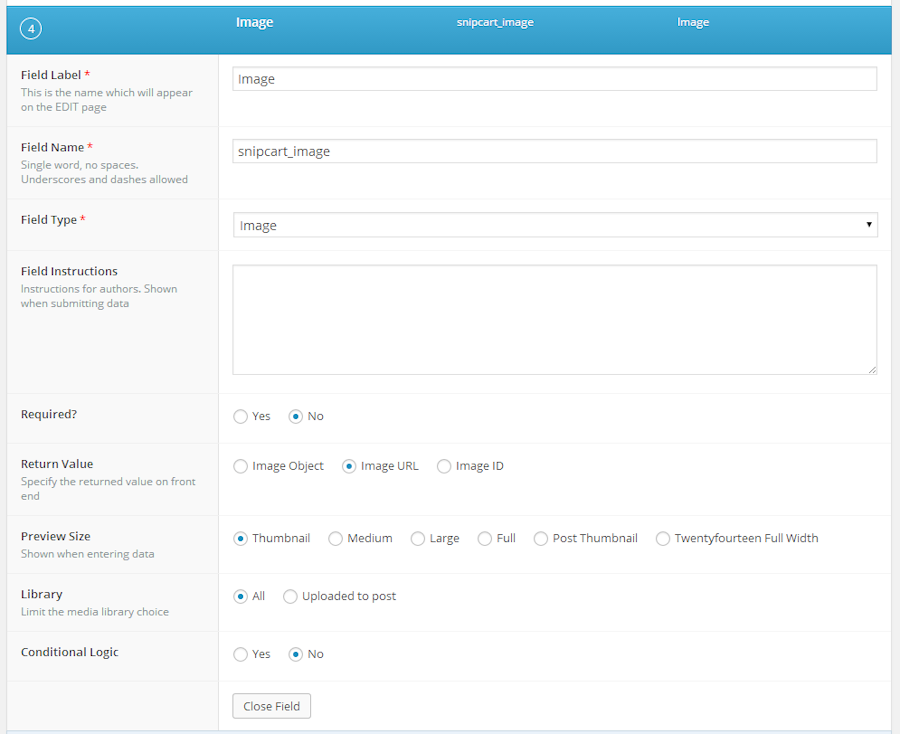
When you create the Image field, you will be asked to define its Return Value. Use Image URL.

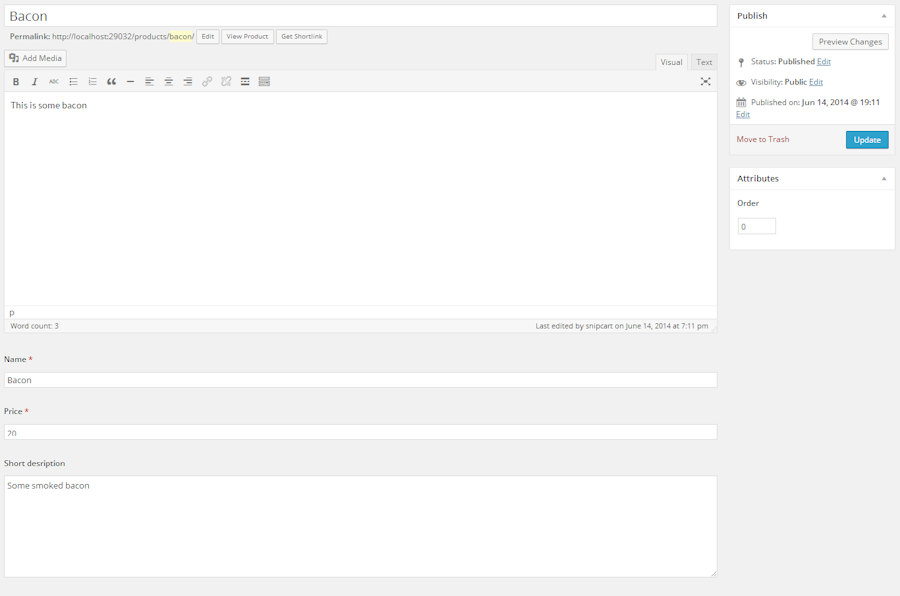
Step 3: Creating the first product
Now let's create some products, shall we? Click on Products in the menu and hit Add Product.

Step 4: Adding some Snipcart magic
We can now define some products in the WordPress dashboard. Cool enough, but we haven't even brought Snipcart in the game yet! So let's play with it a little. First of all, you'll need to add the Snipcart JavaScript file and stylesheet to your template.
Add them in the header.php file located in /wp-content/themes/{your_theme}/header.php.
Please note that if you update your theme, the header.php file will be overwritten: you'll have to change it again. We know there are other/better ways to do this, like creating a custom plugin to register scripts and stylesheets, but it would have made this post at least twice longer.
You can log into Snipcart and go to Account > Credentials, where you'll see the code you need to include. Note that your theme may already have jQuery installed. If so, you shouldn't include it twice.
<!-- lang: html -->

<!-- Include jQuery here only if it is not already in your theme. -->

<script type="text/javascript"
  src="//ajax.googleapis.com/ajax/libs/jquery/1.11.0/jquery.min.js"></script>

<script type="text/javascript"
  id="snipcart"
  src="https://app.snipcart.com/scripts/snipcart.js"
  data-api-key="{YOUR_API_KEY}"></script>

<link type="text/css"
  id="snipcart-theme"
  href="https://app.snipcart.com/themes/base/snipcart.css"
  rel="stylesheet" />
Save and close the header.php file.
Since we created a custom post type, you will need to create a file named single-snipcart_product.php in your theme folder if you want to create a template for this post type. To know more about how templates and post types work, we suggest you to take a look at this webpage.
Here I will copy the content of the single.php file, because it's the default template that will be used if WordPress does not discover a more precise template. Just remove the parts you don't need. In my case, I will simply keep the basic HTML structure.
The plugin Advanced Custom Fields we installed provides a method allowing us to easily access custom fields inside templates. You can use the method the_field('fieldname')
Here's how I created the Snipcart buy button:
<!-- lang: html -->
<div id="product" class="site-content">
<img src="<?php the_field('snipcart_image') ?>" />
<button class="snipcart-add-item"
data-item-id="<?php echo $post->ID ?>"
data-item-name="<?php the_field('snipcart_name') ?>"
data-item-url="<?php echo get_permalink(); ?>"
data-item-price="<?php the_field('snipcart_price') ?>"
data-item-description="<?php the_field('snipcart_description') ?>"
data-item-image="<?php the_field('snipcart_image') ?>">
Buy now for <?php the_field('snipcart_price') ?> $
</button>
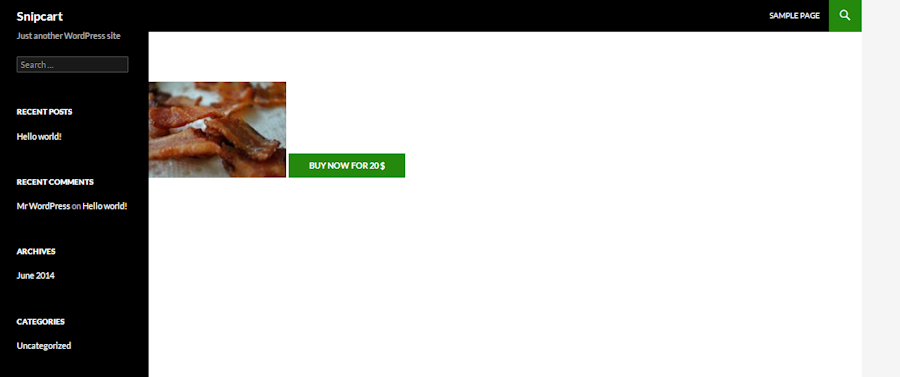
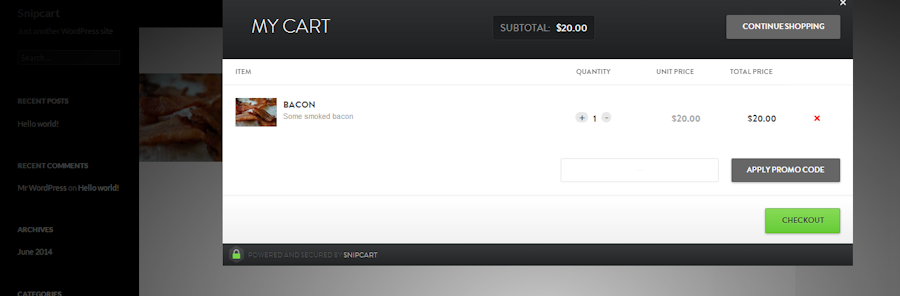
</div>Now, if you navigate to your product page, you should be able to buy it! Don't forget that you will not be able to do a complete checkout if the website isn't live. If you're working locally, our crawler will not be able to reach your website upon checkout and the transaction will fail.
You should have something that looks like this:


Step 5: Listing products
Okay, we've got ourselves a nice product details page. The product can now be bought, but your customers will need to be able to get to this page!
In order for that to happen, we will create a simple products listing, using a trick similar to the one we pulled off for the details page. Create a file named archive-snipcart_product.php in /wp-content/themes/{your_theme}.
If you didn't set Has Archives to True when creating the custom post type, you won't be able to complete this step.
In the archive file, you will be able to loop through products. I decided to generate a simple table containing the product name, a link to the details page and the price. Feel free to use your imagination to make a better looking listing :)
As I did with the single-snipcart_product.php file, I copied the content of the default archive.php file and removed the parts I did not need.
The content should look like this:
<!-- lang: html -->
<h1>Products</h1>
<?php if ( have_posts() ) : ?>
<table>
<thead>
<th>
Name
</th>
<th>
Price
</th>
</thead>
<tbody>
<?php while ( have_posts() ) : the_post(); ?>
<tr>
<td>
<a href="<?php echo get_permalink(); ?>">
<?php the_field('snipcart_name') ?>
</a>
</td>
<td>
<?php the_field('snipcart_price') ?> $
</td>
</tr>
<?php endwhile; ?>
</tbody>
</table>
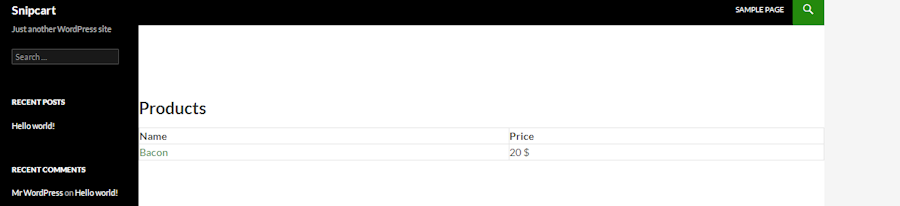
<?php endif; ?>When using have_posts and the_post WordPress methods, it's very easy to iterate through products and generate a listing.
Inside the loop, you can access any properties that you defined on your product.
You should end up with a basic listing that looks like this:

Conclusion
That's it for now, folks! This post explained some of the basics regarding Snipcart's integration with Wordpress. In upcoming posts, we will show you how to manage an inventory within WordPress using our Webhooks.
If you found this post useful in any way, feel free to share it wherever you see fit! Oh, and like we said at the start: the comments section is yours if you've got any kind of feedback, recommendations or questions about using Snipcart with WordPress.


