Build a Vue.Js E-Commerce App with ButterCMS Headless Backend
In a rush? Skip to tutorial steps or live demo.
"I'm a developer, not a God d*mn point & click machine."
That's my dev friend Nic. We're talking e-commerce.
Few pints in and he cranks up the ranting:


"You know what I don't like? Here:
Coding in a closed ecosystem
Rigid all-in-one platforms for everyone and their dog
Not choosing my tech stack
If you want that Shopify site so bad, you can do it yourself, you don't need ME (dev)."
I love Nic.
And he's right: there's a plethora of cool frameworks/ tools out there. Why not create a custom, kick*ss shopping experience with these instead?
Today I want to use Vue.js to show you that's possible. Because yeah, Vue.js e-commerce is a thing!
And with the right set up in the backend—headless content management, namely— it can be a darn cool thing.
Enough babbling, here's what this Vue e-commerce example will include:
How to create a neat, frontend Vue storefront
How to integrate a customizable HTML/JS cart in a Vue app
How to hook the Vue e-comm. app with headless ButterCMS
Now let's make my friend Nic proud, shall we?
Looking for alternative tools to build your headless stack? Visit our developer's guide to headless e-commerce!
First, why Vue for e-commerce?

So, if you haven't heard already: Vue is a progressive, lightweight JS framework for building web UIs.
It's open source, community-supported, reactive, component-based. It's also quite "incremental"—can be dropped in any existing projects—and works wonders for logic concerns separation.
So why use Vue for e-commerce, huh?
It makes for a modular, easily portable store frontend—plays well with any backend.
It's fast, with high performance—speed is key in e-commerce.
It's just... easy to get started with development!
In this quick tuts, I'm going to abstract some of the cart & e-comm. logic by using Snipcart. But you could very well build your own Vue.js shopping cart & hook it to Stripe, for instance.
Oh, and another compelling use case for Vue e-commerce: progressive web applications (PWAs). If your shopping context requires graceful degradation and/or offline functionalities, building an e-comm. PWA with Vue becomes quite handy. On that note, you might want to check out Vue Storefront.
Sidenote: we'll most likely be exploring PWAs in an upcoming blog post. :)
And why power e-commerce with a headless CMS like Butter?

ButterCMS is headless CMS.
Or an API-first CMS, or a Content API, or whatever else the next marketing guy decides to call it. :)
Why use a headless CMS as an e-commerce backend, you ask?
Well, for starters, maybe you're just tired of using behemoths like Magento or Prestashop.
Or maybe you want your online store to benefit from a headless CMS' pros:
Portable, easy to migrate content models & store data
Hosted—no sh*tty, recurring upgrade and patching jobs (w/ Butter)
Multi-platform content delivery (mobile, desktop apps, IoT, web)
I don't want to get too deep into headless e-commerce's ins and outs, because we have a full post coming on that topic.
However, I'd like to highlight some of the good stuff ButterCMS brings to the table:
It has intuitive, thoroughly-documented content modeling.
Its onboarding is smooth and effective.
It has in-depth, stack-specific integration recipes.
The latter gave me a tremendous head start for this Vue tuts!
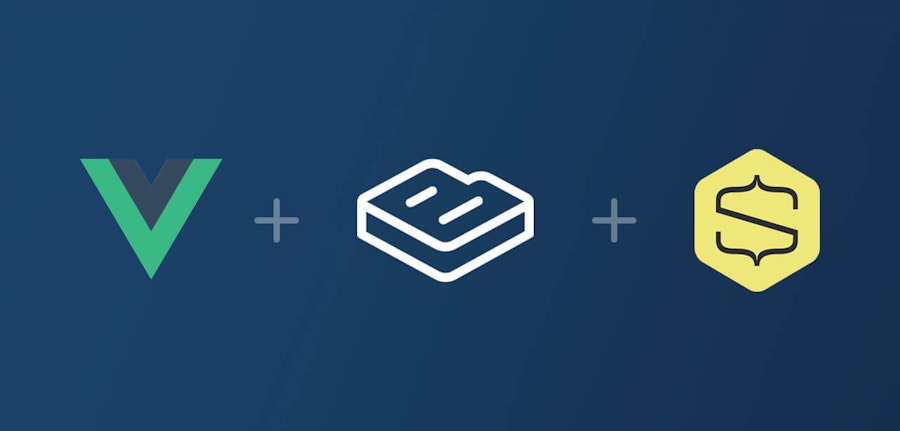
Tutorial: Vue.js e-commerce with Butter CMS & Snipcart

Pre-requisites
Basic knowledge of Vue.js
Snipcart account (forever free in Test mode)
1. Configuring ButterCMS for headless product management
ButterCMS allows to easily create page types with any required fields. This can all be done without any code or schemas definition from the CMS.
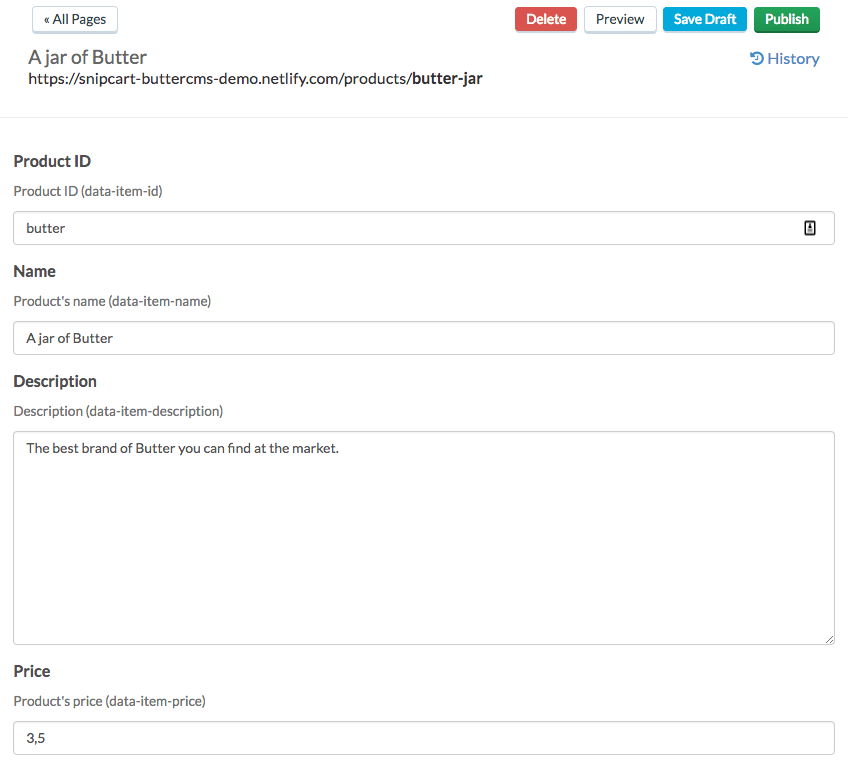
Start by creating a Product page type with fields for every required attribute of Snipcart's product definition (data-item-id, data-item-name, data-item-price). I didn't define the product URL used for price validation: it will be generated later by code.

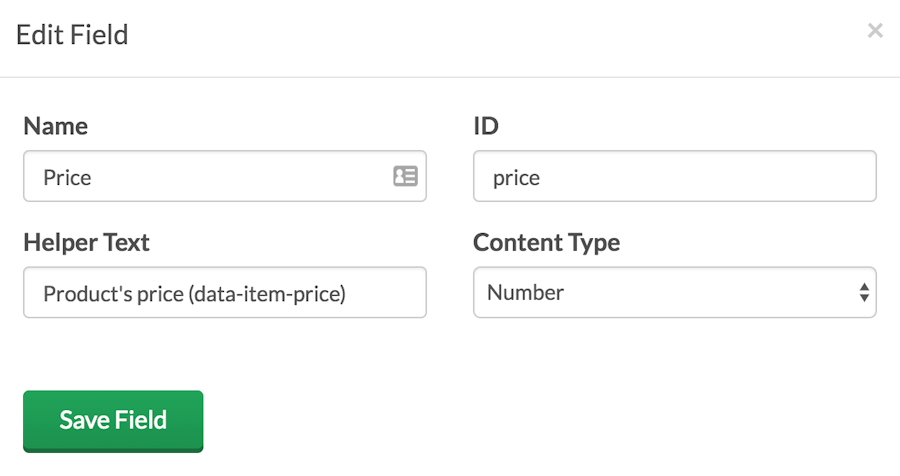

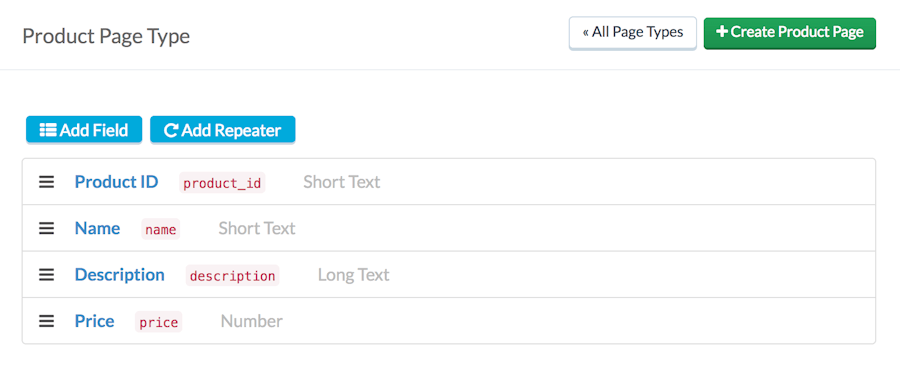
You can see that I've also added a description field. It'll map to Snipcart's data-item-description. You could add more fields if you want!
You should now be able to create content pages of the Product type:

2. Building a Vue.js storefront
Following ButterCMS' Vue guide, I've used vue-cli to generate my e-commerce demo. But you could easily add Butter to an existing project.
Now, create a simple src/buttercms.js file. Then initialize Butter's library with your Butter public API Key to import that file into your Vue.js components:
import Butter from 'buttercms';

export default Butter('{your buttercms public key here}');
Use the routes below for your Vue app: a list of products, a page for the products' details and a NotFound component (to be re-used later).
import Vue from 'vue';
import Router from 'vue-router';
import ProductList from '@/components/ProductList';
import ProductPage from '@/components/ProductPage';
import NotFound from '@/components/NotFound';

Vue.use(Router);

export default new Router({
  mode: 'history',
  routes: [
    {
      path: '/',
      name: 'Products',
      component: ProductList,
    },
    {
      path: '/products/:slug',
      name: 'Product',
      component: ProductPage,
      props: true,
    },
    {
      path: '*',
      name: 'NotFound',
      component: NotFound,
    },
  ],
});
Here comes the fun part.
To show products from Butter's API, just call butter.page.list('product') from the ProductList component's created hook. Then, the reactivity of Vue will work its magic!
import butter from '@/buttercms';
import BuyButton from './BuyButton';

export default {
  name: 'ProductList',
  components: {
    BuyButton,
  },
  data() {
    return {
      products: [],
    };
  },
  methods: {
    getProducts() {
      butter.page.list('product')
        .then((res) => {
          this.products = res.data.data;
        });
    },
  },
  created() {
    this.getProducts();
  },
};
Okay, that was easy. How about displaying the page for a single product? Just use the slug parameter from your route!
import butter from '@/buttercms';
import NotFound from './NotFound';

export default {
  name: 'ProductPage',
  components: {
    NotFound,
  },
  data() {
    return {
      product: {
        slug: '',
        fields: {},
      },
      notFound: false,
    };
  },
  // here
  props: ['slug'],
  methods: {
    getProduct() {
      // and here, that's it! :)
      butter.page.retrieve('product', this.slug)
        .then((res) => {
          this.product = res.data.data;
        }).catch(() => {
          this.notFound = true;
        });
    },
  },
  created() {
    this.getProduct();
  },
};
You can see above that I've used the error handler of the Promise to set a notFound flag. In the component's template, this allows you to either display the product's details or the NotFound page without changing the URL:
<template>
  <not-found v-if="notFound" />
  <div class="product-details" v-else>
    <figure>
      <img :src="product.fields.image" :alt="product.fields.name" />
    </figure>
    <section>
      <h2>{{product.fields.name}}</h2>
      <p>{{product.fields.description}}</p>
      <p><buy-button :product="product.fields" /></p>
    </section>
  </div>
</template>
Now for integrating Snipcart, create a simple BuyButton component:
<template>
<a href="#" class="snipcart-add-item"
:data-item-id="product.product_id"
:data-item-name="product.name"
:data-item-price="product.price"
data-item-url="https://snipcart-buttercms-demo.netlify.com/.netlify/functions/snipcart_json_crawler"
:data-item-image="product.image">Buy for {{ product.price | price }} $</a>
</template>
<script>
export default {
name: 'BuyButton',
props: ['product'],
};
</script>Because this e-commerce demo is a Single Page Application, I've added a Netlify Function to make Snipcart product validation work.
You could have used Webtask or any serverless tech. The function uses Butter API from Node.js to retrieve products and output them to be parsed by Snipcart's JSON Crawler.
var butter = require('buttercms')("{buttercms public API key}");

exports.handler = function(event, context, callback) {

  // snipcart send a GET request when crawling products
  if(event.httpMethod !== 'GET') {
    return callback(null, {
      statusCode: 200,
      body: ''
    });
  }

  // list products the same way we do on the website
  butter.page.list('product')
    .then((res) => {
      var products = res.data.data.map((product) => {
        return {
            id: product.fields.product_id,
          name: product.fields.name,
            price: product.fields.price,
          description: product.fields.description,
          image: product.fields.image,
          url: 'https://snipcart-buttercms-demo.netlify.com/.netlify/functions/snipcart_json_crawler',
        };
      });

      callback(null, {
        statusCode: 200,
        headers: {
            "Content-Type": "application/json"
        },
        body: JSON.stringify(products),
      });
    }); // we would normally handle errors right? ;)
}
And there you have it: a Vue.js e-commerce website powered by ButterCMS.
You could push this a bit further, though. Butter offers webhooks that can be used to automate tasks.
You can use them to notify Snipcart of CMS updates on products so your e-comm. dashboard reflects the changes automatically. Quite simple, really:
Validate that you're receiving a call related to products
Call Snipcart's API to force a fetch of the product's definition
Here:
var request = require('request');

exports.handler = function(event, context, callback) {
  // buttercms send webhook data as POST request
  if(event.httpMethod !== 'POST' || !event.body) {
    return callback(null, {
      statusCode: 200,
      body: ''
    });
  }

  const payload = JSON.parse(event.body);
  if(payload.data.page_type !== 'product') {
    return callback(null, {
      statusCode: 200,
      body: ''
    });
  }

  request.post({
    url: 'https://'+ process.env.SNIPCART_API_KEY +':@app.snipcart.com/api/products',
    json: true,
    body: {
      fetchUrl: 'https://snipcart-buttercms-demo.netlify.com/.netlify/functions/snipcart_json_crawler',
    }
  }, function(err, res, body) {
    callback(null, {
      statusCode: 200,
      body: '',
    });
  });
}
Voilà.
As soon as you add or edit a product in the CMS, its details will be available in Snipcart's Dashboard.
You could use that, for instance, to set an available stock for inventory management in your Dashboard.
Now let's have a look at that ButterCMS + Vue.js e-commerce demo!
Live demo & GitHub repo

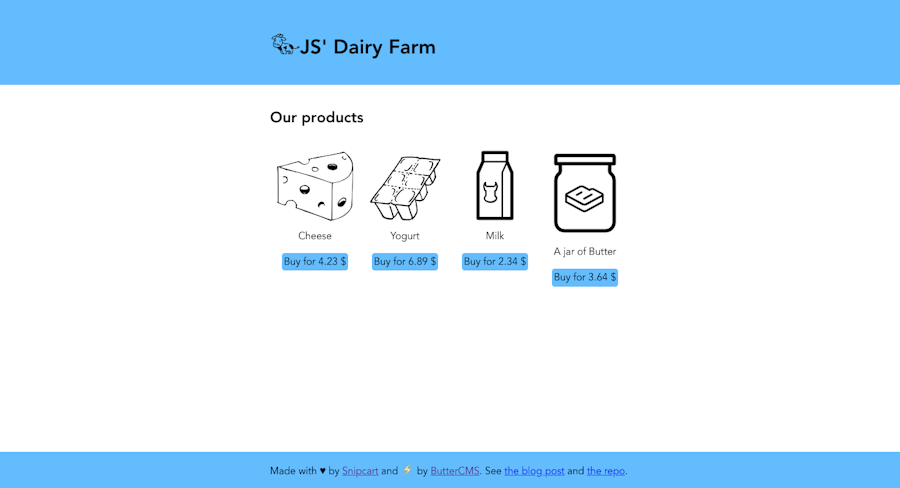
See live demo here
See GitHub repo here
Closing thoughts
Bundling this whole thing together and making it look decent took me two days tops.
Of course, I loved working with Vue for this e-commerce demo.
And Using ButterCMS was a smooth as its name suggest.
Constructive feedback: I would have liked to get an edition API—it could've allowed me, for instance, to sync a flag in the CMS for out-of-stock products.
Well, that's it, folks!
Here's hoping this post nudges you towards killer, custom e-commerce. :)
If you've enjoyed this post, please take a second to share it on Twitter. Got comments, questions? Hit the section below!


