Creating a Static E-Commerce Website with Snipcart, GatsbyJS and DatoCMS
Editor's note: This is a guest post by Stefano Verna from DatoCMS. You can find the original article here.
Today we’re going to prove how easy it is to set up Snipcart on a Gatsby website, with editorial content coming from DatoCMS. As we’ll soon find out, this is an incredibly powerful combo, capable of:
delivering top-notch websites, both from a performance and security point of view
offer an intuitive web-interface to content creators, letting them publish updates without the intervention of a developer
go online at a fraction of the canonical development time needed for a typical e-commerce solution.
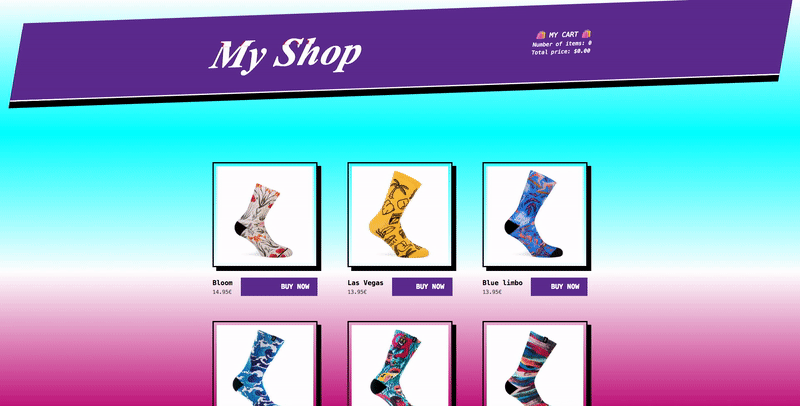
Just to make the demo project a little more interesting, I thought it would have been nice to add some brutalism design to the mix… so… yeah. This will be the final result, whether you like it or not (online preview):

Create your new Gatsby website
First, you’re going to need to install Gatsby. As you can see, it’s quite straightforward:
npm install -g gatsby
The Gatsby CLI tool lets you install starters, that is, partially built sites preconfigured to help you get moving faster on creating a certain type of site.
If you run the following command, a new my-shop directory will be created, with a very simple Gatsby project inside of it:
gatsby new my-shop datocms/snipcart-gatsby-demo#vanilla
Once you enter the my-shop directory, you will be able to start a local development server with this command:
gatsby develop
Now open up the project with some code editor. You will see that it just does two things at the moment:
sets up some basic SASS stylesheet (we’re not interested in dealing with CSS right now);
generates a dumb homepage that presents a bunch of products.
The important part of the code is in src/pages/index.js, which in Gatsby is the React component that will be used to generate the homepage of our static website:
import React from  'react'


const  IndexPage  =  ({  data  })  => (

<div  className="Catalogue">

{

data.site.siteMetadata.products.map(product  => (

<div  className="Catalogue__item"  key={product.slug}>

<a  href="#"  className="Product">

<div  className="Product__image">

<img  src={product.image} />

</div>

<div  className="Product__details">

<div  className="Product__name">

{product.name}

<span  className="Product__price">

{product.price}€

</span>

</div>

<div  className="Product__buy">Buy now</div>

</div>

</a>

</div>

))

}

</div>

)


export  default IndexPage


export  const query =  graphql`

query CatalogueQuery {

site {

siteMetadata {

products {

slug

name

image

price

}

}

}

}

`
As you can see, the products information are not hardcoded in the code, but rather loaded into the React component using a GraphQL query.
The ability to pull data into your pages from any kind of source (local files, third-party APIs, you name it) using GraphQL queries is one of the most peculiar features of GatsbyJS.


In this case, the query fetches the products from a local gatsby-config.js file —and yes, we’re using the awesome Pacific and Co. socks as sample data:
module.exports  =  {

siteMetadata:  {

siteName:  'My Shop',

products: [

{

name:  'Bloom',

image:  'https://www.pacificandco.com/wp-content/uploads/2014/12/pacificandco-calcetines-socks-original-creative-women-BLOOM-perfil-1.jpg',

price:  14.95,

},

{

name:  'Las Vegas',

image:  'https://www.pacificandco.com/wp-content/uploads/2014/12/pacificandco-calcetines-socks-original-creative-funny-LASVEGAS-lemon-perfil-1.jpg',

price:  13.95,

},

{

name:  'Blue limbo',

image:  'https://www.pacificandco.com/wp-content/uploads/2014/12/pacificandco-calcetines-socks-original-creative-funny-BLUELIMBO-perfil-1.jpg',

price:  13.95,

},

{

name:  'Ocean',

image:  'https://www.pacificandco.com/wp-content/uploads/2014/12/calcetines-ocean-perfil-pacificandco-socks.jpg',

price:  13.95,

},

{

name:  'Monkey gang',

image:  'https://www.pacificandco.com/wp-content/uploads/2014/12/calcetines-monkey-gang-perfil-pacificandco-socks.jpg',

price:  12.95,

},

{

name:  'Colorful',

image:  'https://www.pacificandco.com/wp-content/uploads/2014/12/calcetines-colorful-perfil-pacificandco-socks.jpg',

price:  14.95,

},

{

name:  'Street faces',

image:  'https://www.pacificandco.com/wp-content/uploads/2014/12/pacificandco-calcetines-socks-creative-artist-summer-fashion-STREET-FACES-perfil-300x300.jpg',

price:  14.95,

},

{

name:  'Magic museum',

image:  'https://www.pacificandco.com/wp-content/uploads/2014/12/pacificandco-calcetines-socks-original-creative-funny-MAGICMUSEUM-perfil-1.jpg',

price:  12.95,

}

],

},

plugins: [

'gatsby-plugin-sass',

'gatsby-plugin-react-helmet',

],

}
While solution might work in the context of a demo, having to manually commit a change to a JS file in your Gatsby project every time your team wants to change the product catalogue is, well.. not very friendly, nor realistic. Well, here’s where DatoCMS comes into play.
DatoCMS enables developers and content-creators to create and manage content from a simple and familiar web-interface instead of having to work with Markdown/JS files and code editors.
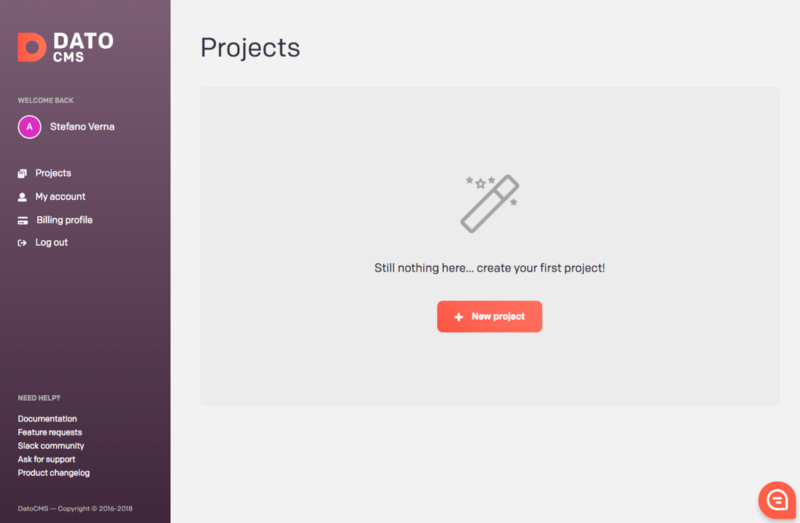
Once you create your DatoCMS account, you’ll be instantly able to:
Create a new project, which will be the container for all your website content and assets;
Define the structure of the content your team will manage inside the DatoCMS web-interface;
Invite your team in, give them proper roles and permissions, and let them insert content.
The best part is that using content coming from DatoCMS in Gatsby is extremely easy too. You just need to:
Add the DatoCMS plugin to your Gatsby website;
Configure the plugin with your DatoCMS project API token;
Access your data using GraphQL queries, just as we did before with data coming from
gatsby-config.js.
Create a new DatoCMS project
Once you’ve created your DatoCMS account, click on the New project button:

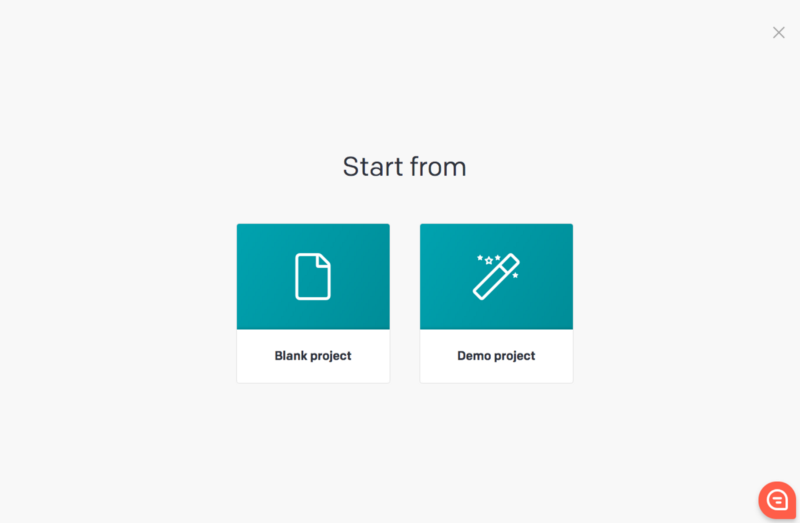
We’ll start from a completely Blank project:
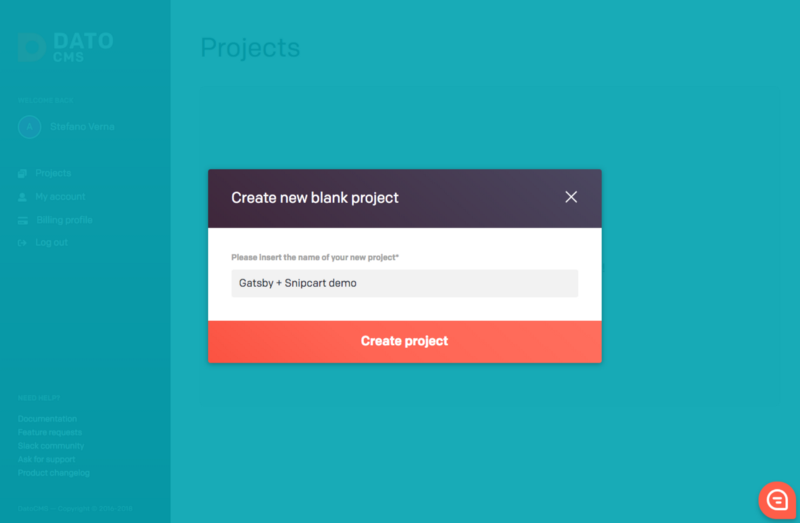
Let’s name our new project “Gatsby + Snipcart demo”:
Now click on the project name, and you will enter the project administrative area:

It’s time for us to define the structure of the content your team will manage inside the DatoCMS web-interface! If you look at this documentation page, you’ll see that:
In DatoCMS, the way you define the kind of content you can edit inside a project passes through the concept of models, which are much like database tables. Each project can specify a number of different models, and they represent blueprints upon which editors will store the website content.
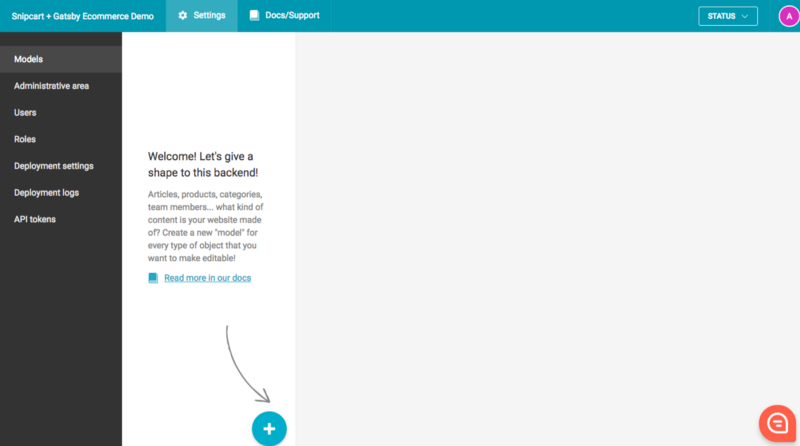
Right now we just want to manage products, so let’s create a Model named Product:
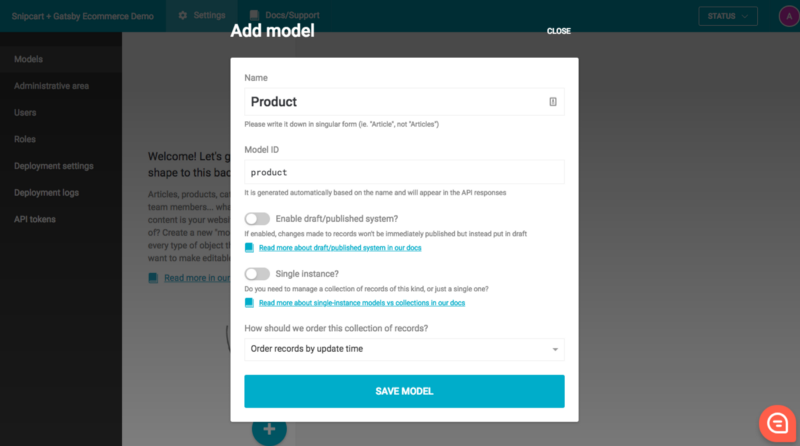
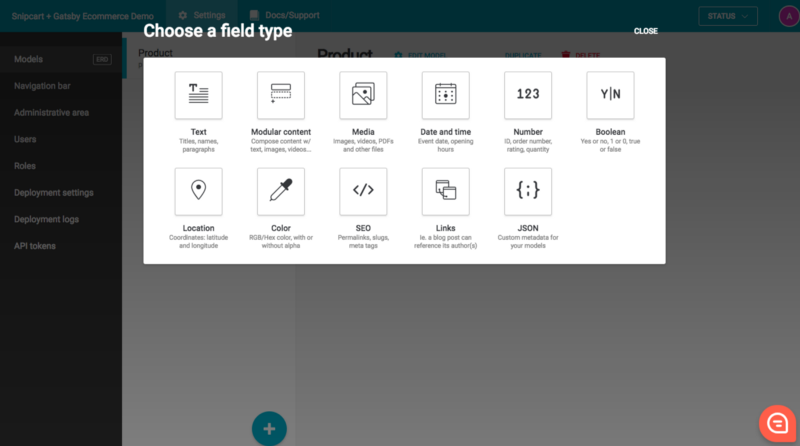
Each model consists of a set of fields that you define. DatoCMS features a lot of different types of fields you can choose from: text, images, videos, numbers, booleans, geolocation points.. you name it.
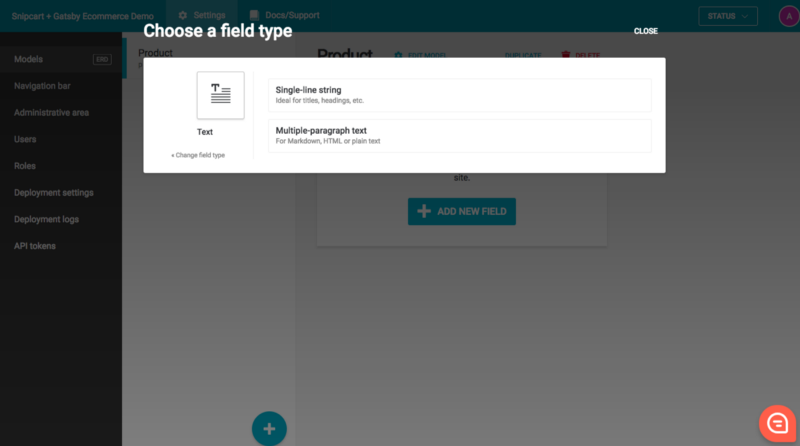
To start, we just want to create a text field that will hold the name of the product. Click on the “Add new field”, click on the “Text” group…
…and then select the Single-line string field type:
Awesome! We want our field to be named, duh, Name:
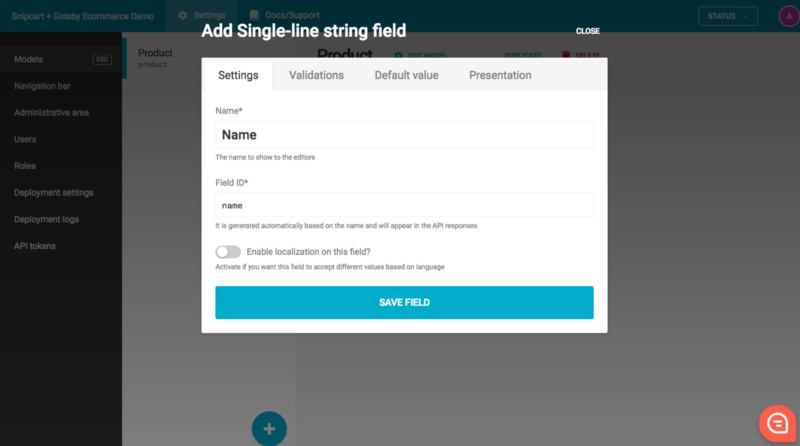
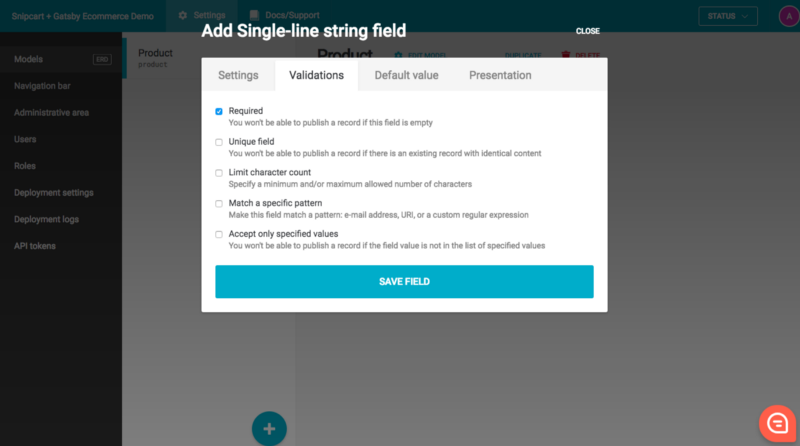
And we want it to be a mandatory field, so we’ll check Required under the Validations tab:
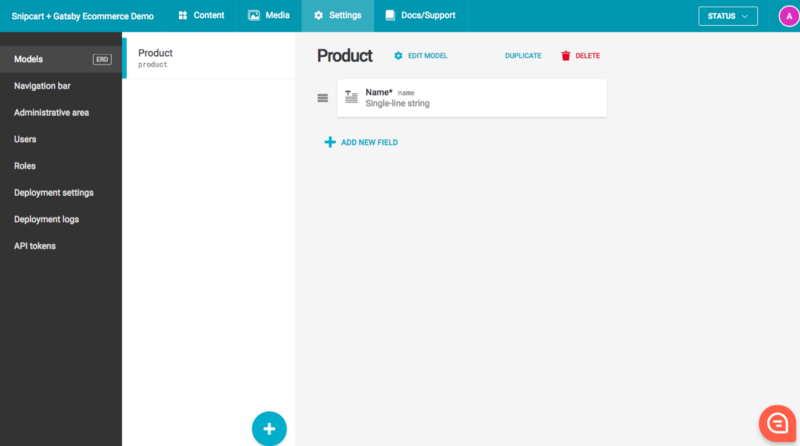
If you did everything correctly, our Product model should now have a Name field (how cool is that):
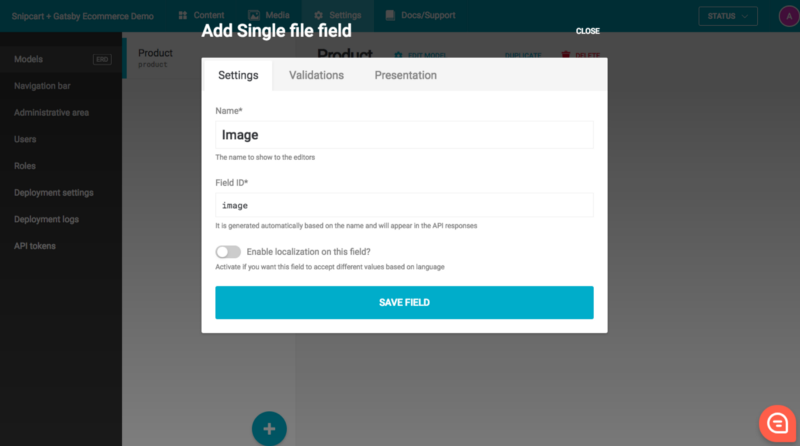
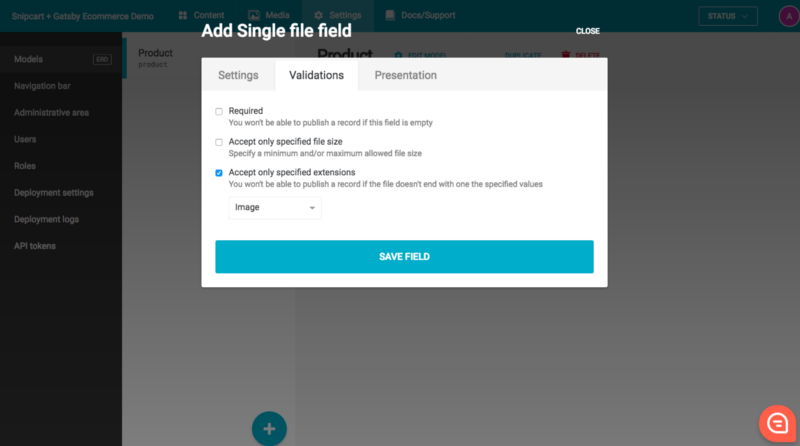
Now let’s add a product image field. Under the Media group select the “Single file” field:

Let’s name this field “Image” (duh, again):
And make sure to force the field only to accept image files:
Great! Now we can repeat the procedure and add another mandatory Floating-point number field named Price:

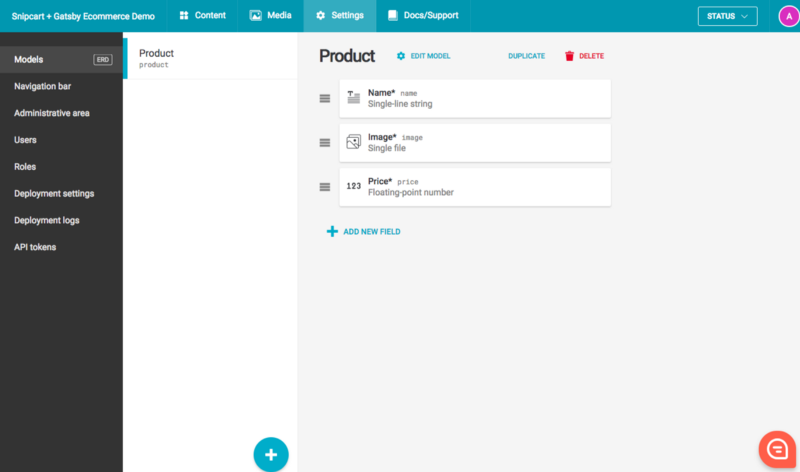
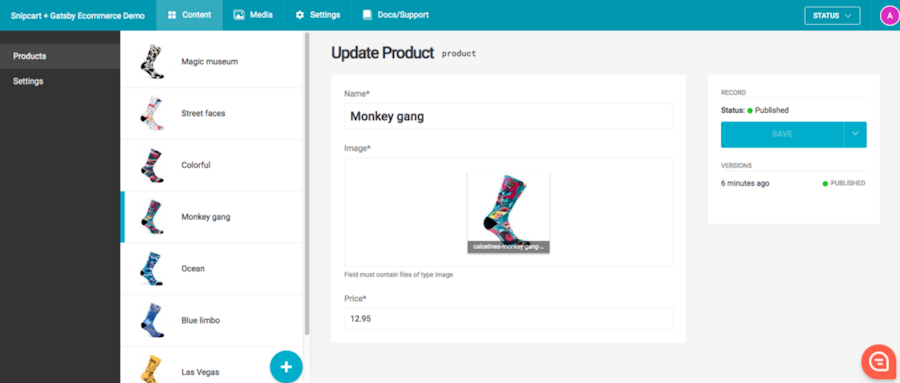
Looks like we’re done! If you now move to the Content tab, you’ll see that you (and the additional users you can invite to the project) can already insert products:

That was easy, isn’t it? Time to celebrate with some random palm-tree emojis: 🌴🌴🌴
Import products into DatoCMS
Now we could just manually insert the first batch of products using the DatoCMS web-interface. The problem is that I’m a lazy person, so we’ll craft a tiny script that will use the DatoCMS Content Management API to import them automagically.
Add the datocms-client NPM package to our project:
yarn add datocms-client
And copy the following import.js file under our project root directory:
const  { SiteClient }  =  require('datocms-client');

const client =  new  SiteClient('YOUR-API-TOKEN');

const config =  require('./gatsby-config');


config.siteMetadata.products.reduce((chain,  product)  => (

chain

.then(()  => client.uploadImage(product.image))

.then((image)  => client.items.create({

name: product.name,

image: image,

price: product.price,

itemType:  'YOUR-MODEL-ID',

}))

),  Promise.resolve());
It’s a pretty short and intuitive script so I won’t go into much detail, but feel free to read this guide if you need to learn more about importing content from external sources into DatoCMS.
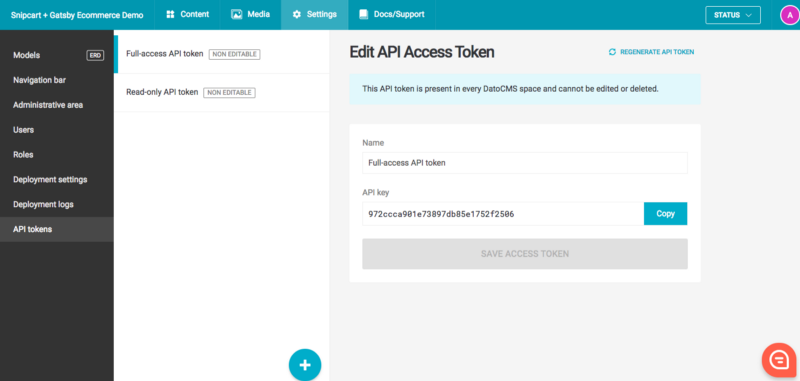
Uh, super-important! Make sure you insert on line 2 of the script your project full-access API token! You can it find it under Settings > API tokens:

Now run the script:
node import.js
Close you’re eyes, and visualise all the potential manual work we’ve just avoided with such grace. Wait a couple of seconds, then open your eyes and cherish the look of an administrative area full of precious content:

Time to use this data into our Gatsby website!
Use DatoCMS content inside Gatsby
First thing first, let’s add to our project the DatoCMS plugin for Gatsby:
yarn add gatsby-source-datocms
We now have to enable it in gatsby-config.js, specifying our project’s read-only API token (which again, you can find under Settings > API tokens). While we’re at it, we can also get rid of the products array, as we won’t need it anymore:
module.exports  =  {

siteMetadata:  {

siteName:  'My Shop',

},

plugins: [

'gatsby-plugin-sass',

'gatsby-plugin-react-helmet',

{

resolve:  `gatsby-source-datocms`,

options:  { apiToken:  `YOUR_READONLY_API_TOKEN`  },

},

],

};
Alright, now we just have to change pages/index.js so that it will fetch the products from DatoCMS instead. Let’s change the GraphQL query at the bottom:
import React from  'react'


const  IndexPage  =  ({  data  })  => (

<div  className="Catalogue">

{

data.products.edges.map(({ node: product }) => (

<div  className="Catalogue__item"  key={product.id}>

<a  href="#"  className="Product">

<div  className="Product__image">

<img  src={product.image.url} />

</div>

<div  className="Product__details">

<div  className="Product__name">

{product.name}

<div  className="Product__price">

{product.price}€

</div>

</div>

<span  className="Product__buy">Buy now</span>

</div>

</a>

</div>

))

}

</div>

)


export  default IndexPage


export  const query =  graphql`

query CatalogueQuery {

products: allDatoCmsProduct {

edges {

node {

id

name

price

image {

url

}

}

}

}

}

`
As you can see, DatoCMS records are available in Gatsby GraphQL schema under the key allDatoCms{YOUR_MODEL_NAME}. Every field we previously created in DatoCMS will be available. The DatoCMS plugin documentation delves a lot deeper into how you can pull data from GraphQL, so make sure to read the README.
In any case, remember that if you ever get lost writing a GraphQL query, Gatsby exposes an awesome GraphQL in-browser IDE to explore your site’s data and schema at the following URL: http://localhost:8000/___graphql:

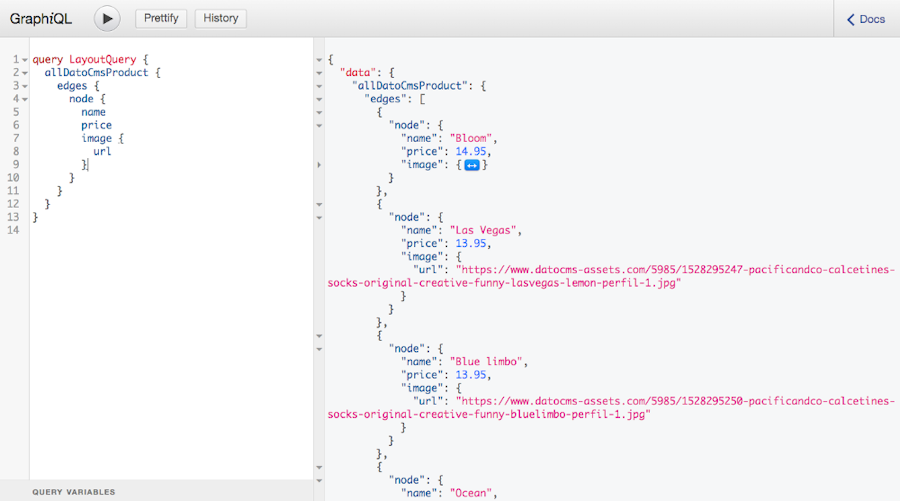
Image manipulations/optimisations
Every image/file you upload in DatoCMS is stored on Imgix, a super-fast CDN optimized for image delivery. By adding some parameters to your image URL you can enhance, resize and crop images, compress them and change format for better performances, create complex compositions, and even extract useful metadata. The transformations happen on-the-fly and get cached on the CDN as well for future reuse.
We can easily increment our site loading times cropping our product images at 300x300px and forcing a conversion to JPEG format:
<div  className="Product__image">

<img  src={`${product.image.url}?w=300&h=300&fit=crop&fm=jpg`} />

</div>
Gatsby also features an incredible plugin called gatsby-image, which can help optimize your site’s performance even more by:
Resizing large images to the size needed by your design
Generating multiple smaller images so smartphones and tablets don’t download desktop-sized images
Efficiently lazy loading images to speed initial page load and save bandwidth, using the “blur-up” technique to show a preview of the image while it loads
Holding the image position so your page doesn’t jump while images load
DatoCMS fully supports gatsby-image, so we just need to slightly change our GraphQL query and replace our <img> tag with its <Img> component to get all these benefits for free:
import React from  'react'

import Img from  'gatsby-image'


const  IndexPage  =  ({  data  })  => (

<div  className="Catalogue">

{

data.products.edges.map(({ node: product }) => (

<div  className="Catalogue__item"  key={product.id}>

<a  href="#"  className="Product">

<div  className="Product__image">

<Img  sizes={product.image.sizes} />

</div>

{ /*... */ }

</a>

</div>

))

}

</div>

)


export  default IndexPage


export  const query =  graphql`

query CatalogueQuery {

products: allDatoCmsProduct {

edges {

node {

id

name

price

image {

sizes(maxWidth: 300, imgixParams: { fm: "jpg" }) {

...GatsbyDatoCmsSizes

}

}

}

}

}

}

`
The difference is quite remarkable, I’d say: 🎩
Add Snipcart to the mix
Alright, time to transform a static website into a full-blown e-commerce!
Thankfully, with Snipcart it’s a matter of exactly two minutes (and by exactly I mean approximately).
First of all, add the gatsby-plugin-snipcart package to our project:
yarn add gatsby-plugin-snipcart
Then, just like we did with the DatoCMS plugin, activate it in gatsby-config.js:
module.exports = {
siteMetadata: {
siteName: 'My Shop',
},
plugins: [
// ...
{
resolve: 'gatsby-plugin-snipcart',
options: {
apiKey: 'YOUR-SNIPCART-API-TOKEN',
autopop: true
}
},
],
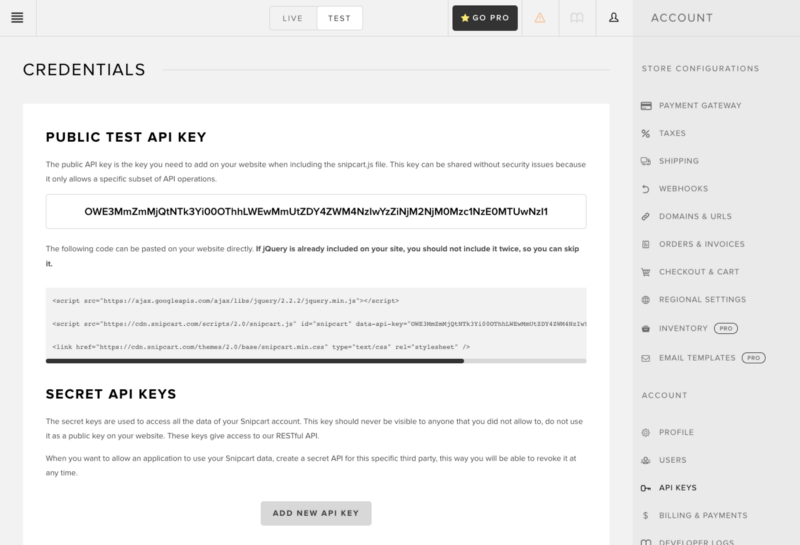
}The autopop option makes the Snipcart cart automatically open when you add a product to the cart. You can find your Snipcart API token in your account dashboard:

Now that everything is set-up, we just have to add a couple of classes starting with snipcart-* to our HTML to make our website come alive.
Let’s start dynamicizing the cart summary in src/layouts/index.js. From the Snipcart doc pages, you’ll see that:
A link having the class
snipcart-checkoutwill pop-up the cart;If you have a container element with the
snippet-summaryclass, you can add two elements withsnipcart-total-itemsandsnipcart-total-priceclasses that will contain such cart information.
I mean, it’s so easy it feels like cheating:
<a  href="#"  className="Header__summary snipcart-summary snipcart-checkout">

<div  className="Header__summary__title">

🛍 MY CART 🛍

</div>

<div  className="Header__summary__line">

Number of items: <span  className="snipcart-total-items"></span>

</div>

<div  className="Header__summary__line">

Total price: <span  className="snipcart-total-price"></span>

</div>

</a>
Now on to the product items. From the “Product definition” page of Snipcart documentation we find out that you can basically convert any link into a buy button. All the product information is stored in the HTML markup using some data-* attributes:
const  IndexPage  =  ({  data  })  => (

<div  className="Catalogue">

{

data.products.edges.map(({ node: product }) => (

<div  className="Catalogue__item"  key={product.id}>

<a

href="#"

className="Product snipcart-add-item"

data-item-id={product.slug}

data-item-price={product.price}

data-item-image={product.image}

data-item-name={product.name}

data-item-url={`/`}

>

{ /* ... */ }

</a>

</div>

))

}

</div>

)
Aaaaand, yes. That’s it. You can sell online now. That’s ridiculous.
Wrapping up
Wow, this was a pretty long tutorial! If you made it till the end smile at yourself: you did a good job today! 🌞
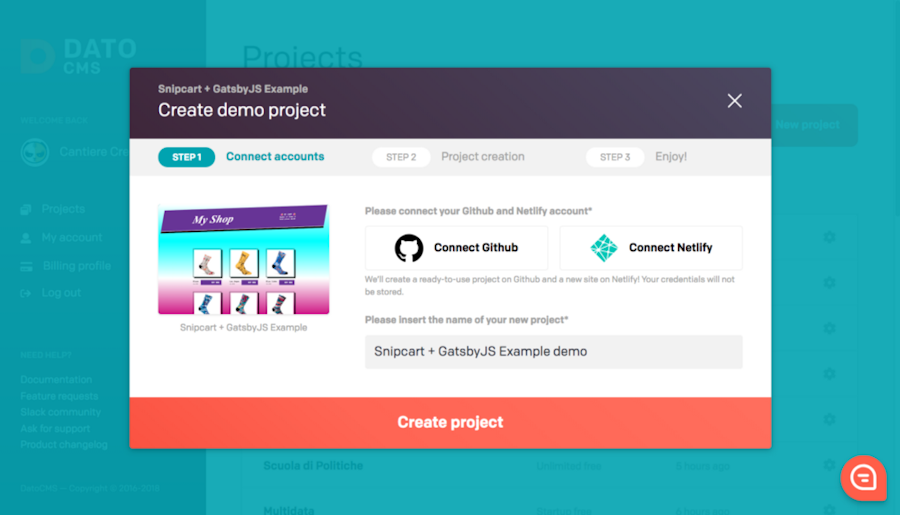
If you want see the final code you can just clone this Github repo… heck, you can even deploy a working copy to your DatoCMS, Github & Netlify accounts with just one-click!
Long life to #JAMStack! 💖

If you've enjoyed this post, please take a second to share it on Twitter. Got comments, questions? Hit the section below!


