Snipcart Webhooks: Zapier & Mailchimp Integration
Editor's note: We've re-designed our merchant dashboard since publishing this post. Click here to see how the new navigation works.
For online merchants, customers’ email addresses have an indisputable value: building a mailing list filled with leads and interested users is key to launching email marketing campaigns with high conversion rates and sending out newsletters that will stimulate traffic.
Since MailChimp is one of the best tools out there when it comes to creating, sending and tracking email newsletters, we thought we’d show you a little trick that might come in handy if you wish to automate your email gathering.
When a user completes a transaction through Snipcart, it’s possible for the cart owner to directly add the customer’s email to MailChimp using our webhooks and Zapier, a pretty neat web applications integration tool. Zapier lets you do a whole bunch of cool stuff with your web apps, but today we’ll start by focusing on the Snipcart-MailChimp integration.
Shall we get started?
First off, you’ll need to head over Zapier and create an account.

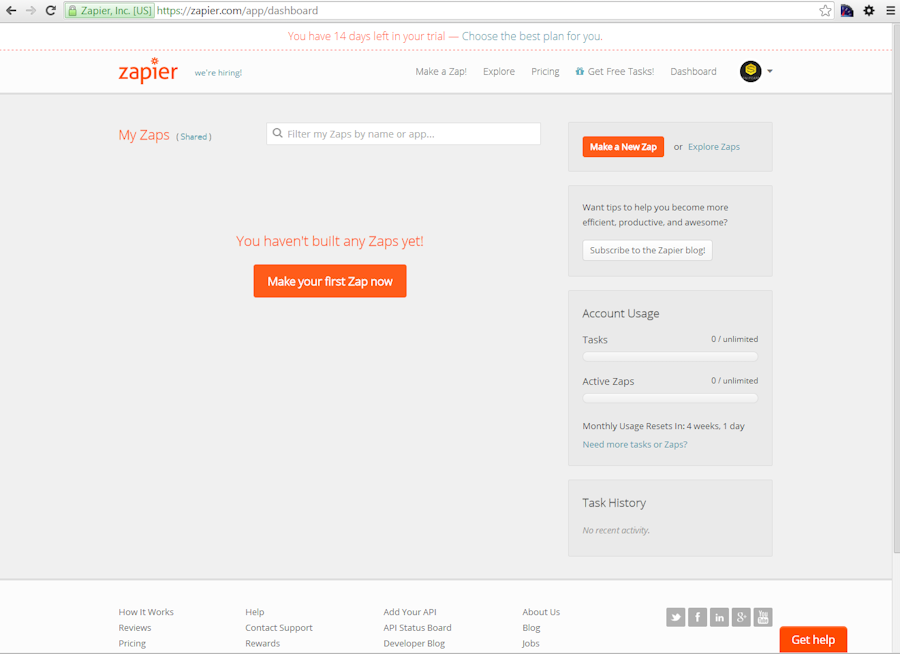
All set? Now hit the Make your first Zap now button.

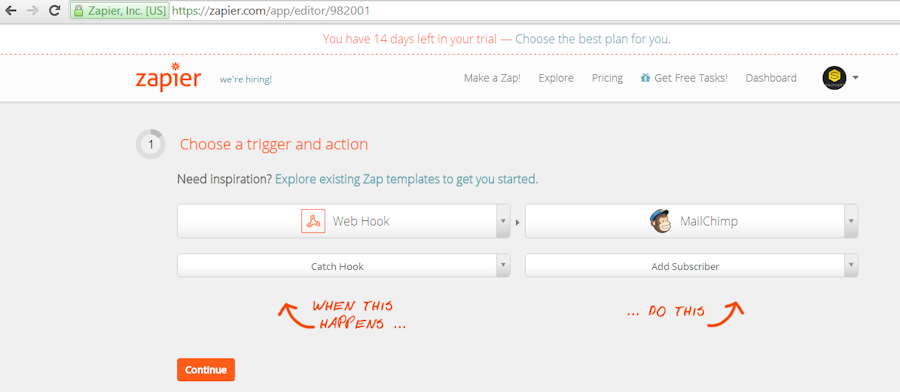
Step 1
Okay, select Web hook as the Trigger app and Catch Hook for the Trigger. Choose MailChimp for the Action app and Add Subscriber for the Action. Click the Continue button.

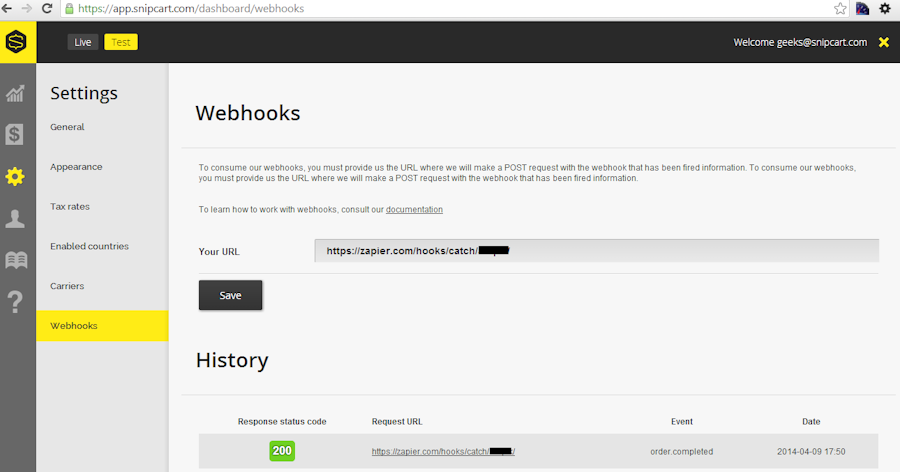
Step 2
Copy the provided custom webhook URL. Okay, let’s leave Zapier for a sec. Login to app.snipcart.com and head over to Settings > Webhooks in your admin dashboard. Paste your Zapier webhook URL in the Your URL field, then hit the Save button.

What you’ll need to do next is to create a new order on your website so that Zapier receives the webhook for later.
Step 3
Let’s go back to Zapier now and proceed with step 3. This is the part where you need to connect to the MailChimp account you’ll be using with Snipcart. Simply enter your MailChimp username and password, then click the Continue button.


Step 4
Easiest one thus far: don’t put in anything. Just click on Continue.
Step 5
Now you have to select the exact MailChimp list you want the webhook to add your customers to. Next, hit the Insert fields button in the email field.

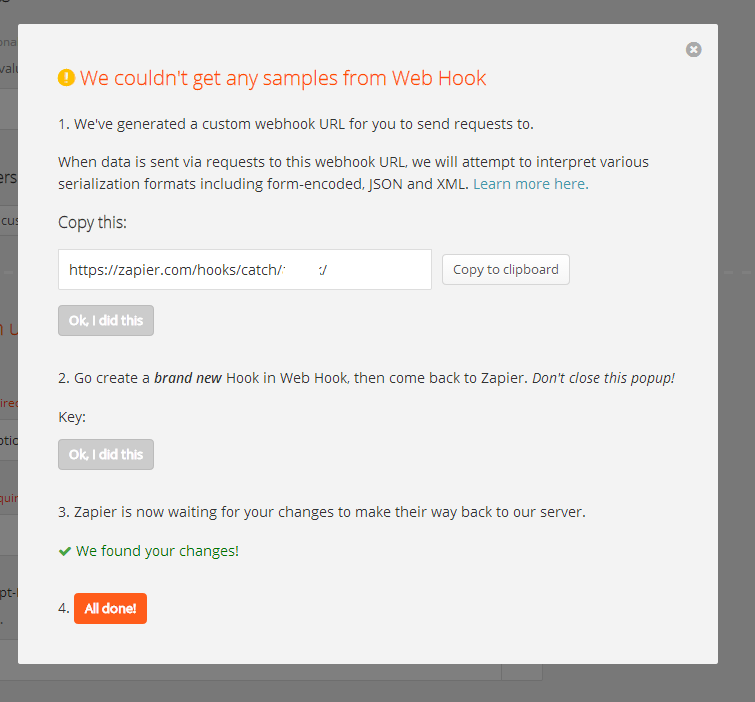
You will see the popup above. If the green “We found your changes!” message doesn’t show, click on Okay, I did this twice. Now switch back to your Snipcart admin dashboard and resend the webhook URL by selecting it in the list and clicking Send this hook again at the top of the screen. Choose Yes in the alert box at the bottom of the screen.

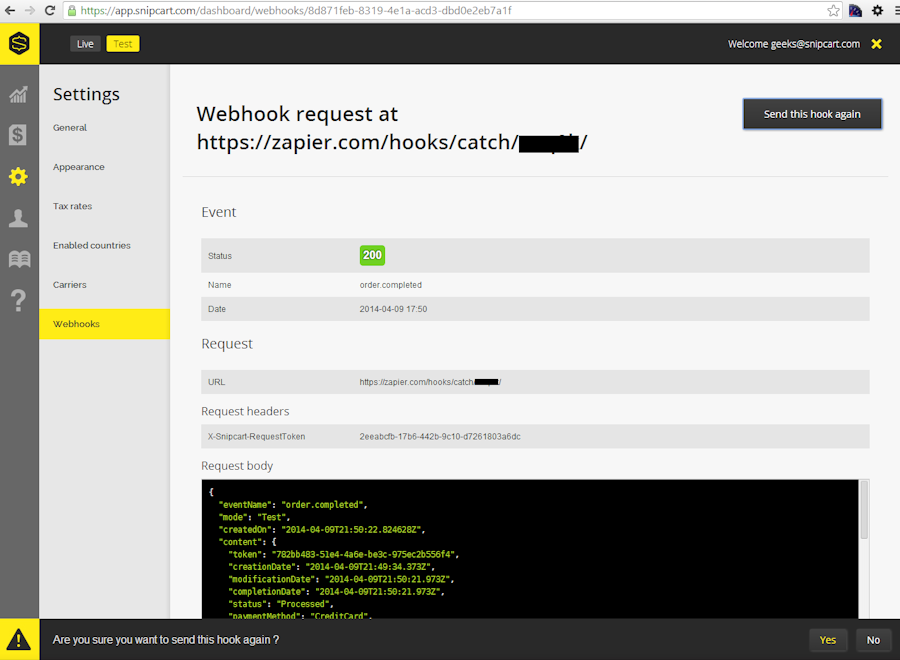
Back to Zapier: the service should receive the webhook again. Got it? Good. Click the All done! button.
You can now select Content Email as the value of the email to add to MailChimp. From this point, all that’s left is completing the rest of the form and you’re done!


Step 6
Wanna see if it actually works? Click on Test Webhook Trigger to make sure it works as expected. To complete this Zap, name it and turn it on. There, you’re all set!
Feel free to use the section below this post if you have any questions or comments regarding Snipcart and Zapier integrations. Now go ahead and get yourself some valuable emails!


