Simple and Quick Discount Settings
Note: This post has been updated with the most recent discount options and dashboard screenshots.
As you may know, Snipcart offers a native, powerful discounting system to create promo codes and more. And we recently released a major update related to the way we handle discounts. So we thought that making a blog post about it and about some specific scenarios we are now able to handle with this update might be a good idea.
In order to illustrate some scenarios of usage, let’s go through some of the most popular configurations and how they're done.
Offer free shipping for orders of more than 150$.
Offer 20% discount when using a promo code.
Offer an alternate price when using a promo code.
Offer an item on sale for a limited period.
Basics
We re-thought the way discounts were initially handled when we launched. Discounts are now configured through 3 sections and parameters that can all be used in combinations:
Discount general information. This section includes the name of the discount, its expiry date and the maximum number of usages allowed. Of course, a discount can also be allowed unlimited usage have no expiry date.
What the discount will do. This is basically the discount value that should be applied. When the discount is triggered, you can choose one of the following:


When the discount should be applied. This represents the condition required for the discount to be applied, or the “trigger”. This section lets you choose how the discount can be used/applied. We currently support five separate events :


1. The free shipping discount
Let's start with something basic. Imagine you want to offer your customers free shipping when they order for more than 150$.
Start by creating a new discount. Login to your Snipcart dashboard and create a discount with these parameters:

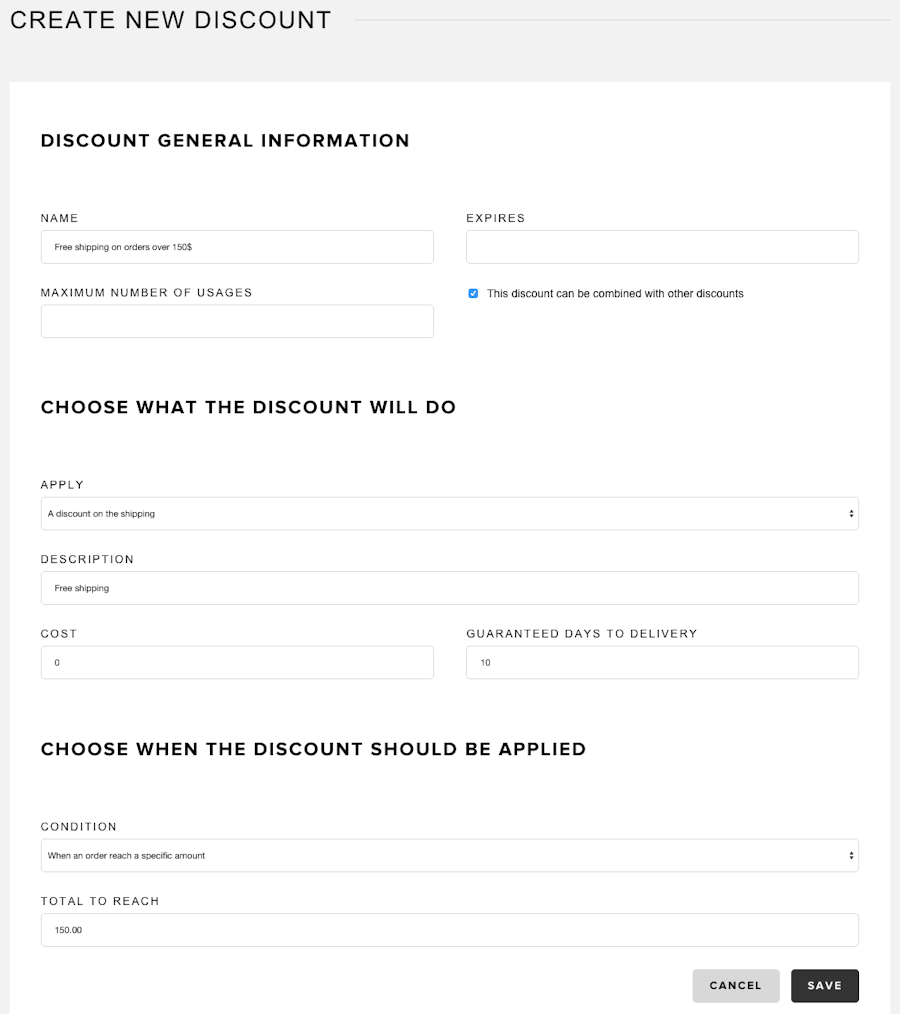
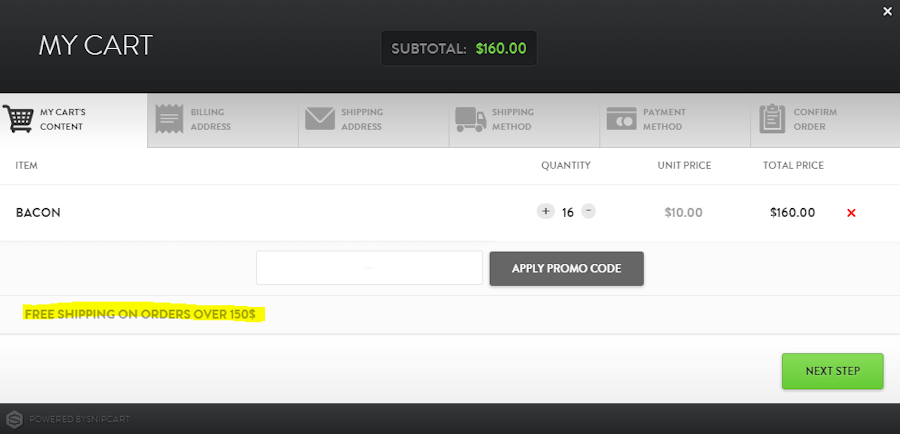
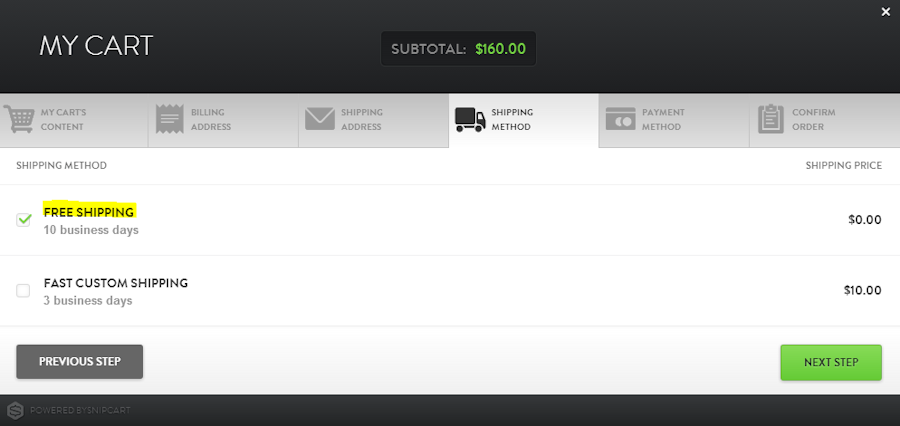
With this discount, when your customers order for more than 150$, they will automatically have a free shipping option available for them to choose. Of course, they could choose that option or opt for paid shipping for a faster shipping, for instance.


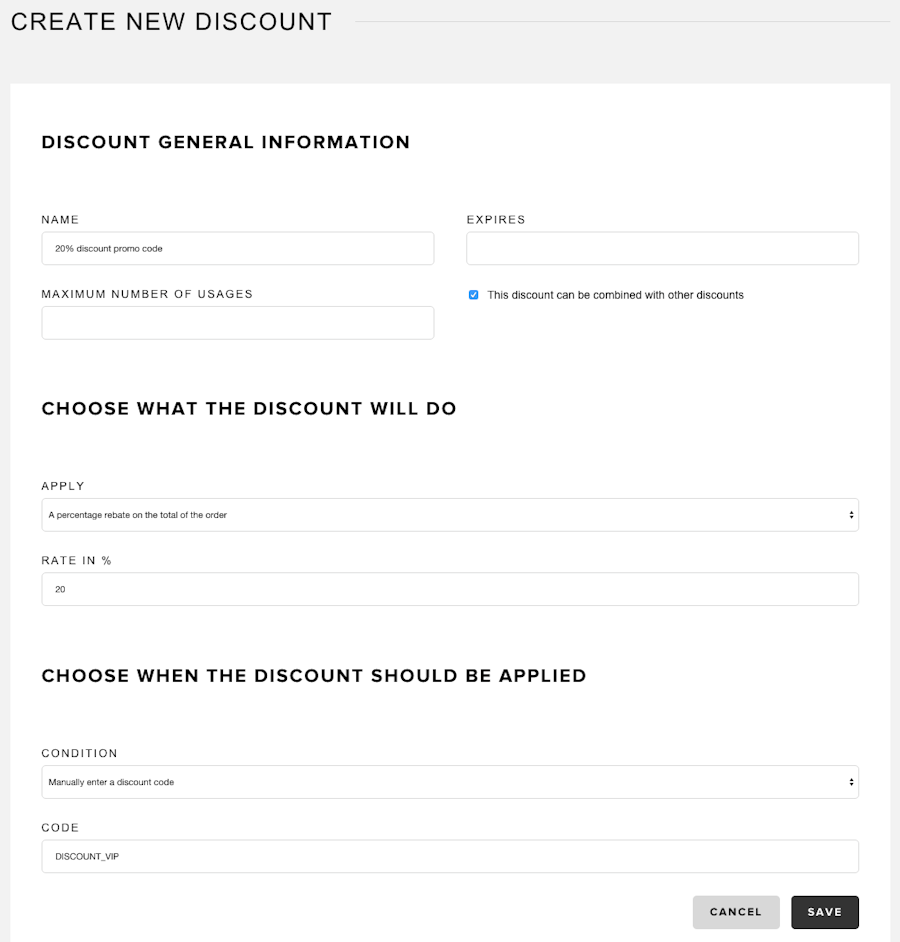
2. The 20% discount promo code
Another classic: You'd like to offer your existing customers a 20% discount on their next order. So we need to create a manual promo code that will apply a 20% discount of the order total. It should be set up as follows:

3. The alternate price promo code
Now let's try something a bit more complex. Say you want to offer an alternate price on a specific item when a customer enters a discount code. For instance, you have VIP customers, and you want them to be able to buy bacon for 5.00$ instead of 10.00$, so you send them a special promo code they can use to have access to a specific price list for specific items only.
Let's start by creating the discount:

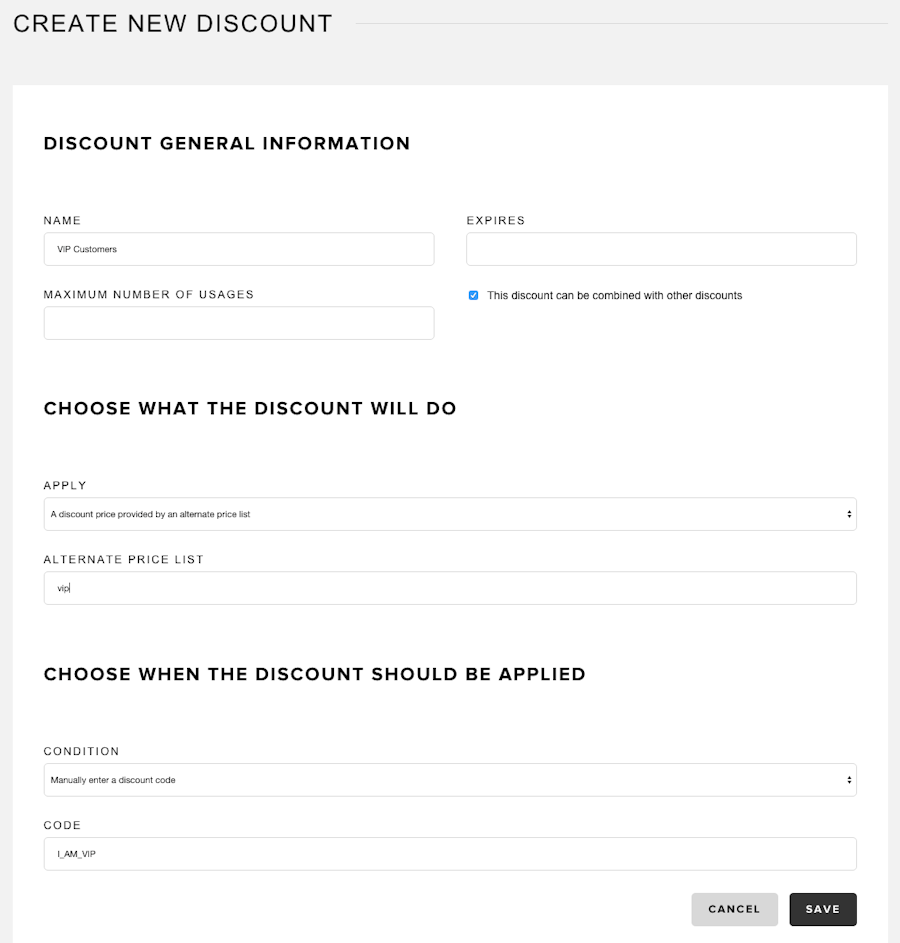
Alternate price discounts require more configuration than other discounts. So you’ll have to define the price for this discount in the product meta data. To do so, edit your product buy button by adding the data-item-price-vip attribute, noting that the “vip” suffix is the name of value of the “alternate price list” field on the discount in the dashboard:
<!-- lang: html -->

<a href="#" class="snipcart-add-item"
    data-item-name="Bacon"
    data-item-price="10.00"
    data-item-price-vip="5.00"
    data-item-id="42"
    data-item-url="http://snipcart.com/"
    data-item-weight="20">
    Buy bacon
</a>
Again, notice that the “vip” suffix comes from the alternate price list that you defined in the discount you just created.
Now, if you add this item to the cart, you will see that the price is 10.00$, as we expected, but enter the I_AMP_VIP discount code and the item price will be switched to the VIP price.


4. The limited time sale price
Alternate prices are very helpful; they could also be used to create a temporary sale on one of your products. Suppose you want to have some bacon on sale for the week. You can create a discount that will be triggered when this item is in the cart and it will use an alternate price list of the items.
The discount that you will be creating should look like this:

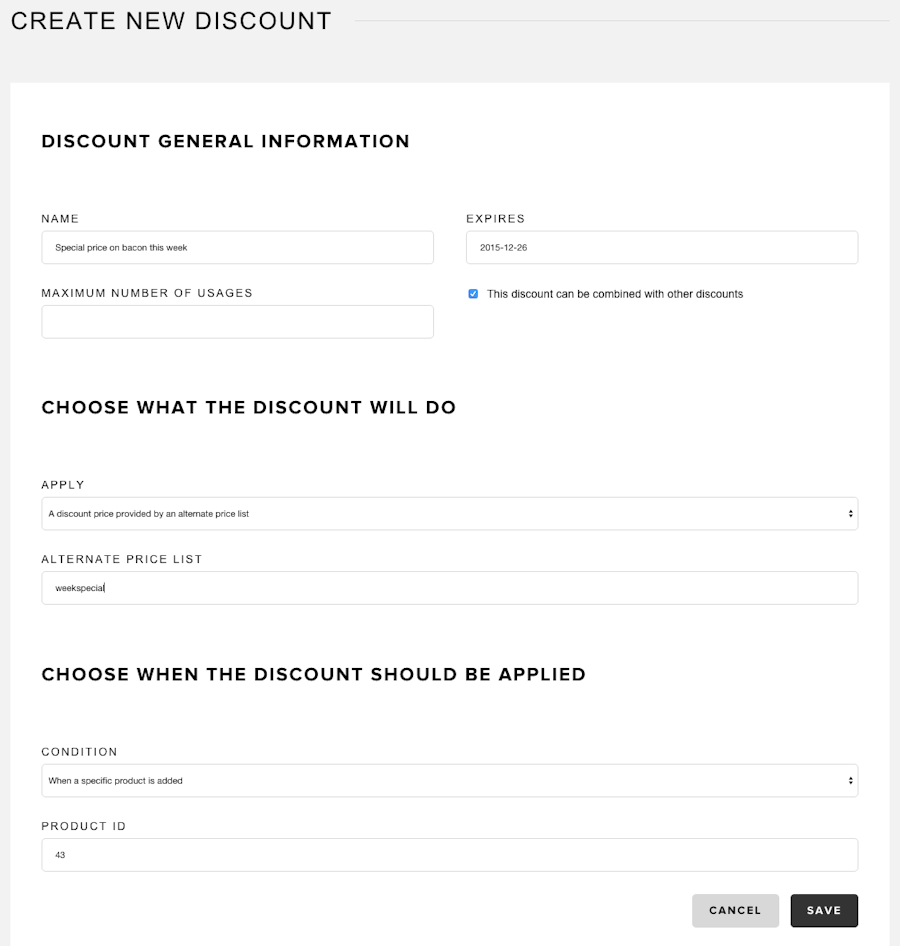
Then, as you did for the VIP price, you will have to add data-item-price-weekspecial attribute to the product buy button:
<!-- lang: html -->

<a href="#" class="snipcart-add-item"
    data-item-name="Bacon"
    data-item-price="10.00"
    data-item-price-vip="5.00"
    data-item-price-weekspecial="8.00"
    data-item-id="42"
    data-item-url="/"
    data-item-weight="20">
    Buy bacon
</a>
And that's all! Now if you add the bacon product to the cart, the price will automatically drop to 8.00$.

If you set up the four different discount scenarios described in this post, you should have a discounts panel on your dashboard that looks like this:

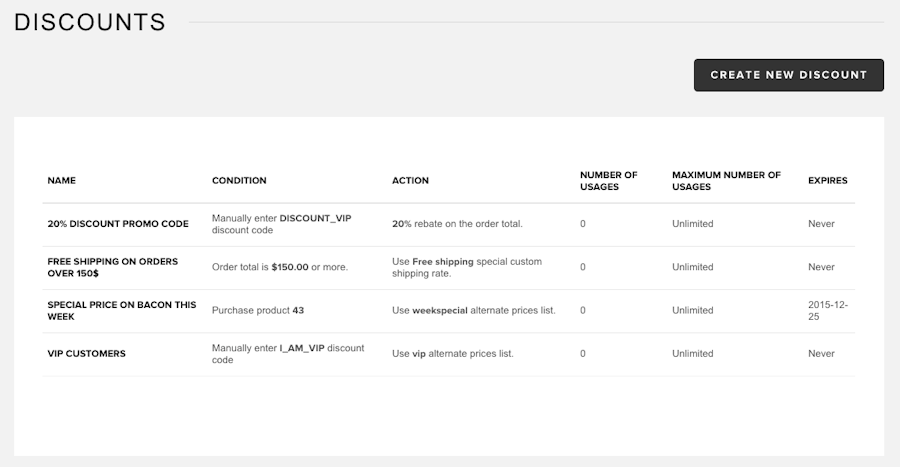
Snipcart's discounts system offers a huge amount of possibilities when it comes to promotions for merchants. We hope you, your business and your customers can benefit from it. If you have any questions or feedback regarding discounts, feel free to email us at geeks@snipcart.com at any time. We'll be glad to give you a hand!


