Integrating E-Commerce on Statamic Flat File CMS
In this latest Snipcart integration post, we’re going to get right into the thick of things. To keep it interesting, I’ve merged two very awesome topics: Statamic, and The Legend of Zelda universe. More specifically, I’ll show you how to integrate our HTML/JS-based shopping cart to Statamic’s flat file PHP-based CMS. No need to worry! It’s quite easy to use. In fact, Statamic allows you to create your website using their admin panel, or by directly editing your files.
I’ll also take you through the IIS installation process, which, unfortunately, was not as straightforward as I had expected.
Installing Statamic on Windows
As some of you know, Snipcart is run primarily on Windows as the bulk of our backend code is written in .NET. For this demo, I was looking to run Statamic on my local IIS.
That being said, according to the Statamic docs, I was missing a few critical pieces to make it all run like a well-oiled machine. So, here’s what I did:
First, I installed PHP. :) I installed it using Web Platform Installer, which is relatively straightforward. It installs the IIS bindings for you.
Then, I copied all of the Statamic files to my snipcart-statamic folder. Before copying the files, I changed my permission settings for the IUSR user to grant complete control.
For this to work in ISS, you’ll have to rename the sample.web.config file to web.config file. This file registers the URL rewrite rules that will be necessary for Statamic to run smoothly.
Please note that I had to remove the second rule from the web.config file. We’ll be in touch with the folks at Statamic about this. I have a feeling that it might be causing some issues.
The next step is to create the IIS site itself. I chose to go with IIS Powershell cmdlets to create it in my command prompt.
New-Website -Name snipcart-statamic.dev -PhysicalPath D:\Dev\snipcart-statamic -HostHeader snipcart-statamic.devI created the new site using IIS and set the host header to snipcart-statamic.dev to make it accessible via http://snipcart-statamic.dev.
Then, I created an entry for my hosts file to map the snipcart-statamic.dev domain and link it to my local IP address. I love using the awesome PsHosts module for this. Once it’s installed, you can manage your hosts file from the command line.
Add-HostEntry -Name snipcart-statamic.dev -Address 127.0.0.1When I hit my URL in local, I got this error message:
MissingDependencyException in ImageManager.php line 123:
PHP Fileinfo extension must be installed/enabled to use Intervention Image.
To get it working, I had to enable the php_fileinfo extension in my php.ini file.
Luckily, it was a quick fix! All I had to do was add this line to the php.ini file:
extension=php_fileinfo.dllThen, I hit refresh...and BAM! Statamic was up and running.
Once you’ve completed all of these steps, you can begin the Statamic installation by heading on over to http://snipcart-statamic.dev/installer.php in your browser. Just follow the setup instructions, and you should be good to go.
Saving Snipcart API Key
For Snipcart to function, you’ll have to input your public API key as you implement our JavaScript file. The best way to store it in Statamic is to use Globals.
To get it working, create a new file named Snipcart.yaml in site/content/globals. It’s important that you attribute a fieldset to the file if you want a nice Control Panel form. Next, create the fieldset that will be responsible for holding the API key specification textbox.
Create a new file named snipcart_config.yaml in site/settings/fieldsets folder. This is what the file content should look like:
title: Snipcart
hide: true
fields:
  snipcart_api_key:
    type: text
    display: Snipcart public API Key
    instructions: "Please open [Snipcart's dashboard](https://app.snipcart.com/dashboard/account/credentials) and enter your **public** API key."
Once that’s done, open the Snipcart.yaml file that was created earlier, as you’ll need to specify the fieldset you plan on using:
fieldset: snipcart_configSave the file and refresh your browser. In the menu, under the Globals section, you should see Snipcart:

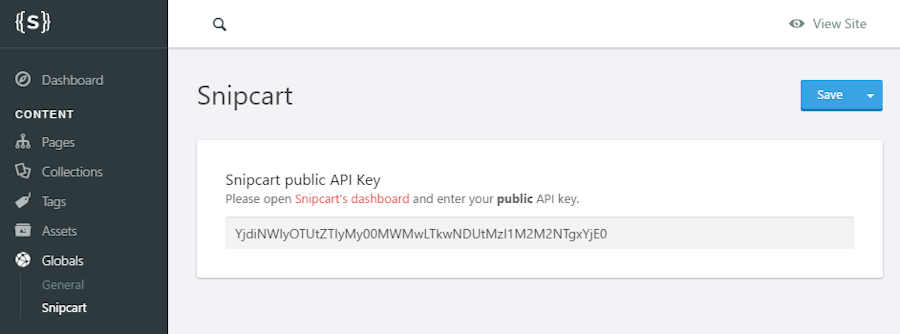
Now, when you click on Snipcart, you should see the API key form. Once you’ve retrieved your public Snipcart API key, paste it right into the box and hit that save button!
Next, you’re going to include the Snipcart files required for your site layout. Open default.html located in the themes/redwood/layouts folder.
Before you close the <head> tag, include this snippet:
{{ if Snipcart:snipcart_api_key }}
    <script src="https://ajax.googleapis.com/ajax/libs/jquery/2.2.2/jquery.min.js"></script>
    <script src="https://cdn.snipcart.com/scripts/2.0/snipcart.js" data-api-key="{{ Snipcart:snipcart_api_key }}"></script>
    <link href="https://cdn.snipcart.com/themes/2.0/base/snipcart.min.css" type="text/css" rel="stylesheet" />
{{ /if }}
Basically it will include Snipcart and it's dependencies if an API key has been set.
Creating product fieldset
Now, here’s where Statamic gets real! First, you’ve got to create a new fieldset that will represent a product. Open the snipcart-statamic folder in your favorite editor. Lately, I’ve been using VS Code.
Locate the site/settings/fieldset. Open this folder and create a new file named product.yaml.
Let's keep it simple... for now! I used this configuration for my product attributes:
title: Product
hide: true
fields:
  title:
    type: title
    display: Name
  price:
    type: text
    display: Price
    validate: numeric
  image:
    type: assets
    display: Image
    container: main
    folder: img
    max_files: 1
  content:
    type: markdown
    display: Content
Once that’s all done, you’ll want to create a new collection for all of your products. Open the site/content/collections folder and create a new folder named products. Then, create a new file in this folder named folder.yaml. This file will be responsible for instructing your control panel as to how products should be created.
title: Products
fieldset: product
template: product/details
columns:
- title
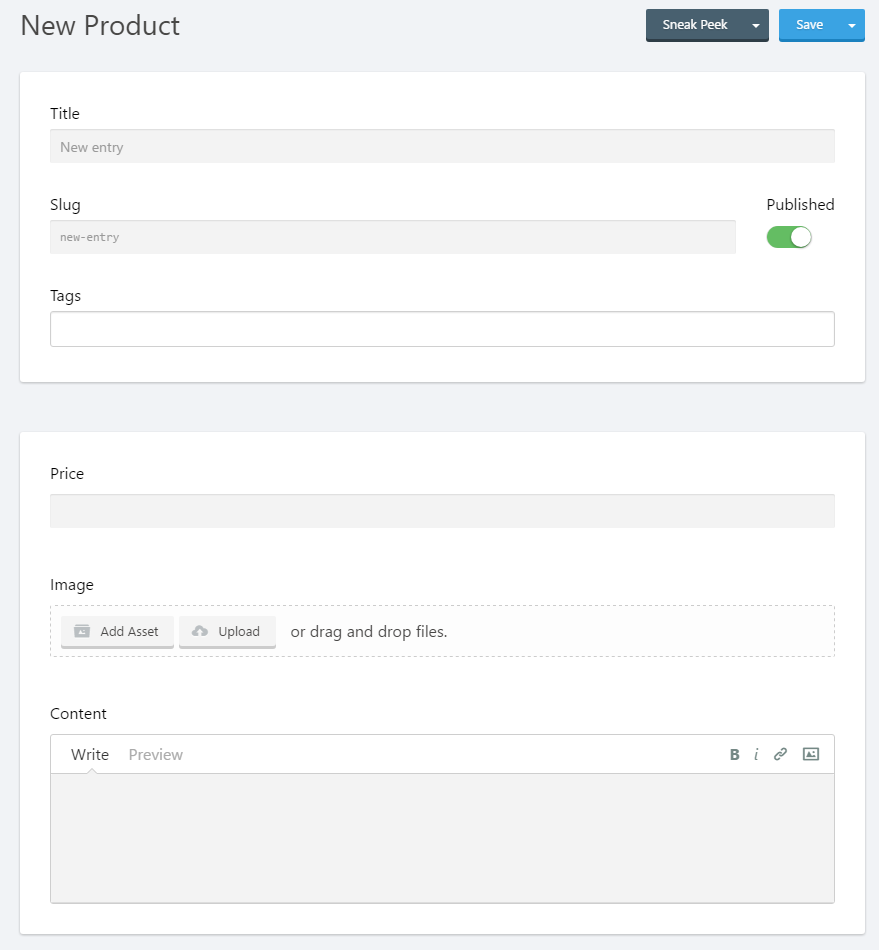
- priceFrom that point on, the collection will use the product fieldset created earlier. Now, when you go to the control panel to create a new product, the form will contain the specified fields. Here's a screenshot:

It’s also important to update any Statamic routes used to register the product details page access route. Open the site/settings/routes.yaml file and add this entry: products: '/products/{slug}' under the collections node. Here’s what my file looked like when I was done with the modifications:
collections:
  blog: '/blog/{year}/{month}/{day}/{slug}'
  things: '/things/{slug}'
  products: '/products/{slug}'
taxonomies:
  tags: '/blog/tags/{slug}'
routes:
  /blog/tags: blog/taxonomies
  /search: search
  /users: user/index
  /users/{username}: user/profile
  /account: user/account
  /login: auth/login
  /register: auth/register
  /forgot-password: auth/password-forgot
  /reset-password: auth/password-reset
Now, products can be created in the Statamic control panel. The next step is to make the products in the public site visible and buyable.
Listing products
First, you’ll want to start by creating a new page in the site/content/pages folder. Create a new folder named 6.products. Then, create a file named index.md in the latter.
---
title: Products
nav_title: Store
template: products/index
mount: products
id: 1227405f-fd88-4c7f-919f-5cf708814665
---

Here are our wonderful Zelda related products.
Setting metadata on the page is necessary if you want items to be visible via the navigation. Plus, it’ll allow us to map the template that we’re going to create later on. I’ve set the nav_title to Store so that a new section appears in our menu named Store.
Now, refresh your Statamic website and have a look at the menu:


You’ll notice that if you click on it, it’s empty! And, that’s only because we haven’t created the template yet. Let’s get to it!
Creating templates
In the theme folder, I’ve decided to stick with the default label that comes with every basic Statamic installation. Now, create a new folder named products in this location: themes/redwood/templates. Then, create two files in this folder. The first one, index.html will hold the template for the main section where all of the products are listed. The second one, details.html, will hold the details for a single product. Remember that this value was set: template: product/details when we created the products collection.
Let’s start with index.html. This template will be responsible for listing all of the sales products.
<section class="container-fluid regular">

    <header>
        <h1>{{ title }}</h1>
        {{ content_raw wrap="h2" }}
    </header>

    <div class="tiles">
        {{ collection:products }}
        <a href="{{ url }}" class="item">
            <div class="image" style="background-image: url('{{ image }}');">
                <h3 class="caption">{{ title }}</h3>
            </div>
        </a>
        {{ /collection:products }}
    </div>

</section>
To get the specific details of individual products, you’ll have to create multiple clickable tiles. However, to see these details, you’ll have to create a template. Using the same folder we just created, index.html template, create a new file named details.html.
I know, I included some inline styles which aren’t exactly ideal. But, it’s what was most simple for the purpose of this demo.
Here's what your details.html file should look like:
<section class="regular">
<header>
<h1>{{ title }}</h1>
{{ description wrap="h2" }}
</header>
<article class="content">
{{ if image }}
<img style="width: 200px; margin: 20px;" src="{{ image }}" class="intro-image" align="left">
{{ /if }}
<div>
<div>
Price: <strong> {{ price | round:2}} $</strong>
</div>
<div>
<button class="snipcart-add-item btn btn-primary"
data-item-name="{{ title }}"
data-item-price="{{ price }}"
data-item-description="{{ description }}"
data-item-url="{{ url }}"
data-item-image="{{ image }}"
data-item-id="{{ id }}">Buy now</button>
</div>
<div>
{{ content }}
</div>
</div>
</article>
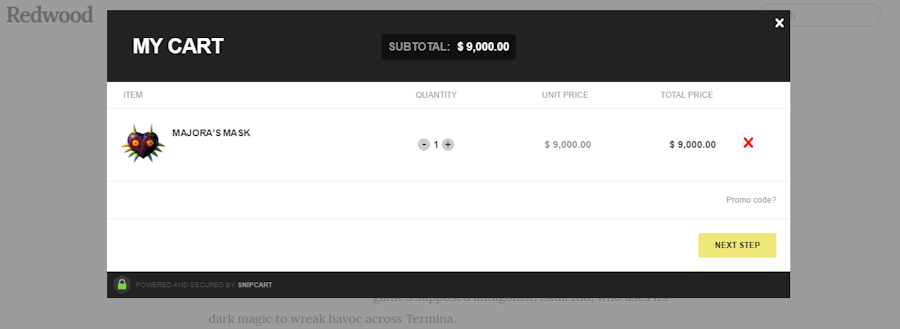
</section>You’ll notice that I’ve added the buy button required for Snipcart and the attributes added in the product fieldset.
If you click on the buy button, Snipcart should pop up! HOORAY!

Conclusion
You see, Statamtic is fairly easy to use and setup. The documentation is thorough and complete. Not to mention, the concepts are easy to understand and implement. I’d say that it took about 2 hours to set this demo up. And that’s including the IIS installation, which, in reality, was the longest part of this process.
Overall, I really enjoyed working with Statamic… despite the fact that I’m not really a PHP kinda guy! ;)
Take a peek inside our store demo, right here and feel free to browse the source code on Github! Enjoy!


