How to Leverage GraphQL with a Headless CMS [Takeshape Tutorial]
In a rush? Skip to technical tutorial or live demo.
The first time we wrote about GraphQL, back in 2017, we described it as a shiny new tool developed by Facebook.
GraphCMS, which we presented in that article, was one of the first softwares to use it as a core feature.
It was just another drop in a sea of development tools. No biggie, right?
Not quite.
I think we can all agree that GraphQL is now integral to the modern web ecosystem.
Proof #1: the number of static site generators and headless CMSs making it a prime built-in feature has been skyrocketing in the last few months.
One of them being TakeShape.io, which I’ll explore further in a technical demo at the end of this post.
First, I want to take a look at:
The state of GraphQL in 2019
The benefits it brings to headless CMSs
The tools that feature GraphQL
An introduction to TakeShape.io
Let’s begin by wrapping our heads around the concepts behind GraphQL.
1. Getting up-to-date with GraphQL

You may be reading without even knowing what GraphQL really is. For clarity’s sake, it’s a query language for APIs that defines how to fetch data from one or many databases.
For a proper technical GraphQL introduction I suggest our first post on the matter.
A lot has changed since its first use case with FB mobile apps back in 2012, mostly regarding its adoption. GraphQL was open-sourced in 2015, giving it an initial burst of life for a larger number of devs. 4 years later, its rising presence in our industry is undeniable.
Proof #2 that GraphQL is an integral part of web development: its adoption by tech giants. Apart from Facebook, other major players like GitHub, Shopify, Pinterest, Paypal & Twitter all use GraphQL in some way or another.
Impressively enough, it fits directly in the adoption timeline that Lee Byron, GraphQL’s creator, had in mind a few years ago. The next step according to him? Omnipresence in web platforms. We have every reason to believe him.
Prepare to hear about GraphQL a lot in 2019. Many publications rank it as one of the most important JS trends to keep an eye on in the next few months. Npm itself says that you’ll need to learn it in 2019 & GraphQL experts are already drooling thinking about the bright future of the tech.
But… wait a second here.
Hype is one thing, but one of my colleagues said something about it that I found pretty interesting:
It’s true that if intensive public talk can sometimes oversell something (that Birdbox movie, anyone?) it can also overshadow its initial merits.
For us, these pillars for GraphQL are:
The GraphQL specification has been developed as a way to define single highly flexible API endpoints giving developers access to complete relational models.
It is incredibly powerful because it gives consumers total control over how they want the requested data to be structured, as well as how deep they want to go into entity relations.
In the same vein, a GitHub engineer explains why he can’t wait for GraphQL to be “uncool” in this episode of JAMstack Radio.
What about that old GraphQL vs. REST talk?
I won’t lose myself too long here because it’s also a topic we discussed in our first GraphQL piece and the debate hasn’t really changed.
Of course, the rising GraphQL adoption is forcing us to keep this discussion going but REST APIs are still alive & well and not under any threat of extinction, for now. You can’t put them aside and say that one is the other’s predecessor because they’re simply not of the same nature. They can live together just fine in the same environment.
Still, GraphQL comes as an upgrade for certain functions that weren’t optimal with REST APIs.
2. How headless CMS are leveraging GraphQL
If you’ve paid attention in the last few months, you might have observed a lot of tools adding GraphQL as a built-in feature, or new ones breaking into the market with GraphQL as a selling point.
This list includes:
Gatsby (SSG) - The popular React-powered static site generator leverages GraphQL to fetch data from multiple sources.
Gridsome (SSG) - The Vue.js equivalent to Gatsby, also featuring GraphQL.
GraphCMS - The name says it all. It was probably the first headless CMS to put GraphQL forward.
Strapi - This neat Node.js headless CMS lets you use REST or GraphQL APIs.
Unite CMS - Still in beta, this new headless CMS is built on Symfony 4 & GraphQL.
CannerCMS - An open-source API-driven headless CMS.
TakeShape - More on this new headless CMS down below.
In this post, I want to focus solely on the headless CMSs in this list. More precisely, how GraphQL is making them better and worthy of your attention.


There are 4 main advantages that I think it’s important to highlight:
→ Better API to retrieve data: The main premise of GraphQL is to offer the capacity for devs to chose exactly what they need from the database and receive that data in a predictable way. Not only that, but you can fetch many resources in a single request. Say goodbye to over bloated server/database requests.
→ Possibility to insert data from external applications: Isn’t it what APIs have always been used for? Sure, but once again GraphQL makes this process more structured and organized. One great thing that headless CMSs enable is modular development. So, when scaling an app you’ll need to plug some external functionalities and GraphQL assures that you’ll only get what you really need from each of them.
→ Great performances: Smaller, more efficient requests to databases and external apps will no doubt be beneficial for your system’s performance.
→ Easy delivery to multiple channels: GraphQL is embracing modern trends. With the rise of mobile, wearable technologies & IoT it’s becoming important to develop APIs that can easily serve multiple channels.
It’s time to move from theory to practice, with TakeShape.io as our guinea pig.
3. What is TakeShape.io?

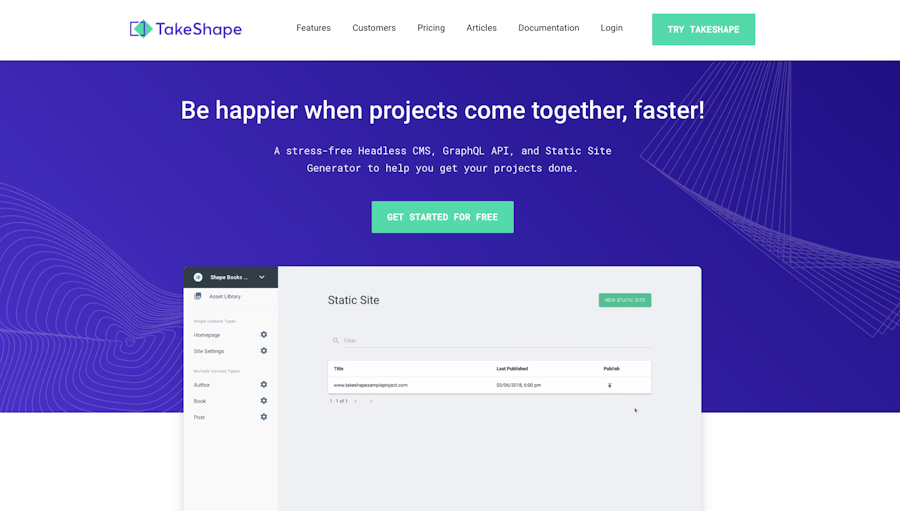
TakeShape is a new JAMstack-oriented tool that combines the functionalities of a headless CMS, GraphQL API and static site generator.
It’s only a few months old since it was officially launched in September 2018. It caught our attention thanks to their JAMstack-related content and we’ve been eager to try it ever since.
It was built with the premise that “content management shouldn’t be hard”. TakeShape was crafted with developers in mind, giving them a frictionless framework to create projects on. But content crafters won’t be left in the dark, thanks to an intuitive interface and the necessary features to manage content efficiently.
It fully embraces the latest modern development trends, making the best of the built-in GraphQL API and even offering its own static site generator. But, don’t worry, as with every good headless CMS, you can also attach to it the frontend tech of your choice.
The founders also seem to be all-around good guys from the small discussion we’ve had with them prior to building this demo, so I’m really happy to finally dive into it!
4. Technical tutorial: Building an app with headless CMS & GraphQL
Context
The idea behind this demo comes from a therapeutic practice that emphasizes the importance to list things you’re grateful for, every day. I’ll build a small app that will allow users to send entries to what I’ll call our Gratitude Journal. I’ll then use GraphQL to fetch the data submitted in the form and publish to a website that will showcase these entries.
Prerequisites:
A TakeShape account (for free)
A Netlify account (also for free)
Basically, I’m going to use TakeShape to build the website and store the data. I’ll then use Netlify functions to add entries to the GraphQL database with TakeShape API. Netlify functions will act as a kind of proxy to make sure the API keys aren’t exposed to the wild and that the entry I’ll insert into my database is in the right state.
Let’s do this!
4.1 Setting up TakeShape
First things first, you need to setup your TakeShape project.
Once your account is created and you’re logged in, you’ll be ready to create your first content type. A content type in TakeShape is the representation of any object or document in your application.
For example, if you were building a classic e-commerce project, you could have a content type for your products, another content type for the product categories and so on. You can then very easily define relationships between your entries.
You’ll end up with a GraphQL database that can be queried directly into the API explorer in the TakeShape app or via their API endpoint. This is a very easy way to get started with GraphQL. For this case, create two content types.
The first one will be for the messages people can submit on the site. Let’s call this content type: Entry.

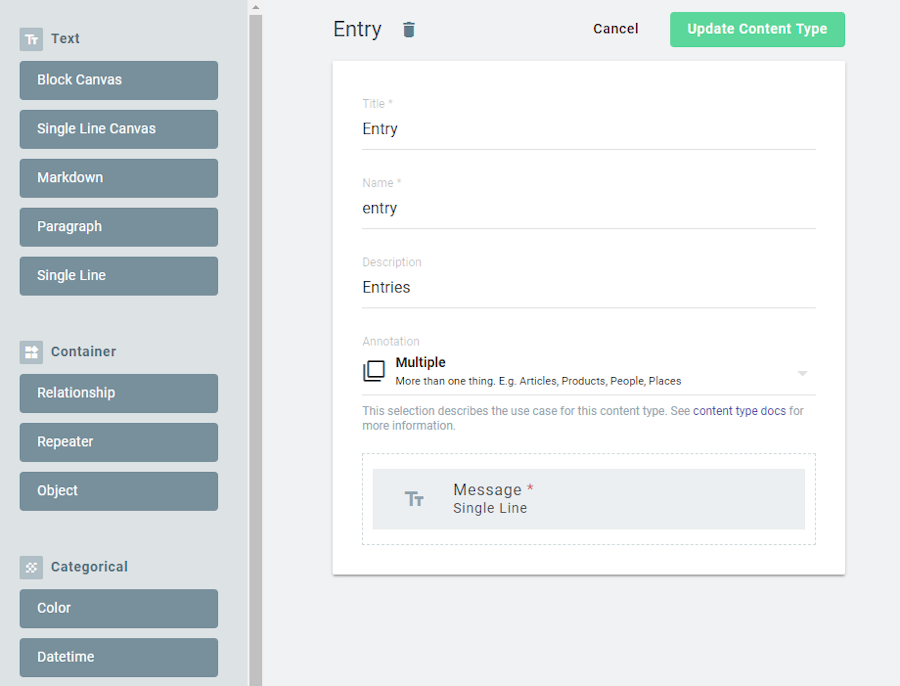
You can define your fields by drag-and-dropping the different controls available in the right side panel in TakeShape app. In this case, use a single line to represent the message. Please note that I used Multiple as Annotation value so we can create more than one entry.
Create the second content type, which will be Home. This will be useful since you want your marketing team to have control over the wording on the homepage. This is where they’ll edit the content. This is going to be a Single entry since it can be added only once (there will be only one homepage).

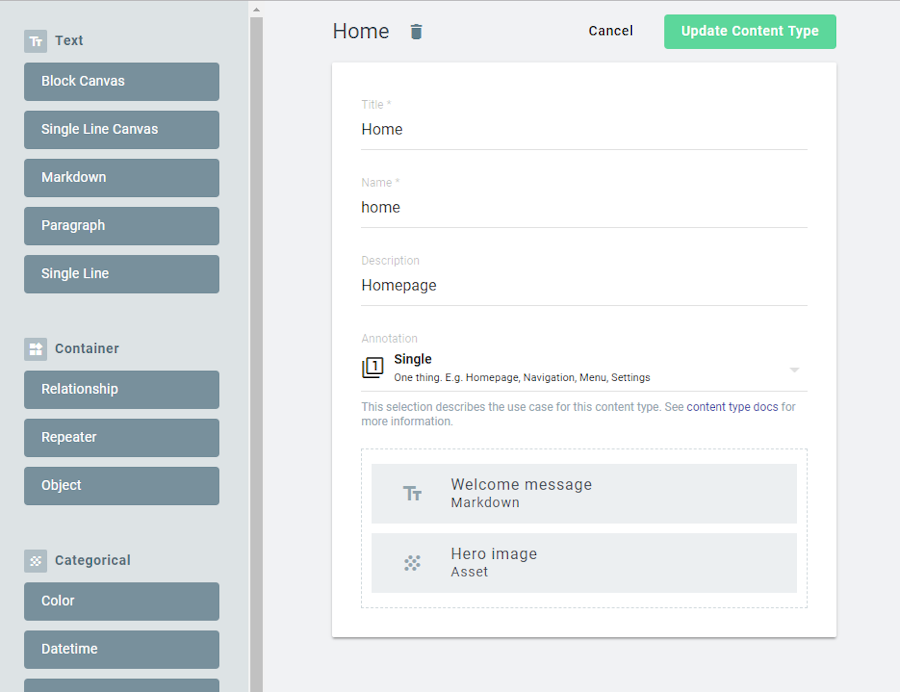
Easy, wasn’t it? Your CMS is ready now, you only need to build the website and the function that will add new entries to your GraphQL database.
Time to dive into the code!
4.2 Creating the project
The code for TakeShape templates and the upcoming Netlify function will reside in the same Git repository.
You’ll need to use TakeShape CLI tools to initialize the project. So you can install it via npm.
npm install takeshape-cli -gCreate a new folder, and in this folder start a new npm project:
npm initFollow the steps to create your project as usual.
Then, you’ll need to initialize the TakeShape project:
tsg initFollow the steps by entering your TakeShape credentials and, you’ll be prompted to answer a couple of questions. Their CLI is well made so this shouldn’t be complicated.
You should now have a couple of files in your folder. As suggested by TakeShape CLI, write a .gitignore file in the root of the folder and add some files to ignore in there:
node_modules
build
.tsgrc
graphql.config.json
Then, you can initialize a new Git repository:
git init4.3 Adding function for the GraphQL database
It’s now time to generate the Netlify function that will be responsible for submitting new entries to TakeShape.
As mentioned earlier, one of the cool things about a GraphQL-powered CMS is that inserting new data is as simple as querying. This isn’t something you’ll often see in demos like this. Most of the time you’ll just gather the data with some queries and display it. In this case, you’ll use GraphQL mutations to create new entries.
Let’s start by adding a few dependencies again. You’ll need to install netlify-lambda npm package which will be used during the build process. This is the CLI tool created by Netlify to compile and test functions locally:
npm install netlify-lambda --save-devAlso, install node-fetch to interact with TakeShape API:
npm install node-fetch --saveCreate a new file at the root of your project named netlify.toml. That’s where you’ll specify where the functions will be located in the project. The Netlify build process will use this file to deploy everything correctly.
[build]
    functions = "build/functions"
The functions will need to be compiled into the build/functions folder. Otherwise, Netlify won’t see them and they won’t be available. You’ll need to use netlify-lambda CLI tool to compile your function. The build function is going to be helpful here, this function awaits one parameter that is the path to the uncompiled functions; your source code.
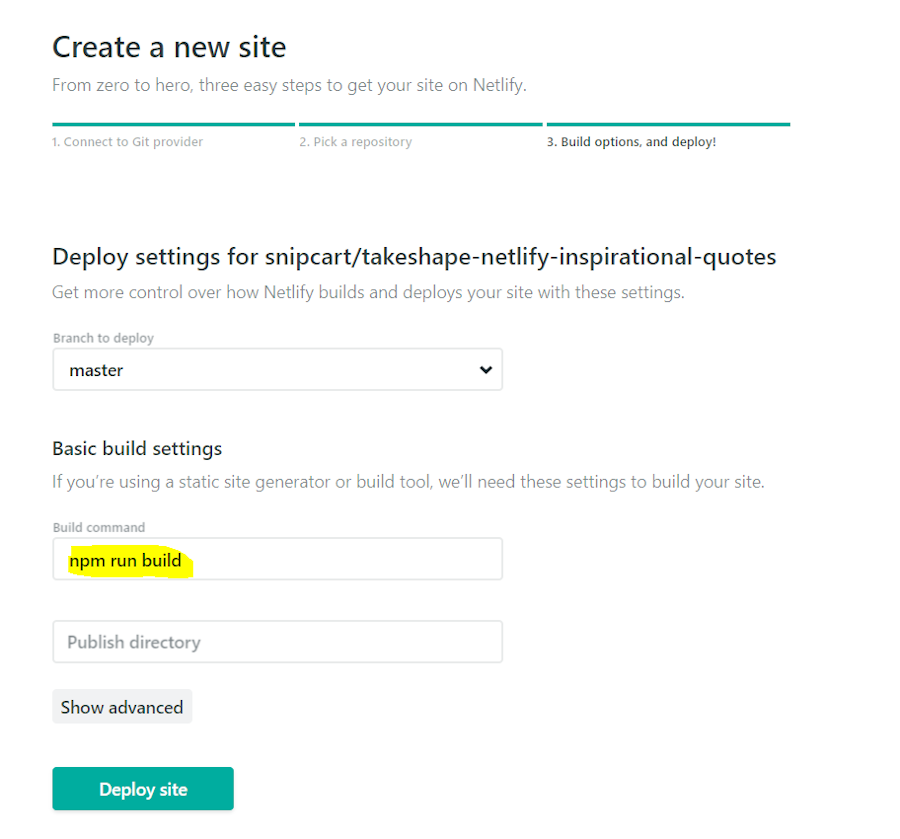
Open your package.json file and add a new script named build.
{
    ...
    "scripts": {
        "build": "netlify-lambda build src/functions"
    },
    ...
}
This is what you’re going to use in Netlify as the build command.
You’ll need two standalone Netlify sites for this demo. One that will be responsible to host your functions (this is going to be an API, in a way) and the other will be the output from TakeShape, the public website. I’ll come back to this later.
For now, create your function. Create a new folder: src/functions at the root of your project. Then create a file named add-entry.js in it.
You’ll need to run a mutation in this function using TakeShape API. It’ll look like this:
mutation {
  createEntry(input: {
    message: "New message",
    _enabled:false
  }) {
    clientMutationId
  }
}
Basically, you’ll write a new entry in TakeShape’s GraphQL datasource that isn’t enabled by default. Your site administrators will therefore be able to review the messages before publishing them on the public website.
Here’s the code for the function itself:
import fetch from 'node-fetch';

const { TAKESHAPE_API_KEY, TAKESHAPE_PROJECT_ID } = process.env;

exports.handler = async (event) => {
    const requestBody = JSON.parse(event.body);
    const body = {
        query: `
        mutation {
            createEntry(input: {
              message: "${requestBody.message}",
              _enabled:false
            }) {
              clientMutationId
            }
          }
        `
    };

    return fetch(`https://api.takeshape.io/project/${TAKESHAPE_PROJECT_ID}/graphql`, {
        method: 'post',
        body: JSON.stringify(body),
        headers: {
            'Content-Type': 'application/json',
            'Authorization': `Bearer ${TAKESHAPE_API_KEY}`
        },
    })
    .then((response) => {
        return {
            statusCode: response.status,
            headers: {
                'Access-Control-Allow-Origin': '*',
                'Access-Control-Allow-Methods': 'POST, GET, OPTIONS',
                'Access-Control-Allow-Headers': 'Content-Type'
            },
            body: JSON.stringify(requestBody)
        }
    })
    .catch((error) => {
        return {
            statusCode: 400,
            body: JSON.stringify(error)
        }
    });
}
Later on, you’ll need to configure some environment variables on Netlify’s side to store TakeShape’s API key and Project ID so we don’t commit them on GitHub. This API key would allow anyone to insert or delete data from your GraphQL database. You really don’t want this shared externally.
Now, commit these files. Using Github, create a new repository and push the project.
git add . -A
git commit -m "Initial commit"

git remote add origin <repo_url>
git push origin master
Then, open your Netlify account and create a new site from this repository.

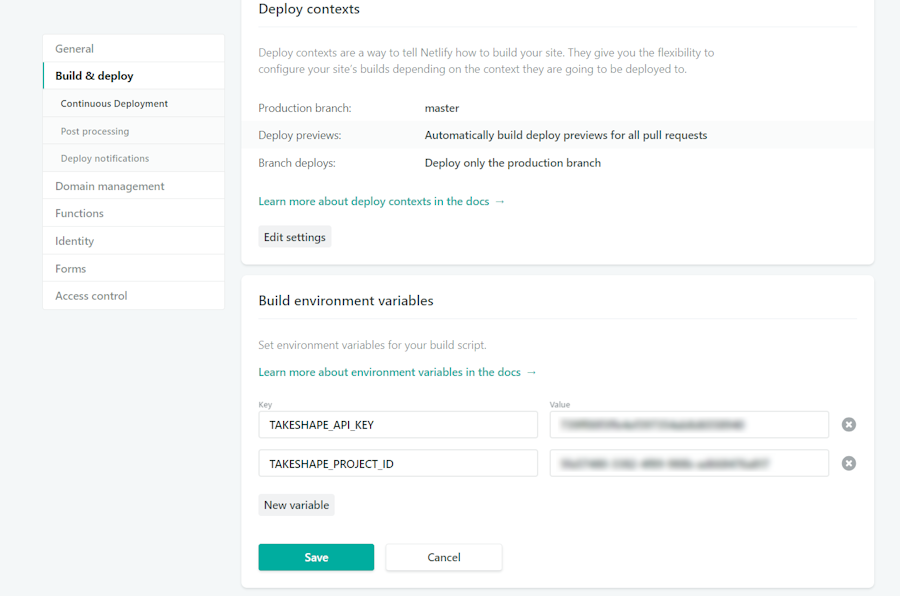
In your site settings, go to Build & Deploy and scroll down to the Build environment variables section.
You’ll need to add two environment variables: TAKESHAPE_API_KEY and TAKESHAPE_PROJECT_ID.

Now, in your TakeShape dashboard, you’ll need to craft a new API key with Read/Write permissions.

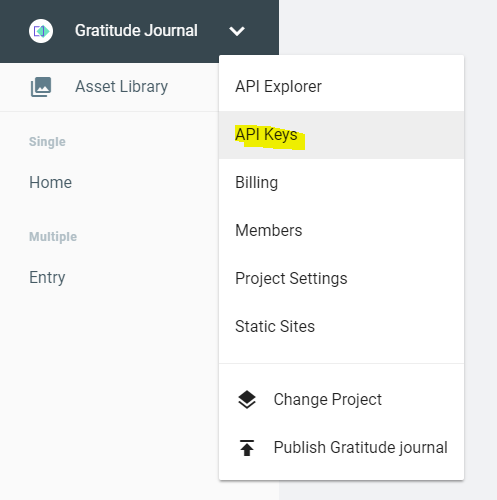
Make sure to note the API key value since you won’t be able to view it anymore. Use this value to specify the TAKESHAPE_API_KEY environment variable in Netlify’s dashboard.
To get your project ID, look at the URL in TakeShape’s dashboard (it’s the guid in it).


With this, your function should now be working as expected and you should be able to submit new entries to TakeShape CMS. You might need to redeploy your site in Netlify, though, to make sure your function is aware of new environment variables.
To test it, you can use an HTTP client such as Postman or Insomnia.

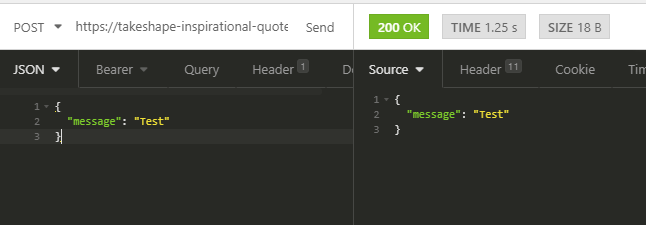
4.4 Building the site
Now that your API is ready, you can build your website. Awesome.
When I started playing around TakeShape in preparation for this demo, I wasn’t even aware that they had their own static site generation feature. That’s really cool in my opinion. It’s solid and enables a quick start for small projects, so that’s what I’m using here.
Make sure that the project you were working on is still open in your favorite code editor. Next thing to do is building the TakeShape config file. At the root of your project, create a new file named tsg.yml. This is where you’ll create your routes and map the templates/queries to them.
Here’s what’s the config looks like:
templatePath: src/templates
staticPath: static
buildPath: build
routes:
  homepage:
    path: /
    template: pages/homepage.html
    context: data/homepage.graphql
What does it mean? You’ll have a single route, the homepage, that will render the homepage.html template and use the data coming from the homepage.graphql query.
Each page specified in the routes array consist of three elements:
The path, which is the URL of the page
The template, which will be the view itself, the HTML markup
And the context, which will be the GraphQL query that will run and populate the view model.
Once you start working with it a bit, you quickly realize it makes a lot of sense.
Also specified in there is the staticPath. This path is the folder where all your static assets, such as Javasript or CSS files, should reside.
Start by creating our query file. Generate a file named homepage.graphql in src/templates/data folder.
query {
    entries: getEntryList(sort:{field:"_createdAt", order: "desc"}) {
        items {
        message,
        _createdAt
        }
    }
    home:getHome {
      heroImage {
        path
      }
      welcomeMessage
    }
}
Your query will return the list of entries and the homepage details. You’ll have access to all this information in your template file.
Let’s create a file named homepage.html in src/templates/pages folder:
<!DOCTYPE html>
<html>
    <head>
        <title>Gratitude Journal</title>
        <script src="https://code.jquery.com/jquery-3.3.1.slim.min.js" integrity="sha384-q8i/X+965DzO0rT7abK41JStQIAqVgRVzpbzo5smXKp4YfRvH+8abtTE1Pi6jizo" crossorigin="anonymous"></script>
        <script src="https://cdnjs.cloudflare.com/ajax/libs/popper.js/1.14.6/umd/popper.min.js" integrity="sha384-wHAiFfRlMFy6i5SRaxvfOCifBUQy1xHdJ/yoi7FRNXMRBu5WHdZYu1hA6ZOblgut" crossorigin="anonymous"></script>

        <link rel="stylesheet" href="https://stackpath.bootstrapcdn.com/bootstrap/4.1.3/css/bootstrap.min.css" integrity="sha384-MCw98/SFnGE8fJT3GXwEOngsV7Zt27NXFoaoApmYm81iuXoPkFOJwJ8ERdknLPMO" crossorigin="anonymous">
        <script src="https://stackpath.bootstrapcdn.com/bootstrap/4.1.3/js/bootstrap.min.js" integrity="sha384-ChfqqxuZUCnJSK3+MXmPNIyE6ZbWh2IMqE241rYiqJxyMiZ6OW/JmZQ5stwEULTy" crossorigin="anonymous"></script>

        <link rel="stylesheet" href="site.css" />
    </head>

    <body>
        <div class="container">
            <section class="header">
                {% if home.heroImage %}
                    <div class="header__image">
                        <img src="{{ home.heroImage.path | image({w: 1140, h: 500, q: 90, crop: 'faces'}) }}" />
                    </div>
                {% endif %}

                <div class="header__intro">
                    {{ home.headerHtml | safe }}
                </div>
            </section>

            <form class="message__form form-group">
                <div id="success-message" class="message__input" role="alert" style="display: none">
                    Thank you for the contribution, we'll review it and it will be visible on the site shortly if approved.
                </div>
                <input autocomplete="off" type="message" class="message__input" id="message" placeholder="Type what you are grateful for and press Enter">
                <button type="submit" style="visibility: hidden">Submit</button>
            </form>

            <section class="entries">
                <ul class="entries__list">
                    {% for entry in entries.items %}
                        <li class="entries__list__item quote__container">
                            <p class="quote">
                                {{ entry.message }}
                            </p>
                        </li>
                    {% endfor %}
                </ul>
            </section>

            <footer class="footer text-center">
                Made w/ ? & <a href="https://takeshape.io">TakeShape</a> by <a href="https://snipcart.com">Snipcart</a>
            </footer>

        </div>
        <script src="app.js"></script>
    </body>
</html>
Noticed the app.js file just before the closing body tag? This is where you’ll add the code that will interact with your Netlify function. Build this file in a new folder named static at the root of your project:
document.addEventListener('DOMContentLoaded', function() {
    const form = document.getElementsByTagName('form')[0];
    const input = document.getElementById('message');

    const API_URL = 'https://takeshape-gratitude-journal-api.netlify.com/.netlify/functions/add-entry'

    let processing = false;

    form.addEventListener('submit', function(event) {
        event.preventDefault();

        if (processing) {
            return;
        }

        processing = true;

        fetch(API_URL, {
            method: 'POST',
            body: JSON.stringify({message: input.value})
        })
        .then(function() {
            document.getElementById('success-message').style.display = 'block';
            document.getElementById('message').style.display = 'none';

            processing = false;
        })
        .catch(function() {
            processing = false;
        })
    })
});
There's also a file named site.css that is included in the header of the site. Create this file in the static folder and just like app.js (please refer to this file on Github), this asset will be deployed and can be included it directly into your markup.
Essentially, you’re going to catch the form submit event, and make your request to the API. That’s pretty straightforward.
Now, you can test it locally using TakeShape tooling. In a command prompt, navigate to your project and use the watch task:
tsg watchYour project will then be compiled into the build folder, which was configured in the tsg.yml file. If you start a web server on this path, you should be able to see your site.
4.5 Deploying the website
Lastly, you need to deploy the site. TakeShape has plenty of deployment options. In this case, I’ll stick to Netlify since it’s easy to use and I’m already relying on their platform for the API.
Open your project settings:

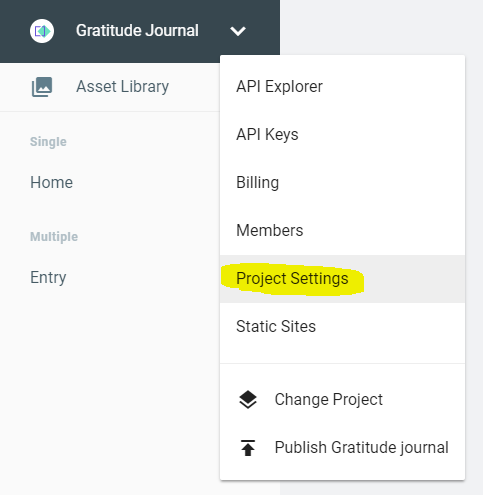
Then, you’ll see the Netlify in the Integrations panel. Connect your Netlify account.
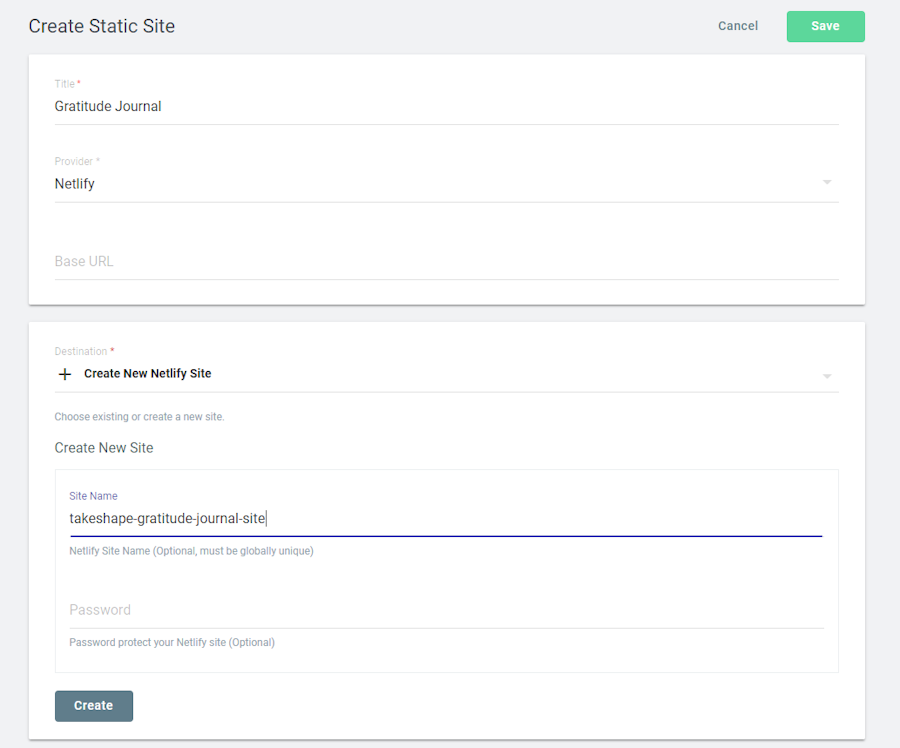
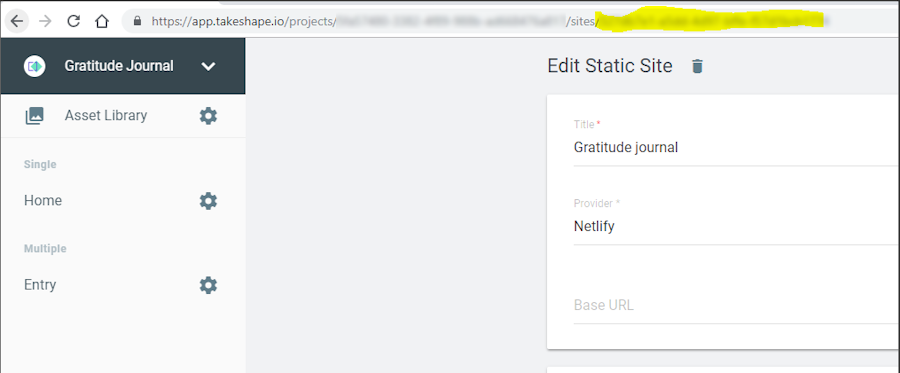
Next, you’ll need to create a Static site in TakeShape:

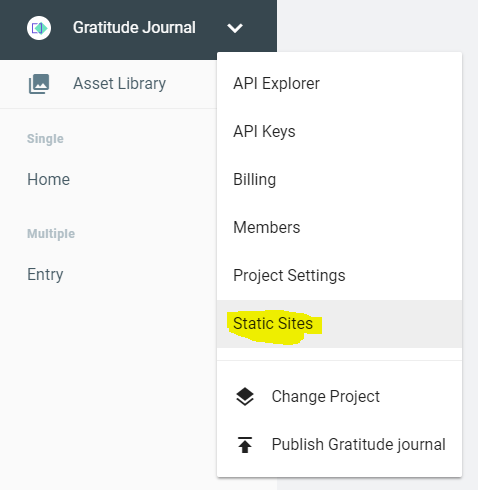
Fill the form by selecting Netlify as provider. You’ll be able to generate a new Netlify site directly from this form.

Now, the deployment.
It’s very simple using TakeShape CLI. Personally, I like to deploy my sites using the site ID. You can find it in your browser URL when you’re in the edit form of the static site:

Then, in your terminal:
tsg deploy --site <site_id>Bing! Your website should now be live, and the API should work as expected.
Live demo & GitHub repo
In case you were wondering how to manually monitor and accept the messages submitted in the form by users, this GIF shows you the way:

See the live demo here
See the GitHub repo here
5. Closing thoughts
Proof #3 that GraphQL is now integral to web development: It’s awesome and integrates so well into modern dev workflows. It’s hard not going back to it once you’ve tasted it.
I had a blast using TakeShape and Netlify functions. These tools make it possible to create full-blown applications without having to deal with servers and infrastructure. You know that’s what we’re all about.
The TakeShape team really did a solid job with their application. Their dashboard is clear and simple, their API is exactly how we expect it to be and building relationships between content types is totally straightforward.
I spent more or less a day putting everything together. I didn’t hit any major hiccups and it was a pretty smooth development ride all around.
I didn’t feel the need to push anything further for this demo. It was meant to be pretty simple and to show how we can insert data into the CMS programmatically. I think this stack would be a great fit for a blog or any content-driven application.
I would also love to eventually use TakeShape for a straight-up e-commerce integration with Snipcart, so I’m saving this on the roadmap! ;)
If you've enjoyed this post, please take a second to share it on Twitter. Got comments, questions? Hit the section below!


