Lean AngularJS E-Commerce with Snipcart & Yeoman
Sun's shining in beautiful Québec City, and I'm about to leave for my personal vacation [insert sunglasses emoji].
And I feel fancy. As a matter of fact, I feel like having myself a tropical summer drink. However, thanks to our content guy, I have one last duty to accomplish before I leave. My task: prove to our audience that enabling AngularJS e-commerce with Snipcart, our shopping cart platform, is child's play.
Quick word on AngularJS
Mandatory protip: Make sure you know your pure JS before using a framework.
AngularJS is an open-source JavaScript web development framework with a strong focus on data binding, dependency injection, and single-page applications. Its initial version was developed by Google in 2010, and its highly anticipated v2.0 should fully ship by the end of the year (hopefully). You can read more about both versions on good ol' Wikipedia.
Thousands of small to huge sites are already powered by Angular. And today, we'll add one more to the list with a tiny, funky shop demo.
In this post, I'm going to show you how to set up quick AngularJS e-commerce by integrating Snipcart's shopping cart to a single-page application.
Plus, to quench my aforementioned estival thirst, we're going to be selling... Piña coladas (and other cocktails)!
Let's do it.
Step 1: Getting our Angular e-commerce project ready with Yeoman
To help us build our online demo shop, we're going to use Yeoman, a useful scaffolding tool. Yeoman is a dev tool used by dozens of developers to generate and automatize their project creation. The community is maintaining a bunch of generators, but you could also create yours. For this post, we'll use an existing one employed by tons of developers.
So first, allow me to point you towards Yeoman's excellent AngularJS generator.
Installing a project here is pretty straightforward; I'll let you do it yourself with the instructions in the readme.
Start by executing the following command:
yo angularWe'll just need to keep the following points in mind when generating our brand new project:
At Snipcart, we're big fans of Gulp. Still, for this project, we advise not to use Yeoman's experimental gulp feature. Our demo shop will be used by a ton of thirsty folks craving cocktails: we can't afford untested features!
Please do not activate the AngularJS router package. We prefer using the awesome, popular angular-ui-router.
Choose your project name wisely; it will appear in important places in the codebase.
You should automatically include Bootstrap to boost development speed. This Yeoman generator handles it like a charm!
Now that our installation is done, we'll just enter "grunt serve" and see a new page open in our browser.
Step 2: Including Snipcart's shopping cart into our Angular application
Now this will probably be the most simple step. We just need to include the following snippet of HTML inside our main layer file (~/app/index.html):
<link id="snipcart-theme" type="text/css" href="https://cdn.snipcart.com/themes/2.0/base/snipcart.min.css" rel="stylesheet">`Then we'll go ahead and include Snipcart's JavaScript with our API key:
<script type="text/javascript" id="snipcart" data-api-key="{YOUR_API_KEY}" src="https://cdn.snipcart.com/scripts/2.0/snipcart.js"></script>`And voilà, Snipcart's shopping cart platform lives inside your single-page Angular app!
Step 3: Creating our e-commerce products
For this example, we'll create a static .json file that will return a few products. It could be replaced by an API or any data source that you may need.
Here is my products.json file:
[{
    "name": "Piña colada",
    "price": "8.00",
    "id": "1",
    "url": "http://snipcart-angular.netlify.com/data/products.json",
    "description": "The piña colada is a sweet cocktail made with rum, coconut cream or coconut milk, and pineapple juice",
    "image": "http://snipcart-angular.netlify.com/images/pina-colada.3f31d970.png"
}, {
    "name": "Margarita",
    "price": "9.00",
    "id": "2",
    "url": "http://snipcart-angular.netlify.com/data/products.json",
    "description": "The margarita is a cocktail made with tequila and citrus fruit juice.",
    "image": ""
}, {
    "name": "Beer",
    "price": "5.00",
    "id": "3",
    "url": "http://snipcart-angular.netlify.com/data/products.json",
    "description": "You know what beer is ;)",
    "image": ""
}]
One important thing to get right with Snipcart and single page applications is the handling of our crawlback security check Since we don't execute JavaScript when crawling web pages, you can't simply point the data-item-url to the page that renders the product component. This is why we'll use our JSON crawler. Our crawler also supports receiving an array of JSON objects. It will scan through all the objects of the array to validate the order correctly. So each product we defined in our products.json file will share the same URL: http://snipcart-angular.netlify.com/data/products.json.
First thing we'll do is add a service to fetch our products. Let's create the file services/products.service.js. It should look like this:
'use strict';

angular.module('snipcartAngularApp')
  .factory('Product', function ($http, $q) {
    var json = $http.get('/data/products.json').then(function (response) {
      return response.data;
    });

    return {
      query: function() {
        return json;
      },
      get: function(id) {
        var q = $q.defer();

        json.then(function (items) {
          angular.forEach(items, function (item) {
            if (id == item.id) {
              q.resolve(item);
              return;
            }
          })
        });

        return q.promise;
      }
    };
  });
Our factory will expose two methods, query and get. query will return all products and get a single product by its unique id.
We'll then need to wire our app and create two routes. A first route that will show available cocktails, and a second one that will show a specific cocktail details.
To define routes, we chose to use angular-ui-router instead of the default angular-router. Why? First, because it offers much more features. Also, since Snipcart uses a route system too, we must be able to write some code using angular-ui-router features to avoid conflicts.
Let's start by adding angular-ui-router dependency with Bower.
bower install angular-ui-router --saveMake sure that the script is included in index.html:
<script src="bower_components/angular-ui-router/release/angular-ui-router.js"></script>We'll now add our first route to render a component that will list all cocktails. In our app.js file, we'll need to inject ui.router and $stateProvider.
angular
  .module('snipcartAngularApp', ['ui.router'])
  .config(function ($stateProvider) {
    $stateProvider
      .state('main', {
        url: '/',
        templateUrl: 'views/main.html',
        controller: 'MainCtrl',
        resolve: {
          products: function($q, Product) {
            var def = $q.defer();
            Product.query().then(function (data) {
              def.resolve(data);
            });
            return def.promise;
          }
        }
      })
  });
When defining the state we use the resolve option to fetch products. Our controller will then directly receive the list of cocktails.
We then need to create the controller that will show data; MainCtrl. Create a new file named main.js in the controllers folder.
'use strict';

angular.module('snipcartAngularApp')
  .controller('MainCtrl', function ($scope, products) {
    $scope.products = data;
  });
Product will be automatically injected by angular and we'll be able to set our products variable in the $scope with the AJAX request result.
Now we need to create the main.html template. Create the main.html file in the views folder.
<h1>
  Let's have a drink
</h1>

<div class="row">
  <div ng-repeat="product in products">
    <div class="col-md-4">
      <product-list-item product="product"></product-list-item>
    </div>
  </div>
</div>
You might notice the product-list-item tag. It's a component that we'll now create. This component will show the product details. We like to create components like those, because if we push the application further, we'll be able to re-use some code.
'use strict';

angular.module('snipcartAngularApp')
  .component('productListItem', {
    templateUrl: 'views/productlistitem.html',
    bindings: {
      'product': '<'
    }
  });
When we render the component, we pass the product as parameter. So we can add a binding to the component that will make it available in the template.
We then need to create the template productlistitem.html in the views folder.
<div class="thumbnail">
  <img src="{{$ctrl.product.image}}" />

  <div class="caption">
    <div>
      <h2 class="section-heading">{{$ctrl.product.name}}</h2>
    </div>
    <div>
      <a ui-sref="productDetails({productId:$ctrl.product.id})">More details</a>
    </div>
  </div>
</div>
Please note this attribute that we used:
ui-sref="productDetails({productId:$ctrl.product.id})This is a feature of angular-ui-router, it will add a link to the new state we will create shortly that will be responsible for rendering the cocktail details and the buy button.
We'll now open app.js file. We'll add the new state that we were referring to:
.state('productDetails', {
  url: '/products/{productId}',
  templateUrl: 'views/productdetails.html',
  controller: 'ProductsCtrl',
  resolve: {
    product: function ($q, $stateParams, Product) {
      var def = $q.defer();
      Product.get($stateParams.productId).then(function (data) {
        def.resolve(data);
      });
      return def.promise;
    }
  }
});
We'll then create the controller ProductsCtrl. Create a new file named products.js in the controllers folder:
'use strict';

angular.module('snipcartAngularApp')
  .controller('ProductsCtrl', function ($scope, $stateParams, product) {
    $scope.product = product;
  });
We'll inject $stateParams and Product. We'll then fetch the product using the product id passed in the $stateParams object and add it to the $scope.
Our template looks like this:
<div id="bar" class="col-md-6">
  <div class="row">
    <div class="col-lg-8 col-sm-6">
     <h2 class="section-heading">
       {{product.name}} ({{product.price}}$)
     </h2>
     <p class="lead">
       {{product.description}}
     </p>
    </div>

   <div class="col-lg-4 col-sm-6">
     <img class="img-responsive" ng-src="{{product.image}}" alt="" ng-if="product.image">
   </div>
 </div>

 <div class="row">
  <div class="col-lg-6 col-sm-6">
    <p>
      <buy-button product="product"></buy-button>
    </p>
  </div>

  <div class="col-lg-6 col-sm-6 text-right">
    <p>
      <a ui-sref="main" class="btn btn-default btn-lg">Back to the menu</a>
    </p>
  </div>
</div>
</div>
Note this line:
<buy-button product="product"></buy-button>We'll create another component that will render the Snipcart buy button, which will have access to the product object.
Create a file named buyButton.component.js in the components folder.
'use strict';

angular.module('snipcartAngularApp')
  .component('buyButton', {
    templateUrl: 'views/buybutton.html',
    bindings: {
      'product' : '<'
    }
  });
The template will be:
<button class="snipcart-add-item btn btn-lg btn-success"
  type="button"
  data-item-name="{{$ctrl.product.name}}"
  data-item-price="{{$ctrl.product.price}}"
  data-item-id="{{$ctrl.product.id}}"
  data-item-url="{{$ctrl.product.url}}"
  data-item-description="{{$ctrl.product.description}}"
  data-item-image="{{$ctrl.product.image}}"
  data-item-weight="{{$ctrl.product.weight}}">
    I want some! <span class="glyphicon glyphicon-ok"></span>
  </button>
If you test your application now, it should be working fine. However, we still need to do a small tweak to avoid conflict with Snipcart's router.
When we close the Snipcart popup, we let a !/ in the hash of the page. This will interfere with the angular router. Fortunately, angular-ui-router allows us to write a custom rule using $urlRouterProvider that we can inject.
In app.js file, we'll add this before defining states:
$urlRouterProvider.rule(function ($injector, $location) {
  var path = $location.path();
  var match = path.match(/(.*)!\/{0,1}$/);

  if (match) {
    return match[1];
  }
});
We'll also make sure that when the url is empty, we redirect to the default route.
$urlRouterProvider.when('', '/');This code will remove the trailing !/ from the URL whenever the window hash ends with it. So it will make your angular application works perfectly with Snipcart.
And that's it for the code! But you could also take some time to customize Snipcart's shopping cart however you want here.
Step 4: Deploying our frontend e-commerce app with Netlify
Like many times before (see suggested posts below), we'll leverage Netlify's power to deploy our project. Netlify is a top-notch, CDN-based hosting service. It streamlines builds, deploys and hosting for modern JAMstack and static sites. We're big fans; you can check out all the demo sites we've deployed on GitHub.
I advise checking out their quickstart documentation first. A simple npm command line will get your project up and running in a flash.
λ netlify init
? Directory to deploy (blank for current dir): dist
? Your build command (middleman build/grunt build/etc): grunt --force
Configuring automated deploys for
  repo: snipcart/snipcart-angular
  branch: master
  dir: dist
  cmd: grunt --force
? Looking good? Yes
And now, ladies and gentlemen, it's with a joyful heart that I present to you our demo site:

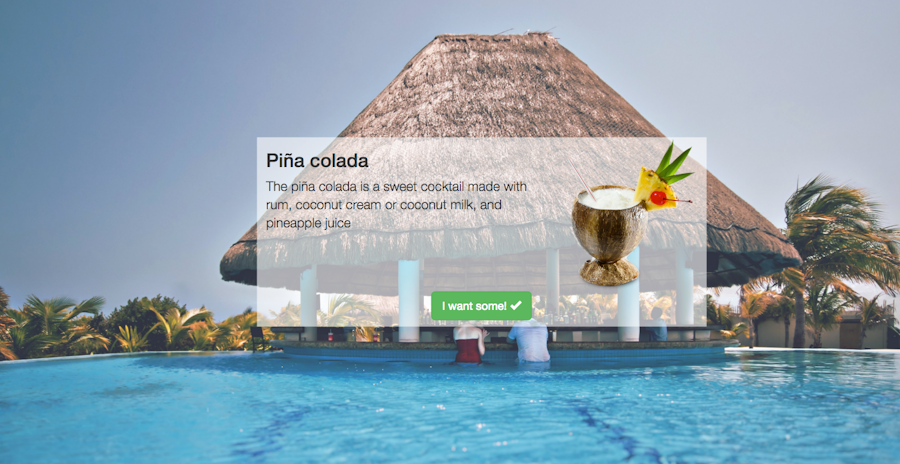
Keep them piña coladas coming!
Conclusion
I'm super happy to see that AngularJS can play well with our shopping cart platform for developers. In less than three hours, I had laid a lean, flexible foundation for a single-page application e-commerce project (side note: it took even less time with Vue.js). Much more features could be developed and added to this kind of web app, of course. I could've added a decoupled layer of content management with a headless CMS, for instance. But at least now you know that the e-commerce part won't be a hassle for you! :)
While I would have loved to use Angular 2, I thought it'd be smarter to serve the existing, huge userbase Angular 1 currently has. Plus, Angular 2 isn't quite production-ready yet (release candidate status right now). But we'll definitely come back to the blog to play with Angular 2 once it's more mature!
For now, though, I'm going to head out the office door and step into a world of sun and piña coladas. So I might not be super duper responsive on comments and pull requests for the next few days (don't worry though, our team will be there!).
Cheers!
If you found this post entertaining or valuable in any way, feel free to send a tweet our way. We'd love that! And if you have any questions or comments regarding AngularJS, Yeoman or Snipcart, hit the section below.


