Contact Form Processing Made Easy with Netlify
In a rush? Skip to technical tutorial
I've been working in web development for a long time.
How long? If I remember right, I set up my first web server while avoiding dinosaurs.
While my memory is a bit hazy, I can distinctly remember that a task early in my career was building form processing CGI scripts for clients. Technology has come a long way since my humble beginnings.
Modern web technologies such as the Jamstack and the rise of static websites have often raised concerns about dynamic functions.
But I want to reassure you: integrating forms into your projects shouldn’t be a hassle.
In this post, I want to talk about a particularly efficient tool that you should add to your dev belt: Netlify Forms.
I’ll explore this feature in-depth:
Netlify Forms basics
Form customization
Spam protection
Enhanced Netlify forms submission
Form notifications
Let’s add some context before getting all technical.
How I discovered Netlify Forms


In the old days, I used Perl (an incredibly flexible language) and had libraries to make form creation simpler, but it's shocking how often I had to write custom code just to take form input and send it along to someone else. Even after I eventually switched languages (ColdFusion FTW), I still spent a lot of time doing basic form processing.
That's why when I started getting heavily into the Jamstack (a few years ago, when we simply called them static web sites), form processing was my chief concern. Luckily a number of services have cropped up to support handling form input.
For example, my blog makes use of Formspree. It has a decent free tier (50 submissions per month), which works fine for my site.
However, I host on Netlify and one of the many services they provide is baked in form processing. If you don’t know Netlify yet, you should look into it right away. This team has done tremendous work to facilitate the integration of dynamic features into modern static, frontend-centric architectures (they also coined the term “Jamstack” back in 2015.)
Besides form processing, it can also handle serverless functions, user authentication, and, at its core, deployment & hosting.
But let’s focus on Netlify Forms here.
Netlify Forms pricing
Before we get started on the technical bits, let's talk pricing.
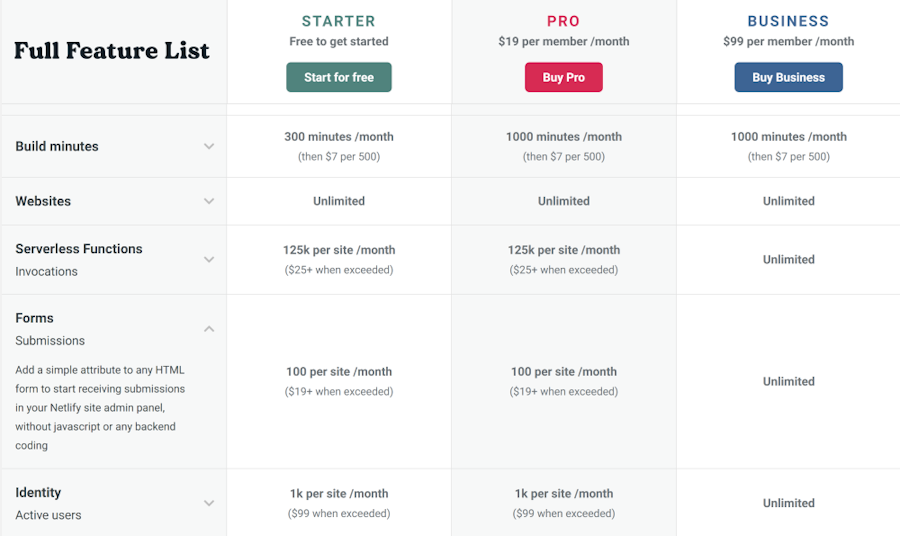
As of the time of writing this tutorial, the free tier of Netlify supported form processing with a max of 100 submissions per month. Oddly enough, the next level, called Pro, doesn't increase this number. However, if you go to the Business tier, there is no limit on the number of form submissions you can handle.
To see the latest details, go to the Netlify pricing page.

Let’s get technical: working with Netlify Forms
Let’s waste no more time and see it in action. I'll start from the very basic, but bear with me as I then show you how to customize, protect, and enhance your forms.
I'll finish it up by setting up notifications for form submissions.
Prerequisites
A free Netlify account
That's it, let's get started!
1. Getting started with forms on Netlify
First, let's generate a form:
<h2>Contact Form</h2>
<form method="post" name="Contact Form">
<p>
    <label for="name">Name:</label>
    <input type="text" name="name" id="name">
</p>
<p>
    <label for="email">Email:</label>
    <input type="email" name="email" id="email">
</p>
<p>
    <label for="comments">Comments:</label><br/>
    <textarea name="comments" id="comments"></textarea>
</p>
<p>
    <input type="submit">
</p>
</form>
We've got a simple contact form here asking for a name, email address, and comments.
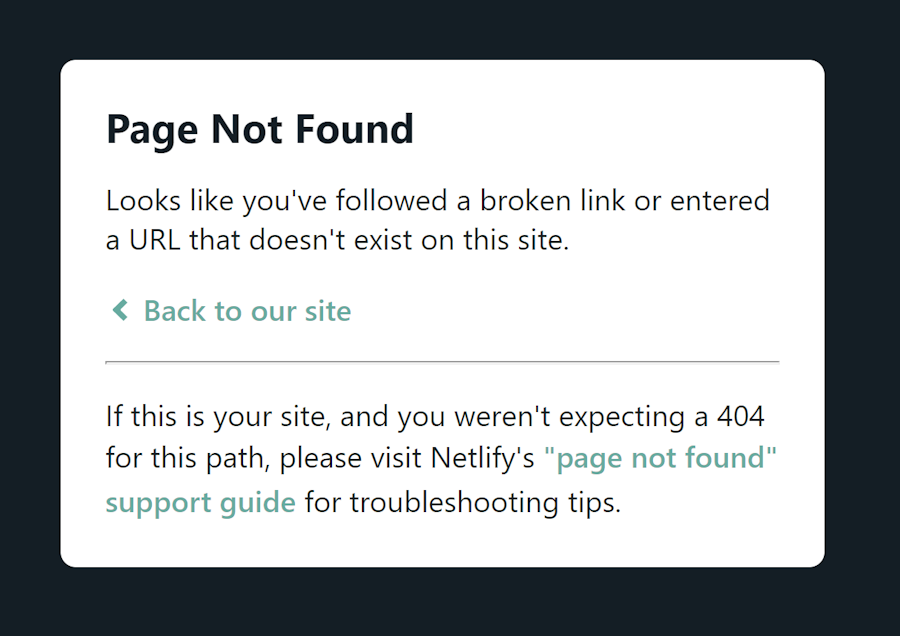
The form has the right method, but it has no action value (yet). If you deploy this as is to Netlify and then submit the form, Netlify recognizes something is wrong and displays this:

To start using Netlify forms, you need to add one attribute to your form tag:
<form method="post" name="Contact Form" netlify>That's it. Seriously. You can also use this instead:
<form method="post" name="Contact Form" data-netlify="true">Which technically is more HTML spec-compliant. I prefer this style but use what you want.
Now, if you submit the form, you get:

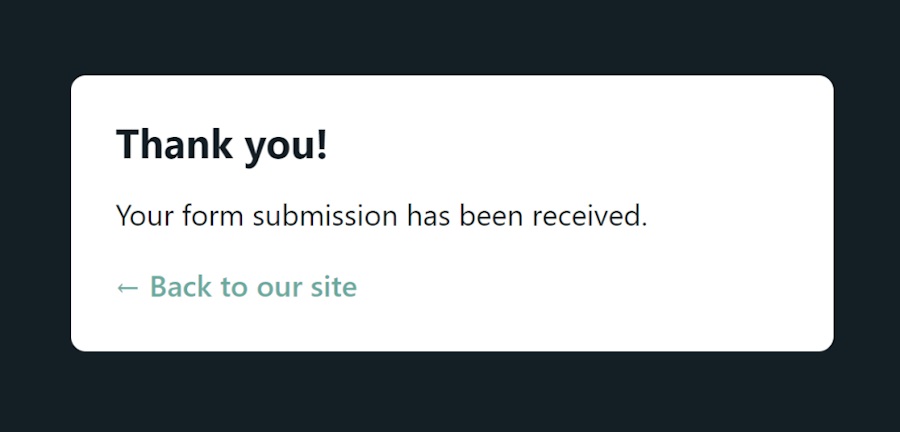
This is the default response to the form submission and we'll see in a minute how to modify this.
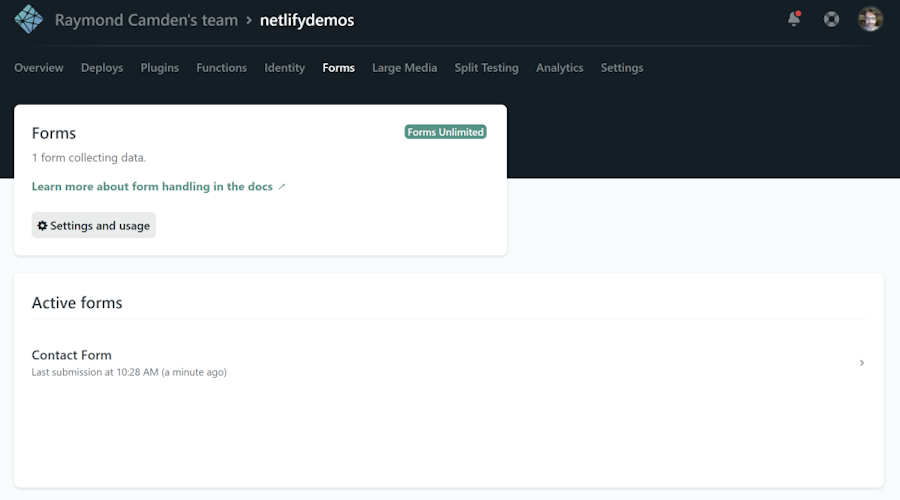
So, where did the form data go? If you log in to your Netlify dashboard, select your site, and hit the Forms link in the top navigation, you'll first see a listing of your forms.
Netlify lets you specify a name for your forms and if your site has two or more forms, you should absolutely set this value so you can organize submissions into different queues. Our form used the name "Contact Form", so you see that below.

After clicking on the form, you can then see your submissions:

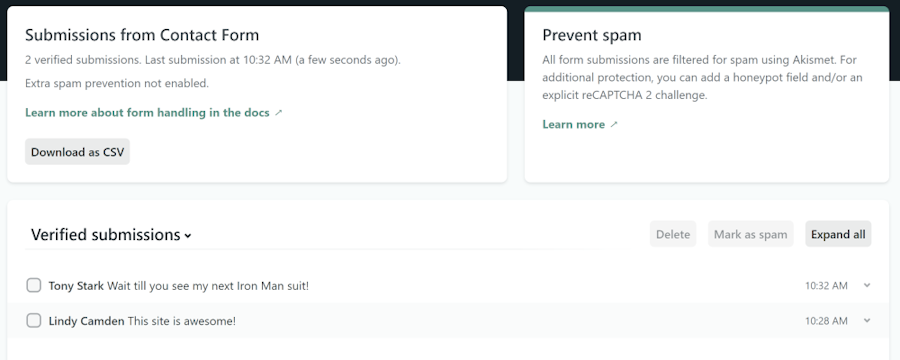
Notice that Netlify is doing a bit of "sniffing" on your form data and making assumptions based on what was sent in the form itself. We sent three values: a name, an email address, and a set of comments. Netlify then determined that it made sense to display the name and comments.
As far as I can see, you don't have any control over this aspect of the dashboard. I actually saw different results while I tested.
Clicking on an individual form submission will expand the details:

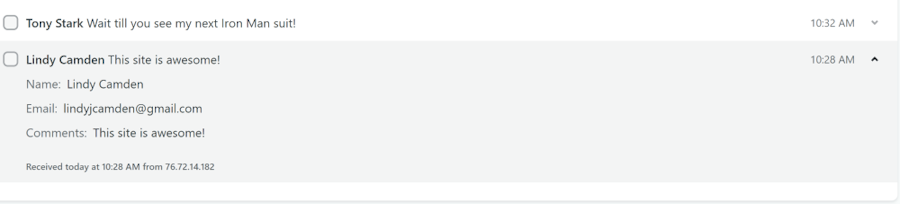
And we're done!
Ok, maybe not so fast. There are a few more details to go over; things like more control over how the form works, spam protection, notifications, and getting form submissions emailed.
Let's dig deeper.
2. Customizing the form
Let's build a new version of our form to make a few adjustments.
First, let's add a proper “Thank you” page.
To do this, we add an action attribute that points to a URL.
<form method="post" name="Contact Form 2" action="/thankyou.html" data-netlify="true">Notice I've given this a new name as well. My “Thank you” page is just a simple HTML page, but now I get redirected to it when I submit my form.
Note the URL in the screenshot:

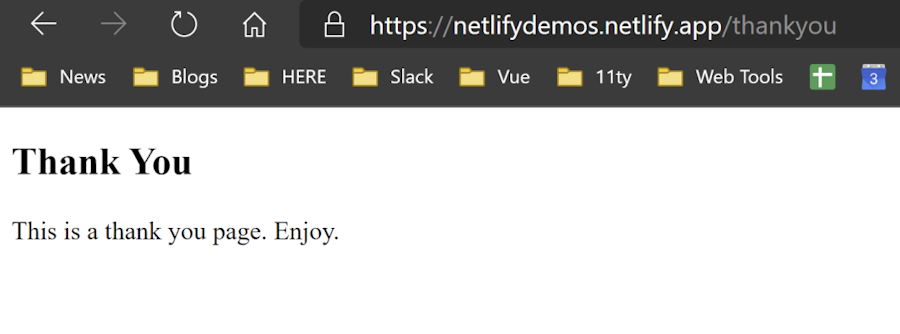
Cool, now users see something that (would normally) match our site design and control the message precisely. Now let's talk spam protection.
3. Spam protection
This may surprise you, but some people abuse forms to send commercial messages. Shocking, right?
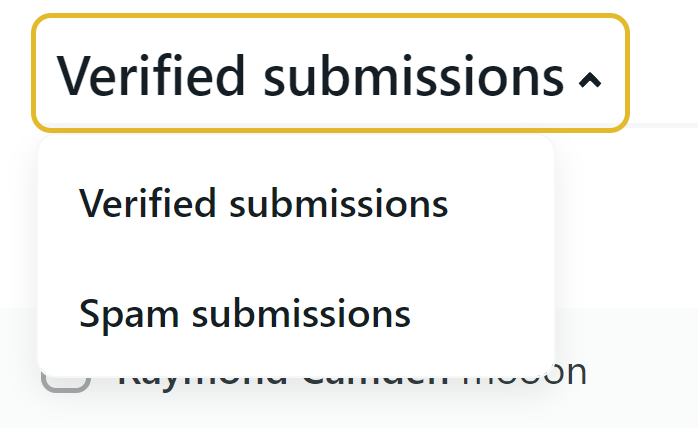
By default, Netlify automatically checks form submission for spam by running them through Akismet. In the earlier screenshot of form submissions, you'll notice it said, "Verified submissions". These are forms that passed the spam check.
Other submissions will be available if you select that and select the "Spam submissions" option:

Netlify provides two additional ways to block spam:
The first one is by adding a "honeypot". This is a hidden form field (not using
type="hidden"but hidden via CSS) that uses another special, Netlify only, HTML attribute:netlify-honeypot. The value of this attribute must match the name of the hidden form field. Here's an example:
<form method="post" name="Contact Form 2" action="/thankyou.html" netlify-honeypot="hpfield" data-netlify="true">
<input class="hidden" name="hpfield">
I used this CSS to hide the field:
.hidden {
    display:none
}
You can also add a CAPTCHA challenge via Google's reCAPTCHA service. To do so requires two more changes. First, we add
data-netlify-recaptcha="true"to the form tag:
<form method="post" name="Contact Form 2" action="/thankyou.html"
data-netlify-recaptcha="true" netlify-honeypot="hpfield" data-netlify="true">
Then you specify an empty div for the CAPTCHA, it must also use the same data attribute:
<div data-netlify-recaptcha="true"></div>For the sake of completeness, here's the entire form:
<form method="post" name="Contact Form 2" action="/thankyou.html"
data-netlify-recaptcha="true" netlify-honeypot="hpfield" data-netlify="true">
<input class="hidden" name="hpfield">
<p>
    <label for="name">Name:</label>
    <input type="text" name="name" id="name">
</p>
<p>
    <label for="email">Email:</label>
    <input type="email" name="email" id="email">
</p>
<p>
    <label for="comments">Comments:</label><br/>
    <textarea name="comments" id="comments"></textarea>
</p>
<div data-netlify-recaptcha="true"></div>
<p>
    <input type="submit">
</p>
</form>
Now when you view the form in your browser (and you can test this yourself here), you'll see the CAPTCHA added:

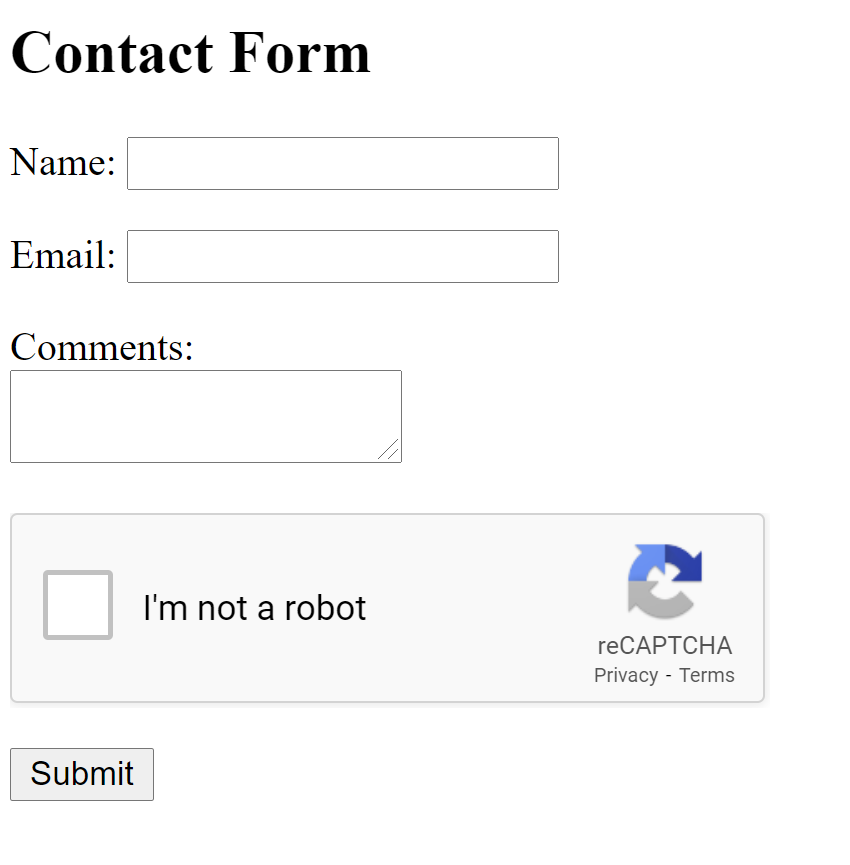
If you want, you can customize the CAPTCHA even more - check the Netlify docs for more information.
Ok, we still haven't talked about working with form submissions, but we've got one more thing to look at - submitting forms via Ajax.
4. Netlify forms submission - the Web 2.0 way
So far, all we've shown is how to submit a form the old fashion way - a simple boring submission. But this is 2020. Web 9.0, etc. Everything has to be done with JavaScript, right?
(That's a joke, by the way.)
Netlify's form service does support you submitting forms with your fancy frontend framework or even vanilla JavaScript.
First off, you can use JavaScript to POST form data and Netlify will pick it up, but you must include a form field named form-name that matches the name of your form.
Netlify adds this form field automatically in your "regular" non-JavaScript forms. If you view source on the previous demo, you'll see this:
<form method='post' name='Contact Form 2' action='/thankyou' data-netlify-recaptcha='true'><input type='hidden' name='form-name' value='Contact Form 2' />If Netlify does not see the form tag and doesn't make the modification you see above, then your form submission won't work. This is especially important to keep in mind as, during my testing of this feature, I ran into a bug with their service and my Vue code.
Specifically I had built a demo using Vue's markup. My form tag looked like this:
<form method="post" name="My Contact Form 7" action="/thankyou.html" id="myForm" netlify @submit.prevent="sendForm" ref="formTag">When I submitted a form, I noticed 404 errors in the POST. (Remember, browser dev tools are your friend!)
Turns out, the @submit.prevent="sendForm" aspect broke Netlify's ability to see my form and recognize it needed to be handled. I'm guessing a regex issue, but I don't know for sure.
If you're curious, you can see updates on the support forum I shared my findings on. Obviously, this issue could apply to other frameworks as well, so if you run into trouble, remember to view the source and see if this is your problem.
Outside of that though, it was rather trivial to build a Vue.js demo:
<!DOCTYPE html>
<html lang="en">
<head>
    <meta charset="UTF-8">
    <meta name="viewport" content="width=device-width, initial-scale=1.0">
    <title>Special Contact Form</title>
</head>
<body>
    <h2>Contact Form</h2>
    <form method="post" name="My Contact Form 7" action="/thankyou.html" id="myForm" netlify ref="formTag" >
    <p>
        <label for="name">Name:</label>
        <input type="text" name="name" id="name" v-model="name">
    </p>
    <p>
        <label for="email">Email:</label>
        <input type="email" name="email" id="email" v-model="email">
    </p>
    <p>
        <label for="comments">Comments:</label><br/>
        <textarea name="comments" id="comments" v-model="comments"></textarea>
    </p>
    <p>
        <input type="submit" @click.prevent="sendForm">
    </p>
    </form>
<script src="https://cdn.jsdelivr.net/npm/vue/dist/vue.js"></script>
<script>
const app = new Vue({
    el:'#myForm',
    data:{
        name:'',
        email:'',
        comments:''
    },
    methods:{
        async sendForm() {
            let formName = this.$refs.formTag.getAttribute('name');

            let formData = new FormData();
            formData.append('name', this.name);
            formData.append('email', this.email);
            formData.append('comments', this.comments);
            formData.append('form-name', formName);
            let resp = await fetch('/', {
                method:'POST',
                body:formData
            });
            // assume ok, although double check
            alert('Submitted!');
        }
    }
});
</script>
</body>
</html>
Notice I've modified the submit button in this form instead of the form tag itself. I use a function, sendForm, that uses the browser FormData API to create my form information, including the required form-name attribute Netlify requires.
My submission handler could be a bit nicer (clearing out previous values, for example. Oh, and I never use alert in production), but you get the idea. Note that your HTTP request will not get a response, but will return a 200 status code response.
You can demo this yourself here!
Note that you can use any frontend framework or even no framework at all.
All Netlify cares about is seeing that initial form tag and you passing the form-name value along.
Now that we've seen a few different ways to submit forms, how about getting the results?
5. Form Notifications
Earlier in this article, I showed you the Forms dashboard, which lets you look at your form submissions. Most likely, though, you don't want to have to log into your Netlify dashboard and check for responses there.
You've got two options here:
The first option is to add a notification.
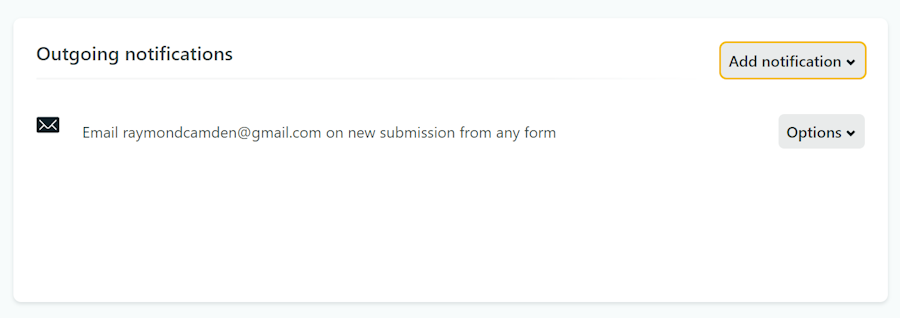
In the Site settings for your site, under the Forms section, you'll see the option to add a notification:

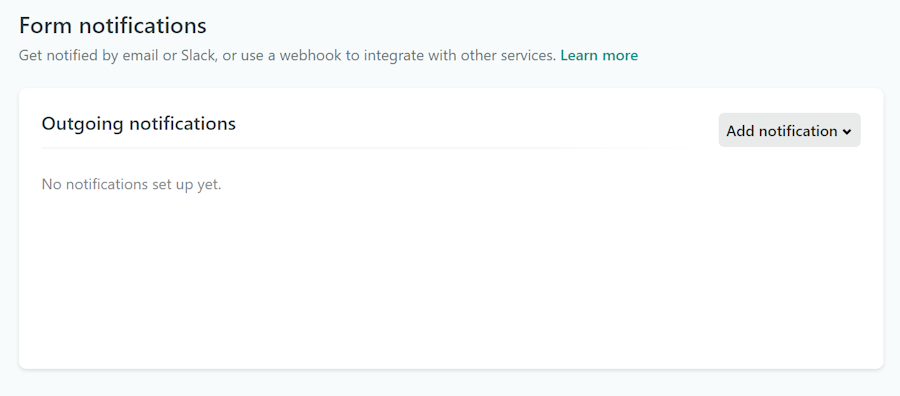
Selecting "Add Notification" lets you pick from three options:

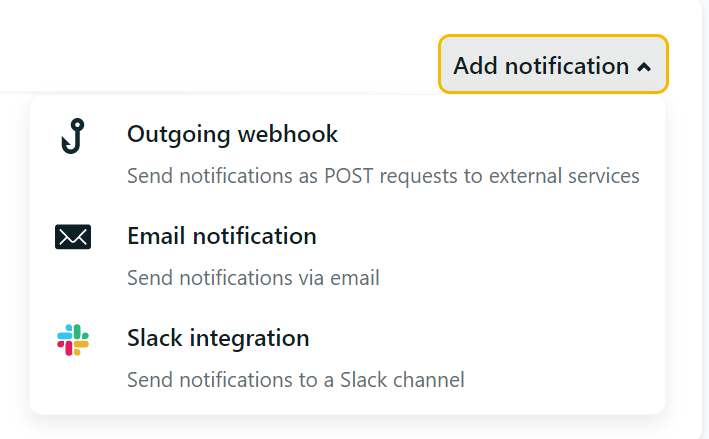
Let's choose email notification. This brings up new options:

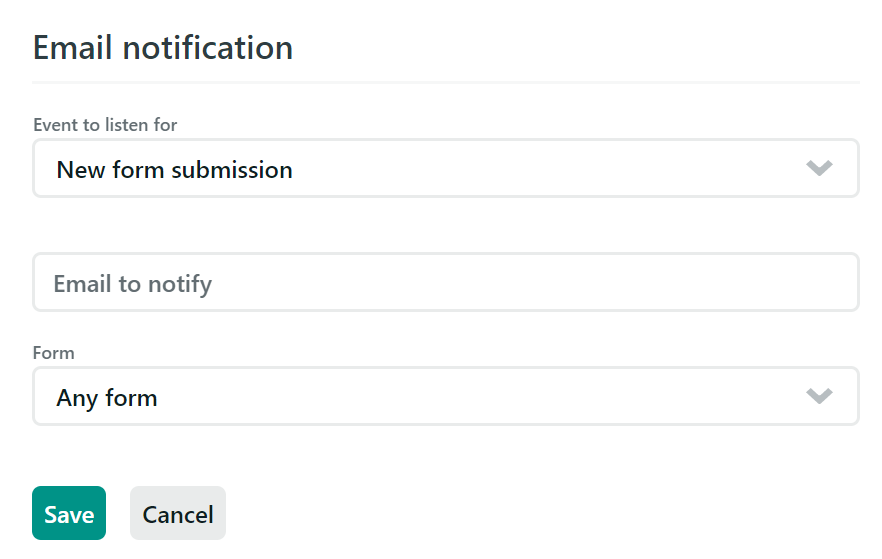
The "Event to listen for" is hardcoded to "New form submission". Netlify has other events you can configure as well, but you are only dealing with form submissions from this particular part of the user interface.
The second field simply asks for where to send the email.
Finally, the third option lets you specify that all forms should be emailed to the address you select or only a particular one. After saving your options, you can see it displayed:

If I submit my forms, an email is sent with the form details (same for you, if you try out the demo above.)

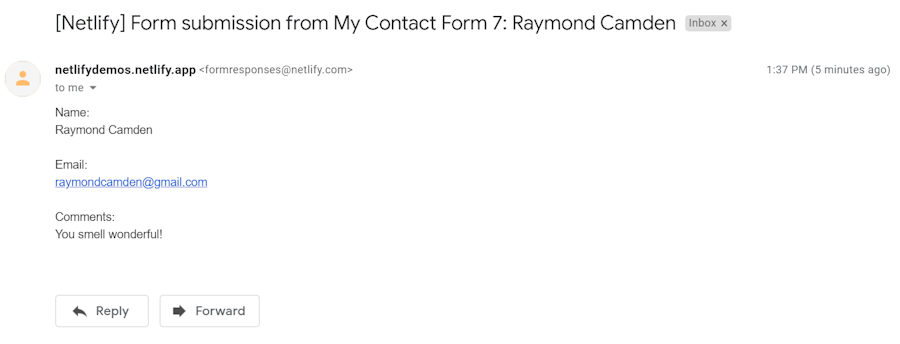
As you can see, the complete form details are there. The sender matches the site's domain, including the form, while the email address of the sender is an internal Netlify one.
This email showed up incredibly quickly in my testing, so there wasn't any wait to get the response.
That's the quick and simple version - how about something a bit more advanced?
One of the more advanced Netlify functionalities is the Functions feature, which lets you easily add serverless functionality to your site. One aspect of this feature is the ability to run a particular serverless function on specific events, including form submissions.
To use this feature, you must name your serverless function submission-created. For those using JavaScript, that would be submission-created.js.
This is easy to start with if you use the netlify CLI to scaffold it out. Use netlify functions:create and when asked to pick a template, scroll down to the submission-created one.
This scaffolds out a function that demonstrates requesting the Buttondown newsletter service. While that's a cool service, let's rewrite the function to be more of a generic email handler.
const SG_KEY = process.env.SENDGRID;
const helper = require('sendgrid').mail;
const sg = require('sendgrid')(SG_KEY);
exports.handler = async event => {
  const form = JSON.parse(event.body).payload;
  console.log(`Recieved a submission: ${JSON.stringify(form)}`);

  let from_email = new helper.Email('raymondcamden@gmail.com');
    let to_email = new helper.Email('raymondcamden@gmail.com');
    let subject = 'Form Submission';

  let content = `Form:
${JSON.stringify(form,null, '\t')}`;
  let mailContent = new helper.Content('text/plain', content);
    let mail = new helper.Mail(from_email, subject, to_email, mailContent);
    let request = sg.emptyRequest({
        method: 'POST',
        path: '/v3/mail/send',
        body: mail.toJSON()
    });
  try {
    let response = await sg.API(request);
    return {
      statusCode: 200,
      body: { success: true }
    };
  } catch(e) {
    console.log('Error with SendGrid', e);
  }

}
This function makes use of SendGrid to take the contents of the email and send it to me.
Notice that the form data is sent via the event.body argument in a key called payload. I took that data and simply stringified it, which does not make for a terrific email, but is a great way to see what you get.
At the time of this article's creation, Netlify has not yet documented what’s in this data. You may think: “Why should they? It's just the form data, right?”
Nope.
Remember that my test form had three fields: name, email, and comments. When the form is submitted, here is what that data looks like:
{
    "number": 7,
    "title": null,
    "email": "raymondcamden@gmail.com",
    "name": "Raymond Camden",
    "first_name": "Raymond",
    "last_name": "Camden",
    "company": null,
    "summary": "moo",
    "body": "moo",
    "data": {
        "name": "Raymond Camden",
        "email": "raymondcamden@gmail.com",
        "comments": "moo",
        "ip": "131.228.197.12",
        "user_agent": "Mozilla/5.0 (Windows NT 10.0; Win64; x64) AppleWebKit/537.36 (KHTML, like Gecko) Chrome/86.0.4240.75 Safari/537.36 Edg/86.0.622.38",
        "referrer": "https://netlifydemos.netlify.app/form2.html"
    },
    "created_at": "2020-10-12T21:25:29.142Z",
    "human_fields": {
        "Name:": "Raymond Camden",
        "Email:": "raymondcamden@gmail.com",
        "Comments:": "moo"
    },
    "ordered_human_fields": [
        {
            "title": "Name:",
            "name": "name",
            "value": "Raymond Camden"
        },
        {
            "title": "Email:",
            "name": "email",
            "value": "raymondcamden@gmail.com"
        },
        {
            "title": "Comments:",
            "name": "comments",
            "value": "moo"
        }
    ],
    "id": "5f84c9c9db334b0131217089",
    "form_id": "5f789f2947e09d000777b49b",
    "site_url": "http://netlifydemos.netlify.app",
    "form_name": "Contact Form 2"
}
Woah, that's a lot more, right? I've done research into this before, but from what I can tell, Netlify does some "guessing" on your form data and makes some interesting additions:
First, note
first_nameandlast_nameparsed from thenamefield.Secondly, there's a
summaryfield based on thecommentsfield. Not sure what the intent is there.human_fieldsseems to be capitalized forms of the form field names.datais the "pure" form... kinda. You can see they added three fields (ip,user_agent, andreferrer) as well.
And so on. Until this is properly documented on the Netlify side, I'd say the "safe" thing to do is stick to the data values.
If you are building a form handler for one form and know exactly what fields you have, you can access them as you want. If you want your handler to be a bit more generic, you can try something like this:
  let date = new Date();
  let content = `
Form Submitted at ${date}
--------------------------------
`;
    for(let key in form.data) {
    let field = key + ':';
        content += `
${field.padEnd(30)}${form.data[key]}
`;
    }
All I've done here is loop over data and add it to a text variable. I also added the date. In theory, it's the same as the email, but I like it this way. Now when I submit, I get:

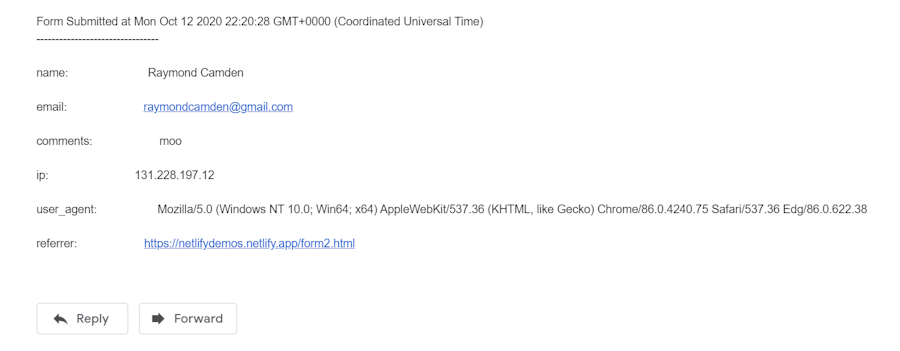
That still isn't cute, but could be improved quite effortlessly. And again, if you aren't changing your form and know the contents, you can create a string that better matches your needs.
Closing thoughts: forms, forms, and more forms
I hope this tour of Netlify's extensive forms feature has been helpful. I didn’t think I could do such an in-depth piece on this subject, but I guess it demonstrates the flexibility of the feature.
I’ve talked about serverless functions a bit in this demo, but I invite you to learn more about the many functionalities Netlify has to offer. Also, let us know in the comments if you’d like any of these covered on the Snipcart blog.
Oh! And be sure to check the docs for the latest changes and use the Netlify Community board to ask for help.
If you've enjoyed this post, please take a second to share it on Twitter. Got comments, questions? Hit the section below!


