Exploring Netlify CMS, a React & Git-Based Content Management System
Ah, websites.
We don't make 'em like we used to, huh?
At least not with the JAMstack!

We don't need a monolithic CMS; we have modern static site generators & web apps.
We don't always need a relational database; we have Git to store content.
We don't need to maintain servers; we have CDNs, dedicated APIs & backends-as-a-service.
"But wait, if I drop my WordPress install and store my content in, say, GitHub, how can non-technical folks manage it?"
There are many answers to that. In this post I discuss one: Netlify CMS.
We've known Netlify's core team for a while now. They've been pioneering the JAMstack movement for years. Even before their SF startup trailblazing, their top priority has always been to empower developers with modern web dev tools.
The set of resources they've released is quite large, from static "serverless" functions to deploy previews, but today I'll solely explore their Git-based, React-powered open source CMS.
I'll touch on the web development approach it fosters, and show you how to strap it on a JAMstack site.
A Git-based approach to managing content


First, it's important to understand what you're getting into here.
The premise of the JAMstack is that you can leverage modern frontend tooling to create lighter, faster, more secure sites. And FYI, this isn't fringe developer extravaganza. Entire organizations like Smashing Magazine, Sequoi Capital & Mailchimp have migrated to the JAMstack.
One of the first implications here is decoupling the building & hosting of your site. You can "pre-bake" and pre-build static assets and then serve them on CDNs. This effectively frees your content from the database/templates imperatives of traditional CMS.
However, the content itself still needs to live somewhere. That's where Git—we'll focus on GitHub in this post—comes in.
To create your site, you can use a static site generator like Jekyll or Hugo. Or a JS framework like Angular, React, or Vue. It doesn't matter. The point is you store the site's content in a GitHub repository, where most of your pages can be simple Markdown/YAML files. Then, you deploy & host that static content on CDNs.
GitHub's well-oiled collaboration mechanisms—branches, forks, pull requests, merges—allow for easy tracking & rollbacks of site modifications (we'll see how Netlify CMS handles this with elegance).
This all sounds awesome... for developers. But asking non-technical peeps to create, edit, review and approve content in GitHub? That's a recipe for disaster.
Yet fear not, dear friends, for there are many ways to side-step said disaster. From headless CMS like Directus & Contentful to generator-specific CMS like CloudCannon, there's a growing offering of tools out there.
Understanding Netlify's Git-based, React CMS

Netlify at its core is an automation platform to deploy modern static websites. They also happen to make cool open source projects. Netlify CMS is one of them.
In a nutshell, Netlify CMS is a Git-based, open source React CMS.
Compared to other polished but proprietary CMS products, it's an attempt at offering an open source standard to Git-centric content management. In other words, it aims at leveraging the budding community to become the WordPress of JAMstack & static workflows.
"SPA as a CMS" integration
Unlike some of its SaaS counterparts, Netlify CMS is a full-blown React app you add to your site. It can be plugged into any static site generator out there. You include it in your project with two simple files (cms.js & config.yml) along with its CSS. You can get the CMS from a CDN, or bundle it directly in your app.
It then binds to your /admin/ route to serve its interface.
So the cms.js will give you access to the React CMS UI layer.
And the config.yml is where you'll define content types & fields.
Netlify CMS groups the content it manages in collections. I'll show you a hands-on example later, but here's its full architecture.
GitHub content management workflow
You must have guessed it by now, but with Netlify CMS, your content lives in... GitHub! That's right, the CMS itself leverages GitHub's API to interact directly with your content repo. In that sense, it is "build-tool agnostic."
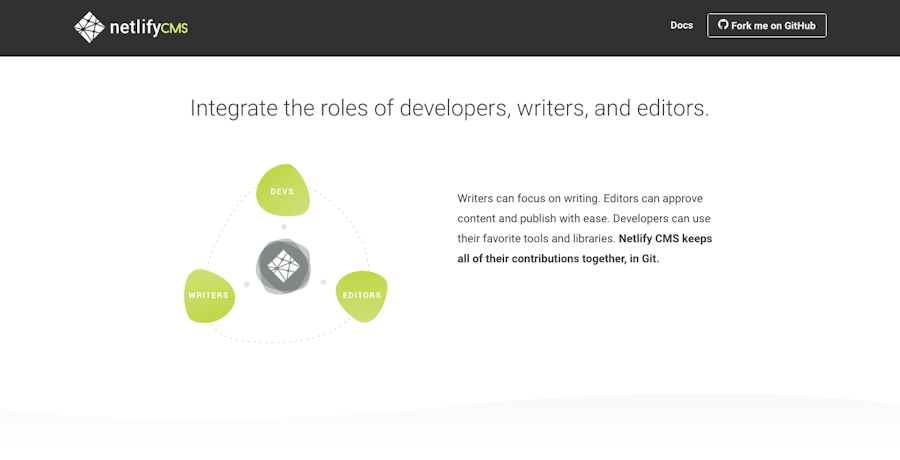
To use it, you'll need to give the CMS access to your GitHub account. You can invite users to a project site by adding them as collaborators or members of your organization. After that, non-technical folks won't have to interact with GitHub ever again.
It is a developer-first approach that loops non-technical users into an effective workflow. We can definitely get behind this at Snipcart. :)
Content management & editorial workflow

Once you've included the CMS on your site, content edition is a breeze. Add /admin at the end of your site's URL and you'll access the CMS UI.
It's smooth sailing from there:
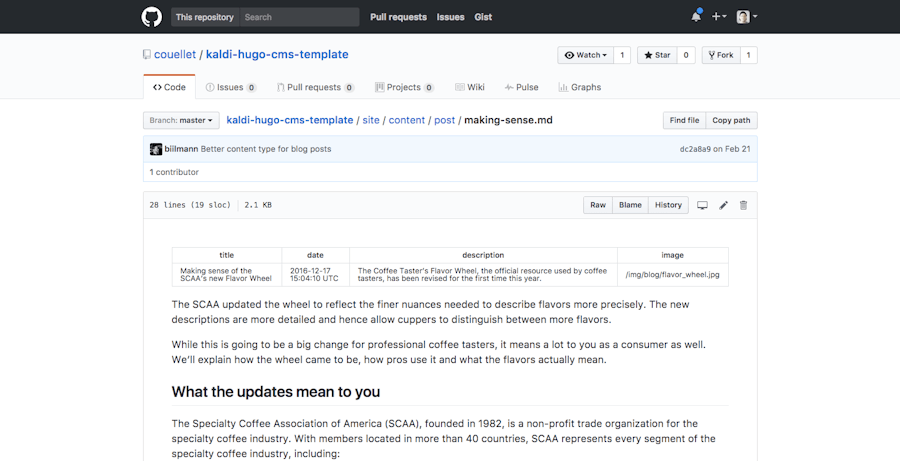
New pages add new files to your GitHub repo.
Changes & edits generate commits to existing files.
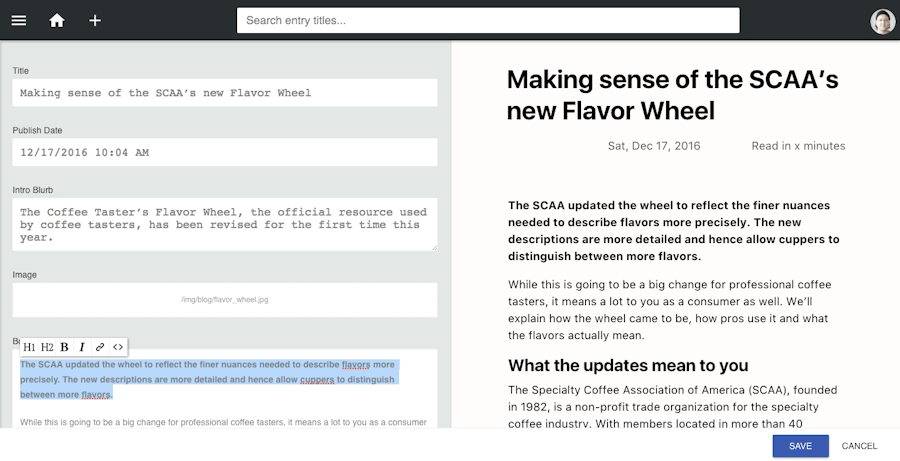
Depending on the content types you've specified, there's a bunch of typical CMS stuff to be done: create pages, change titles, categories, dates, authors, text, images, etc. Netlify CMS even offers a rich-text editor to simplify markdown formatting.
Now, on a static site, edited content can't be built & "previewed" dynamically like with traditional CMS. The whole site must re-build for the new content to be accessible. So to help non-technical editors keep track of their changes, the React app includes a side preview rendering.
Another neat feature of Netlify CMS is the Git-based, optional "editor workflow". While simple, it caters to the needs of non-technical folks & more serious web publishers. It allows writers to submit drafts and editors to approve & publish them. But here's the cool part—what happens in GitHub under the hood:

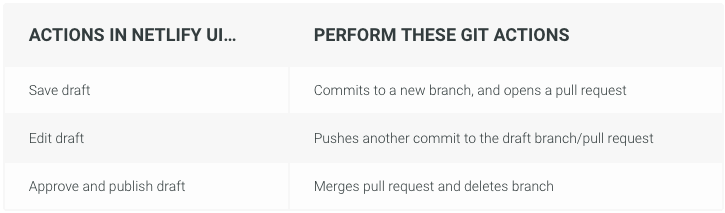
A smart way to use Git branching!
Extending the CMS with React
React has become a frontend developer favorite these days, and Netlify makes good use of its reusable components system & Redux. The side by side preview React CMS template, for instance, can easily be enhanced with React components. Same thing goes for the content editor: you can add React-powered modules to it like color & image pickers. In a way, this opens up the door for developers who want to enhance the content management experience of non-technical folks.
You can see existing CMS widgets here, or better yet, contribute your own!
As for SEO, well, it'll be mostly handled in how you structure your site or app's content. Your CMS, however, can include whichever meta-fields you need.
Note: we've written about Vue.js pre-rendering for SEO recently, should that inspire or help you.
If you feel like test-driving Netlify CMS with Hugo as a static site generator yourself first, use the free Kaldi-Hugo starter template they provide.
Netlify CMS tutorial: installing it on a real GitHub repo
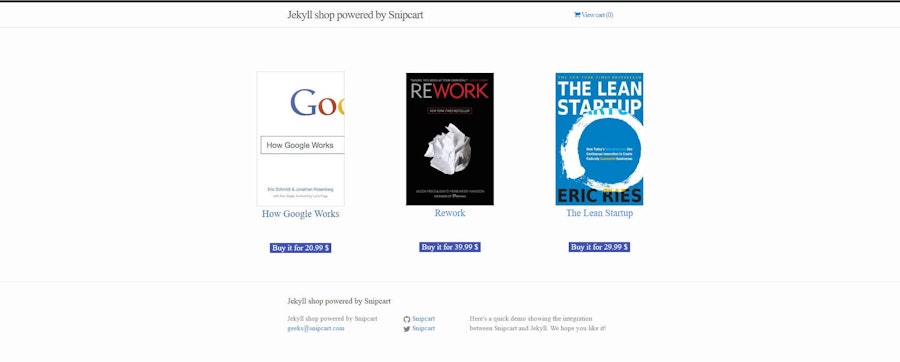
In this section, I'll show you how to strap Netlify CMS on top of a GitHub repo containing an existing static site. I'll use one of our most popular open source JAMstack projects: snipcart-jekyll-integration.
You can find details regarding this integration here.
We'll see how the products we had included in our Jekyll site can easily become manageable in Netlify CMS.
Pre-requisites
Free Snipcart account (should you want to include it in the project)
GitHub account
Scaffolding the static site's project
Start up a new folder where you want your project to be & initialize it for npm & git.
For our demo, we will use the npm package, but you could also use the CDN. Go ahead and run npm install --save netlify-cms to add it.
Since we're bundling everything together with webpack, we will also need a few loaders to make this work.
npm install --save-dev file-loader
npm install --save-dev style-loader
npm install --save-dev css-loader
npm install --save-dev babel-loader babel-core babel-preset-env webpack`
Now fire up your favorite editor: time to get your hands dirty.
What we will do first is create a new /admin folder in the project's root.
In there, we will put 3 new files: index.html, index.js, config.yml.
Our index.html will simply be used to load our SPA CMS.
Here's its content:
<!doctype html>
<html>
<head>
  <meta charset="utf-8" />
  <meta name="viewport" content="width=device-width, initial-scale=1.0" />
  <title>Content Manager</title>
  </head>
<body>
  <script src="./bundle.js"></script>
</body>
</html>
Our index.js file is where we will bundle the CMS package during our build process. Now, in this example, we won't actually extend the CMS in any way. Still, I thought it'd be nice to show you how to load it via webpack:
import CMS from 'netlify-cms'
import CSS from 'netlify-cms/dist/cms.css'

export default {
    CMS,
    CSS
}
The last file is the most important. It's where we specify our GitHub repo, acting as a backend, and where we declare our collections structure. We could also define custom admin pages such as a settings one here.
backend:
  name: github
  repo: snipcart/netlify-cms-snipcart
  branch: master

media_folder: "img/uploads"

collections:
  - name: "products"
    label: "Products"
    folder: "_products"
    slug: "{{slug}}"
    create: true
    fields:
        - {label: "SKU", name: "sku", widget: "string" }
        - {label: "Price", name: "price", widget: "number"}
        - {label: "Image", name: "image", widget: "string"}
        - {label: "Body", name: "body", widget: "string"}
        - {label: "Slug", name: "slug", widget: "string" }
        - {label: "Layout", name: "layout", widget: "hidden", default: "productdetails"}
Adding content to our new project
Let's take our existing static store and wrap it to the CMS within the build process. This will show you how granular and "platform-agnostic" Netlify's approach is.
We will use our Jekyll integration to do this. You can find the whole repo here.
Simply copy the files and drop them in the root folder.
The only thing you will need to change is every _products folder's file to .md instead of .html.
Creating the build process
We already have everything required for our site. At this point, we only need webpack to wrap things up.
Create a webpack.config.js file in the root directory:
module.exports = {
    entry: "./admin/index.js",
    output: {
        path: `${__dirname}/admin`,
        filename: "bundle.js"
    },
    module: {
        loaders: [
            { test: /\.css$/, loader: "style-loader!css-loader" },
            {
                test: /\.(eot|svg|ttf|woff|woff2)$/,
                loader: 'file-loader?name=public/fonts/[name].[ext]'
            }
        ]
    }
};
This will load and wrap your /admin/index.js file inside bundle.js and output it directly in your admin folder. Last necessary tweak is on Jekyll's side. Add the following section to your _config.yml:
exclude:
 - admin/index.js
 - webpack.config.js
 - package.json
 - README.md
Open your packages.json file and add these two to your scripts section:
    "dev": "webpack && jekyll serve",
    "build": "webpack && jekyll build"
This will output everything in a neat _site folder. And when you hit the /admin route, the React CMS will be loaded. If you change anything from there, it will update the Git repo and trigger back your build, assuming you set it up
Let's try it on Netlify's platform.
Booting up live: GitHub in the back, Jekyll in the front, and Netlify CMS in the middle!
Time to deploy this Netlify CMS demo!
Push everything to GitHub and go to http://netlify.com. Don't worry; if your project is open source, everything is free. :)
Hit the "New site from Git", then select GitHub and your repo.
You will have to use npm run build as your build command, and _site as your publish directory.
After the build, you can access your website and TA-DAH!

See the repo including Netlify CMS on top of our Snipcart-Jekyll integration
You can go to the /admin route, and the CMS will pop up.
Login through GitHub and you will see the React-powered editor:

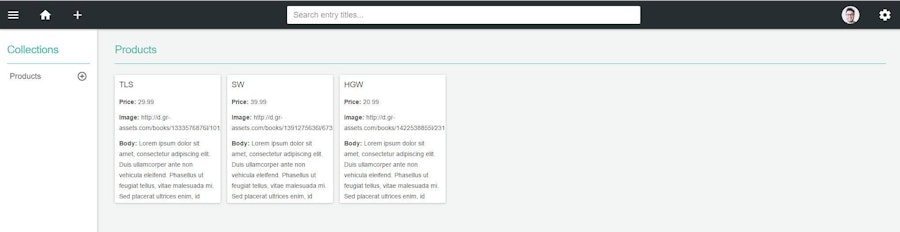
If you add a new product, it will be pushed to the GitHub repo, and the build will be triggered.
And that's it!
This leaves us with some pretty cool JAM:
Light & fast static e-commerce site with Jekyll & Snipcart
Secure & version-controlled content repository in GitHub
Lightweight & extendable content management in Netlify CMS
Automated build & deployments with Netlify's platform
Both developers & non-technical folks should be happy with this set up. Job's done!
Conclusion
Playing around with Netlify CMS was great. Even if it's is still quite young, the documentation is concise and easy to follow. It really acts as a cool static site generator CMS. I had a small problem with the front-matter not loading correctly in the static files created under Windows. But I posted an issue, and it got sorted out in 15 minutes. Couldn't ask for better service! Overall, I must've spent an hour or so making this demo work.
Had I had more time, I could've ported the whole Jekyll site settings directly in Netlify CMS. It would have made it easy for non-technical peeps to edit the whole site as opposed to just products. Doing so would require injecting these settings in the Jekyll build.
Overall, I think that Netlify CMS is a small yet substantial step towards unified open source content management on modern JAMstack sites. I'm excited to see how developers start extending this new generation CMS, and how it grows with time & community input. Git makes a lot of sense for social coding, and I think it can do something similar for content management if harnessed right.
For all our JAMstack thoughts & tuts, head this way.
If you've enjoyed this post, please take a second to share it on Twitter. Got comments, questions regarding this workflow? Hit the section below!


