A Ghost Demo: How to Go Headless with Ghost CMS [Tutorial]
In a rush? Skip to technical tutorial or live demo
As a kid, didn’t you love listening to ghost stories while sitting around a campfire? Some were lame, like Casper; some were kinda’ cool, like Bloody Mary; and some were just downright weird, like Shirime (yeah... I’ll let you look that one up yourself).
All these stories had one thing in common: they connected the listeners, even if for just a brief period of time.
But today, I’m going to use my Ghost demo to teach you how to connect with your readers for a long time. And to do that, we won’t be focused on stories about ghosts (don’t worry, those will be in there too) because we’ll actually be using the ghost itself.
Ghost CMS, that is.
Plus, in keeping with the spooky vibe of this post, let’s make that a Ghost gone headless. More specifically, in this article I am going to:
But first things first, let’s get caught up on exactly what Ghost CMS is.
A brief history of Ghost CMS…


Ghost is a free, open-source platform designed with one thing in mind: minimalistic content publishing. In other words, Ghost is made for bloggers. Period. In fact, it was the brain-child of a former WordPress employee, John O’Nolan, so it’s no surprise that blogging stays fixed at this platform’s core.
O’Nolan worked with fellow coder Hannah Wolfe to create Ghost back in 2013 after getting frustrated with WordPress (and it is just me or have we been hearing that a lot in the last five years?). This probably doesn’t surprise you as Ghost is commonly touted as a sleeker WP alternative.
The overall goal was to create a platform that was simple, lean, and modern. Something with all the good parts of WordPress without being over-bloated. But the best description of Ghost comes from O’Nolan’s own words: it’s “just a blogging website.”
And it’s directly in that simplicity where Ghost’s force lies.
What makes Ghost CMS a great tool for bloggers?
https://www.datocms-assets.com/48401/1627664365-fast-typing.webm
Apart from its headless capabilities (which we will get into soon), one of the most obvious benefits of Ghost is its leanness. Instead of taking the shotgun approach like some CMSs which try to hit everything, Ghost can be thought of more like a sharpshooter. It’s designed for a specific task—publishing content—and it performs that task really, really effectively.
But before you get the wrong idea that Ghost sites are all plain, think again. Yes, the goal is to get content out to your readers, but there are plenty of pre-built themes to ensure your audience is aesthetically pleased as well. You can also customize their out-of-the-box theme by writing some Handlebars.js code.
And then there’s the SEO optimization which is pretty much a “must have” in the blogging world at this point. The Ghost site itself lays out a few of the key SEO features that come built-in:
There are built-in XML sitemaps, Google AMP pages, canonical tags, optimised URLs, microformats, Facebook Open Graph tags, support for Twitter cards and clean semantic markup. All of this is done for you automatically, with no plugins needed.
Finally, it’s super fast. O’Nolan and Wolfe built Ghost on Node.js (which we love) so as you would expect, it runs with lightning quick speed.
Now that we’ve gotten that out of the way, let’s take this one step further and chop this Ghost’s head clean off.
Using Ghost as a headless CMS
If this isn’t the first time you’re reading through our blog, then you may have noticed we love the JAMstack. A lot. Part of the reason is that we see a ton of value in CMSs going headless (which we’ll explain a bit more below).
And we’ll be (kinda) doing that here in our Ghost demo. Let me explain…
The original version of Ghost functioned in the classic monolithic style, as you’d probably expect. But in an effort to keep up with the times—a successful effort, btw—Ghost became headless by design. Ghost’s core is a RESTful JSON API which works well with the default frontend (monolithic) but can be accessed from the outside as well (headless). The bottom line? Ghost now fits (quite nicely) on the JAMstack.
Using Ghost as a headless CMS offers some major benefits:
More flexibility: When you have specific needs that go beyond just rendering content in a web page, headless is the key.
Faster Distribution and Lower Cost: Going headless makes it incredibly easy to generate a static site that can be globally distributed using a platform like Netlify. As a happy bonus, having the freedom to host and deploy your static site with Netlify (or a similar product) lets you do things on the cheap. It’s amazing how far you can get for free with open source services. :)
For our purposes, we’re going the ol’ monolithic approach for the landing page, but will go headless for the weekly content update newsletter in our Ghost demo. Here’s how:
First, we’ll create our Ghost site and customize the Handlebar’s template. That’s the monolithic (boring) part. Now let’s get headless.
We will be using their experimental (yet very stable) "Subscribers" feature. In their docs, Ghost makes it clear that “Email addresses can be viewed and edited from Ghost admin, but no emails will be sent without further integrations with an email tool.”
So, that’s precisely what we’ll be doing here: creating a custom email tool that works by extending this feature.
Then we will use their APIs both to retrieve posts to bundle into each newsletter and to retrieve subscribers who will receive the newsletter.
The stack we are going to use to make this newsletter happen is a Ghost site with a bit of custom templating, and a small scheduling and webhook workflow built on top of AWS Lambda.
Let's get started!

1. Starting up your Ghost blog
I won't go to great length on how to install and host a Ghost site. Their team has it well covered in their neat documentation site.
Whether you go fully managed with Ghost Pro, or boot your own using Ghost-CLI, you'll see that getting started with Ghost is dead easy (pun intended).
I personally used this starter repo that allows you to quickly spin up a fresh Ghost instance in a free Azure hosting environment in no time.
Once your site is live, complete the initial setup screens to create your account and invite your content editors to create theirs. Once logged in, I recommend you take a look at the sample content under the "Getting Started" tag. It lays out the most commonly used features in a quite friendly form.
This tutorial will build on top of Ghost's default template, Casper.
2. Enable Subscribers feature
A key piece of your newsletter setup will be to let people subscribe to your scary content. Ghost now offers a "Subscribers" feature. At the time of writing, this feature is marked as "Experimental". You can enable it under the "Labs" section of the Ghost admin:
/ghost/#/settings/labs


3. Create a custom content structure
There will be 3 kinds of content node in our Ghost demo for now:
The landing page
The welcome email
Ghost stories
But we have to configure some routes first, to serve custom Handlebars templates.
Ghost comes with some routes baked in the default install. Let's customize them to our needs
# ./content/settings/routes.yaml

routes:

  # This is the root route.
  # Data context mapped to the page with the slug 'landing'
  /:
    data: page.landing
    template: landing

  # This is the route used to generate the welcome email HTML.
  # Data context mapped to the page with the slug 'nl-welcome-email'
  /nl-welcome-email/:
    data: page.nl-welcome-email
    template: nl-welcome-email

collections:

  # This is the route used to generate the weekly email HTML.
  /nl-stories-email/:
    permalink: /stories/{slug}/
    template: nl-stories-email
Configuring custom routes in Ghost is easy and flexible. It's important to note that if your site is hosted on Ghost Pro, you still have the ability to upload custom routes under Settings >> Labs
3.1 Create the landing page
Since the site will only feature a weekly newsletter for now, let's create a minimal template that will call people to subscribe.
Just create the landing.hbs file under ./content/themes/casper/.
{{!< default}}

<header id="landing-header" class="site-header outer">
    {{> "site-nav"}}
</header>

{{#page}}

<main id="site-main" class="site-main outer">
    <div class="inner">

        <article class="post-full {{post_class}}">

            <header class="post-full-header">
                <section class="post-full-meta">
                </section>
                <h1 class="post-full-title">{{title}}</h1>
            </header>

            <section class="post-full-content">
                <div class="post-content" style="padding-bottom:70px;">
                    {{content}}
                    <a href="#subscribe">Stay up to date!</a>
                </div>
            </section>

        </article>

    </div>
</main>
{{/page}}
The Casper theme features a nice "Subscribe" modal overlay. You can trigger it by navigating to the #subscribe anchor.
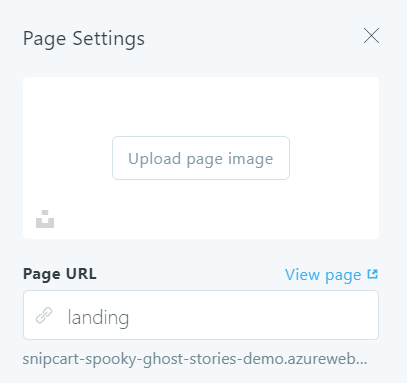
The landing page content node will be created as a Page since it is not part of any content collection, like Posts do.
Create a new page, and don't forget to publish it. Make sure the page's slug (called "Page URL" in the UI) is set to landing. It's important because we have some routing rules in place that rely on it.

3.2 Create welcome email content node
Just like the landing page, the welcome email will be of type "Page". This node is meant to be hit by the "Subscriber added" webhook (spoiler alert!) that will be configured later.
The slug must be set to nl-welcome-email so the routing works.
For the sake of brevety, I wont expand on how to create custom templates for the emails. Just know that rendring emails so they are compatible with the majority of email clients is quite a puzzle. Luckily, some cool people already solved it for us. Here I used Cerberus as a base to design the emails.
3.3 Create the first story
Add a tag for the stories
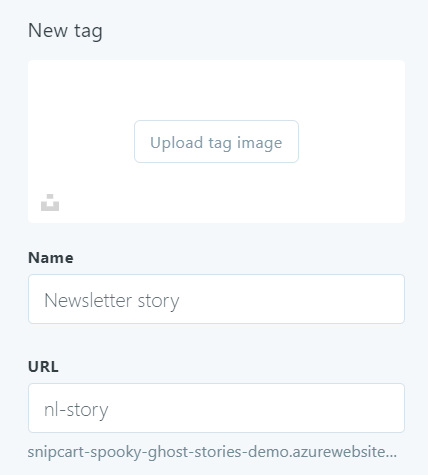
What's a good blogging platform without content tagging? Let's create a tag for our stories so we can better filter them out. This may come handy if you ever add content other than ghost stories on the blog.
/ghost/#/settings/tags

Create the first story
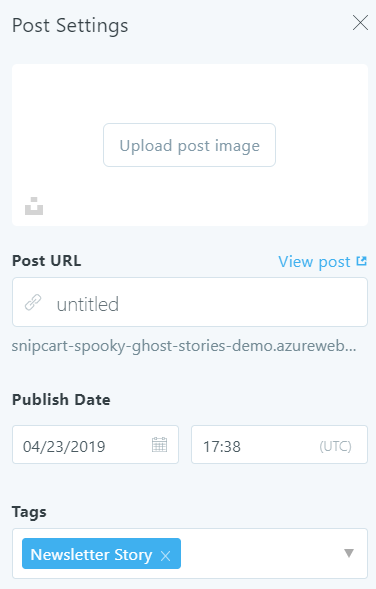
Stories will be of type Post, and will be marked with the newly created nl-story tag.

4. Integrate with Ghost's API
All right, now to the crunchy bits! We will have to cook some custom code to enforce our newsletter logic. For that we'll make use of Ghost's API.
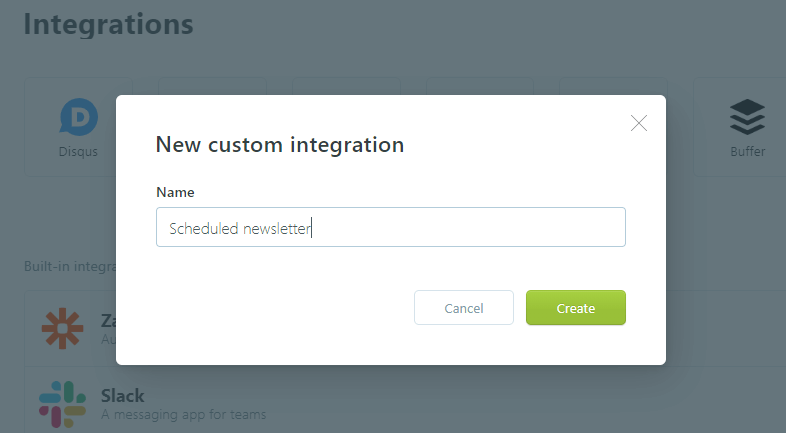
Our integration with the API starts with creating a new Integration in the admin.
/ghost/#/settings/integrations/new

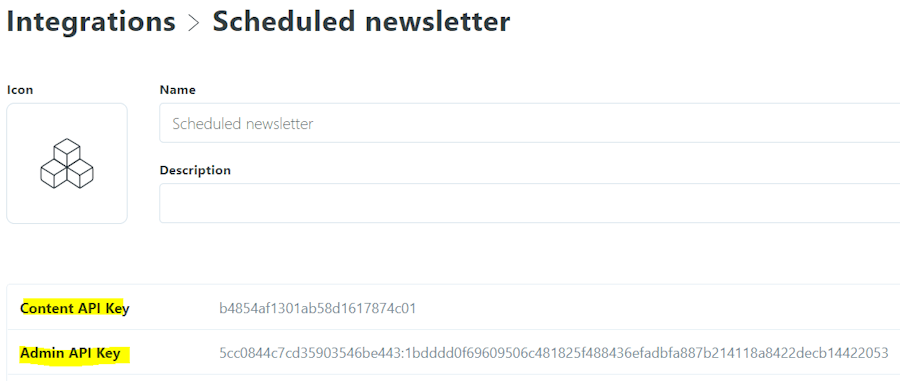
Once created, the integration details page will show two API keys. Save them for later.

5. Greet new subscribers
By default, Ghost's "Subscriber" feature doesn't send any email. It only accepts and stores registrations. It's up to you to extended it to make it fit your needs.
Let's build something to say hi to people who register!
Ghost can send webhooks when events occur in its database. That's what we'll use to trigger welcome emails.
5.1 A serverless endpoint
To react to Ghost events, we have to create a HTTP endpoint that will accept calls from our instance. Why not embrace the hype and go serverless using AWS Lambda?
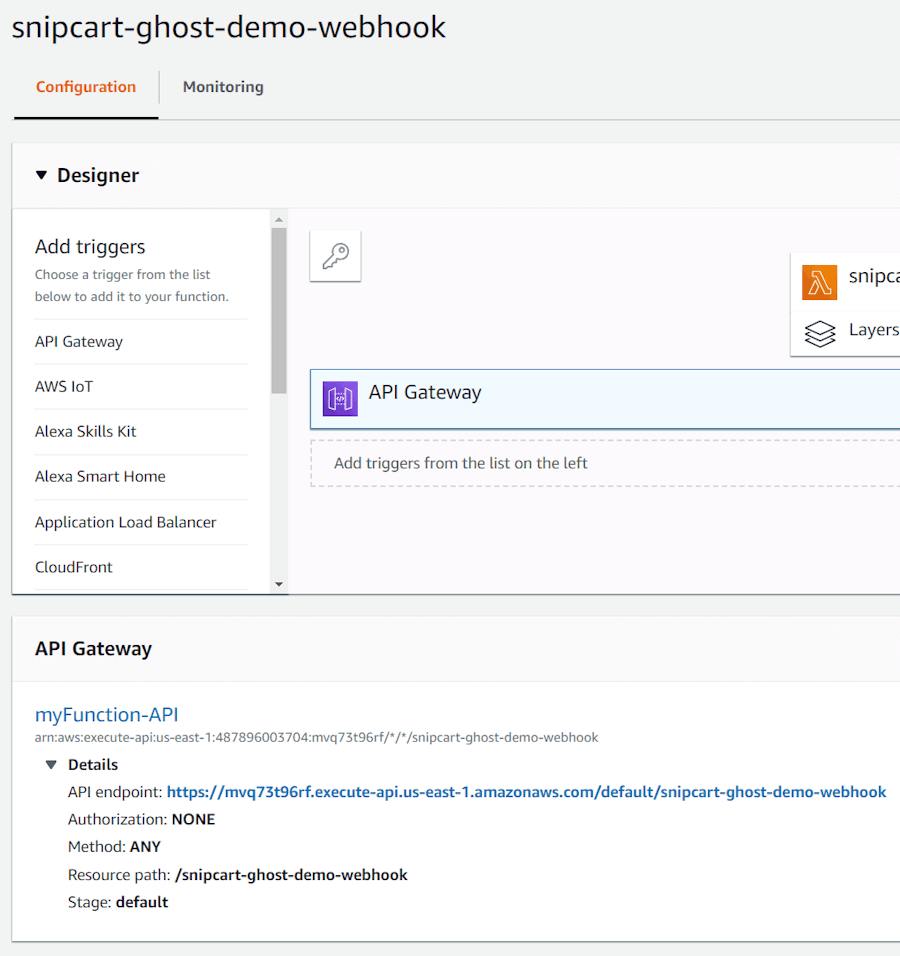
Let's start by creating a "snipcart-ghost-demo-webhook" function based on the "microservice-http-endpoint" blueprint, like shown here.
At the "Role" step, choose "Create a new role with basic Lambdda permissions". We will not need the DynamoDB persmission that the default template requires.
After hitting the "Create" button, AWS will automatically create an API Gateway and add it as a trigger for your function.
Let's customize the function's script by pushing code from a local folder. First, create a new Node.js package like so:
 npm init
    npm install --save @sendgrid/mail @tryghost/admin-api @tryghost/content-api aws-sdk axios
Here I will send emails using SendGrid, but feel free to use your favorite service instead.
Then, add a file named index.js, with the following content:
const GhostContentAPI = require('@tryghost/content-api');
const sgMail = require('@sendgrid/mail');
const axios = require('axios');

sgMail.setApiKey(process.env.SENDGRID_API_KEY);

const ghost = new GhostContentAPI({
  url: process.env.GHOST_HOST,
  key: process.env.GHOST_CONTENT_KEY,
  version: 'v2'
});

async function handler(event, context, callback) {

  const done = (err, res) => callback(null, {
    statusCode: err ? '400' : '200',
    body: err ? err.message : JSON.stringify(res),
    headers: { 'Content-Type': 'application/json' }
  });

  switch (event.httpMethod) {
    case 'POST':
      const payload = JSON.parse(event.body);

      const emailData = await ghost.pages.read({ slug: 'nl-welcome-email' }, { include: 'authors' });
      const emailHtml = (await axios.get(`${process.env.GHOST_HOST}/nl-welcome-email/`, { responseType: 'text' })).data;

      const msg = {
        to: payload.subscriber.current.email,
        from: `${emailData.primary_author.name} from Spooky Ghost Stories <geeks@snipcart.com>`,
        subject: emailData.title,
        html: emailHtml,
      };

      await sgMail.send(msg);

      done();
      break;

    default:
      done('Method not supported');
  }
};

exports.handler = handler;
A few things to note here:
We are relying on environment variables for some settings. These will have to be set in your Lambda function. You can find the value for
GHOST_CONTENT_KEYin the details screen of the integration we created earlier.The event body is the actual POST body we receive from Ghost. This is where the info about the new subscriber will be accessible.
We are hitting Ghost's API to have meta data about the content node.
We are retrieving the email HTML by simply calling the route we defined for this node, at
/nl-welcome-email/.
Now, let's ship this code to our Lambda function. You'll have to install and configure the AWS CLI.
Then, bundle and ship your code like so:
7z a -r ../snipcart-ghost-demo-webhook.zip .
aws lambda update-function-code --function-name snipcart-ghost-demo-webhook --zip-file fileb://../snipcart-ghost-demo-webhook.zip
I'm using 7-Zip here, you may have to adapt the zip procedure to fit your environment
Cool! With the function up and running (and reachable via HTTP), let's connect Ghost events to it.
5.2 Connect Ghost webhook
First, let's find the URL of your serverless function. Just click the "API Gateway" box, in your Lambda function details page. The URL appears in a section below.

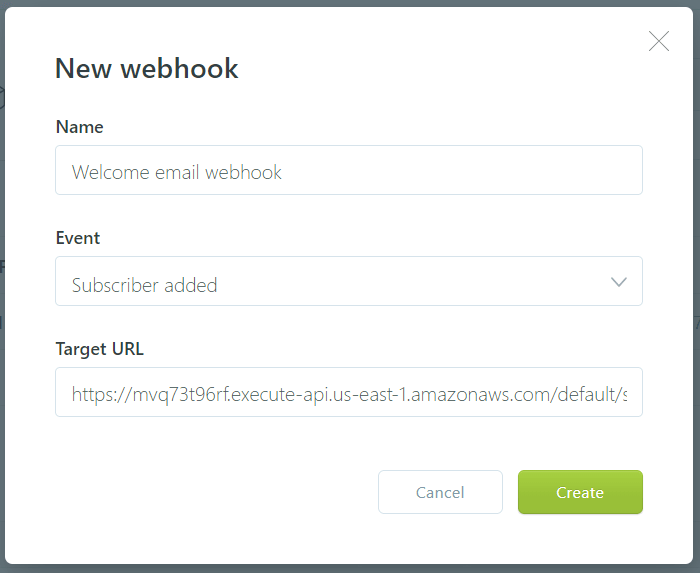
Then, in the Ghost admin, go to our custom integration details page, under Settings >> Integrations. In the Webhooks table, click "Add webhook" and configure as follows:

6. Send weekly updates
Let's keep our subscribers in the loop with a small weekly email routine.
6.1 The email template
Say we have a small content team, and they will be publishing posts at a rate of exactly two stories a week.
Here is how we will iterate through these stories in the nl-stories-email template:
{{#get "posts" filter="primary_tag:nl-story" limit="2" order="published_at desc" }}
{{#foreach posts}}

{{/foreach}}
{{/get}}
For more fine-grained control on how stories are bundled, we could also make use of the featured content property provided by Ghost.
6.2 Build the scheduler
We'll use a very similar setup to schedule our weekly deliveries.
First, create a blank (no blueprint) Lambda function named "snipcart-ghost-demo-schedule". In the visual designer, add a "CloudWatch Events" trigger. Configure it like below, and hit "Save":


Now, using the same workflow as before, push the following code:
const GhostAdminAPI = require('@tryghost/admin-api');
const sgMail = require('@sendgrid/mail');
const axios = require('axios');

sgMail.setApiKey(process.env.SENDGRID_API_KEY);

const ghost = new GhostAdminAPI({
  url: process.env.GHOST_HOST,
  key: process.env.GHOST_ADMIN_KEY,
  version: 'v2'
});

async function handler(event, context, callback) {

  var subscribers = await ghost.subscribers.browse();
  var emailHtml = (await axios.get(`${process.env.GHOST_HOST}/nl-stories-email/`, {responseType: 'text'})).data;

  const subscriberEmails = subscribers.map((s) => s.email);

  const msg = {
    to: subscriberEmails,
    from: 'Spooky Ghost Stories <geeks@snipcart.com>',
    subject: 'This week\'s content on Spooky Ghost Stories',
    html: emailHtml,
  };

  await sgMail.send(msg);
};

exports.handler = handler;
Here are the interesting bits in the above snippet
We are fetching all our subscribers from the Ghost API
We are retrieving the email HTML from
/nl-stories-email/.
Aaaaaand we're all set!
Checkout the GitHub repo
Checkout the live demo
Final thoughts
I really enjoyed playing with Ghost. I've been thinking of a simple newsletter setup for a while, and Ghost turned out to serve this purpose pretty well. I've been pushing its limits a bit though, and I started to foresee some places where Ghost could fall short going deeper. To be fair, Ghost is definitely not advertised as a CMS that does it all, so I'm pretty content with what I ended up doing with “just a blogging website”.
If you've enjoyed this post, please take a second to share it on Twitter. Got comments, questions? Hit the section below!


