What Is Cypress Testing and 4 Steps to Get Started
While building a new web app with modern JavaScript frameworks is a breeze, debugging it once it has been launched is something we all want to avoid. To ensure your app is working as intended, you’ve used tools like Selenium to automate debugging before production, but more complex JavaScript code can cause them to break.
Frameworks like React, Vue.js or Angular also introduced a shift from multi-page applications to single-page applications (SPA). Meaning more complex JavaScript code that can cause legacy tools like Selenium to break.
That’s when Cypress came in a modern, frontend-centric testing framework for modern web apps.
Let’s explore what Cypress is and how you can get started using it.
What is Cypress?
Cypress is a modern and complete end-to-end testing framework that aims at unifying web app testing regardless of the programming language used. It works on all platforms and all browsers. Cypress also provides an integrated development environment (IDE) that you load up in your browser.
Cypress can be used for both integration and unit testing. Cypress tests are written in JavaScript and run in a real browser. It uses an event-based architecture that hooks into Google Chrome’s lifecycle events, enabling it to wait for things like Ajax requests to complete without using a polling/timeout mechanism. This leads to reliable and fast tests.
You can think of Cypress.io as the Redux of automated testing, with features like time travel, current and previous state diff-ing, live code reloading, and much more. You can even use all the debugging tools you know and love with Chrome (even installing additional tools like React Dev Tools and Redux Dev Tools).
The idea is to run tests using the same stack that is used during development. Cypress is not just another testing tool. It is an open-source testing framework that combines many cool features like running your tests in the browser or headless, screenshots and video recordings, in-browser debugging, asynchronous testing, etc. Cypress also has a CLI that can be used to test your website on various browsers and devices.
Best of all, you will see it all happen right in front of your eyes. With a second monitor, you can quickly spot your tests running when you save your changes in the test file. This will save you a lot of time writing tests, debugging broken tests, and making tests fun to write.
In short, it is truly the future of E2E testing and how it should have been in the first place.
What are the differences between Cypress and Selenium?
There are several key differences between Cypress and Selenium:
Cypress is designed specifically for testing web applications, whereas Selenium can be used to test a range of different applications.
Cypress has a much simpler and more intuitive interface than Selenium. This makes it much easier to learn and use for novice testers.
Cypress runs directly in the browser, making it run tests much faster. On the other hand, Selenium WebDriver uses a driver that communicates with the browser via HTTP.
Cypress uses JavaScript to write tests and run them in the browsers. Selenium uses its own language called Selenese, alternatively, you can use other scripting languages like JavaScipt, C#, Ruby, and Python.
What are the benefits of Cypress?
There are many benefits of using Cypress for your web application testing needs. Here are some of the biggest ones:
1. Easy-to-use interface
Cypress provides an easy-to-use interface making testing quick and efficient. Additionally, Cypress automatically waits for commands to complete before moving on to the next command, which eliminates the need for manual synchronization.
2. Built-in support for assertion library
Cypress also includes built-in support for assertion libraries and provides a rich set of tools for debugging and troubleshooting tests. Overall, Cypress is an excellent choice for web application testing and provides a great deal of flexibility and power.
3. JavaScript framework-friendly
Cypress is built to work with all the popular JavaScript frameworks. Since all tests in Cypress are written in JavaScript, the time required to create your web application tests is usually shorter than with Selenium.
4. Run natively in your browser
Cypress runs directly in the browser and not outside. It also means better handling when visible and ready elements, making it usually faster.
5. Debugging Live Inspect with Chrome Dev Tools
Cypress comes with the excellent Test Runner to run tests and debug your app. It also enables you to use Chrome Dev Tools. This way, you can interact directly with your browser’s console to see what’s going on with your application.
6. Video recording
Cypress comes with a build-in screenshot and video recorder to capture screenshots of test failures or record a video of the whole test when it’s running.
7. Cypress Dashboard
Cypress has a paying service that offers a hosted dashboard service in which you can access all the recordings of the test you’ve run.
Get started with Cypress in 4 steps
Now that we know what Cypress is and its benefits, let’s learn how to use it to test a web application. In this tutorial, we’ll use this project to run our tests. Make sure you clone the GitHub repository before getting started.
1. Adding Cypress to our project
The first thing you’ll need to do is to open the project’s folder you just clone in the terminal and install all its dependencies by running the following command:
npm installWhen the command is done executing, we’ll want to add Cypress to it by using the following command:
npm install cypress --save-devNow head to the package.json file at the root of the project. In it, add the following inside the "script":
"cypress:open": "cypress open",
"cypress:run": "cypress run"
Lastly, you’ll need to run Cypress directly from the npm command:
npm run testYour browser should open a local instance of the website and a Cypress window will appear, you can close them for now. You can also kill the local server.
If you already have a server running, you will only need to run cypress with
npx cypress open. However, in the case of this sample project, you can run the default server with npm run test.2. Creating a test in Cypress
Now that we have added Cypress to our project, let’s create our first test. We’ll set up a test to ensure that the total shows the correct amount when a product is added to the cart.
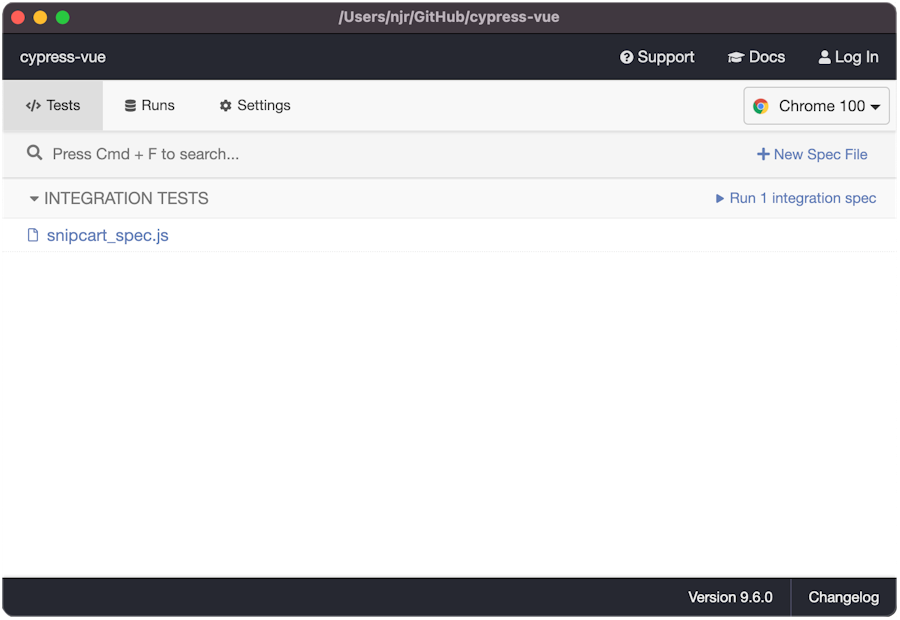
To do so, head to /cypress/integration and create a file named snipcart_spec.js in it.
Falculatif: you can delete the “Getting started” folders in the location as we won’t need them.
In this file, we’ll paste the following code:
describe("Test Ecommerce features", () => {
    it("Test Ecommerce features", () => {
      cy.viewport(1366, 900);

      cy.visit("localhost:3000");
      waitForSnipcartReady();
      cy.get("#la-gioconda").click();
      cy.get(".total").should("contain", "79.99", { timeout: 30000 });
      expect(cy.get(".snipcart-modal").should("exist"));
    });
This will visit our local page in a 1366x900 viewport. Then we create a promise to wait for the Snipcart script to finish loading by capturing the snipcart.ready event.
All of Cypress’s functionality is available under the global cy object you can see above. There is no need for any async/await or any asynchronous non-sense. Tests execute one step at a time, waiting for the previous step to complete, except for waiting for the Snipcart event, as for this, we need to capture the running document.
Tip: Remember to always keep the intention of your tests clear. If you want to group several related steps, you can do so in a function. In the above example, we are testing that if the user adds a product to the cart, the cart price total increases the correct amount. You can hide irrelevant details like the exact buttons clicked in private functions to reduce the noise.
3. Running a Cypress test
Now that we have created our first test, let’s run it.
We’ll first need to run Cypress by using the following command in the terminal:
npm run testIn the Cypress window, you should be able to see the test we created earlier. To run it, simply click on it.

This will open a new browser window and run the test automatically. You should see the test running in real-time in Cypress on the left and the browser on the right.


As you can see in the window, the test passed and you can see the details of what happened.
4. Dealing with errors in Cypress
We have created a test and made it run successfully, but what would happen if we expected an error?
Since our project is not a live site with a valid Snipcart API key, we expect an error message "Order couldn't be processed." when proceeding to payment. However, we don’t want our test to fail as we know this is normal behaviour in this case.
Let’s add a step in our test to check the full checkout process. To avoid a failing test, we’ll add an expect() element
For this let’s add the following code inside the describe() function before or after the other it() into the snipcart_spec.js file we’ve created earlier:
it("Test the checkout process", () => {
    cy.viewport(1366, 900);

    cy.visit("localhost:3000");

    // wait for document event 'snipcart.ready'
    waitForSnipcartReady();

    // add the product to the cart
    cy.get("#la-gioconda").click();

    cy.get("#snipcart footer button.snipcart-button-primary", {
      timeout: 30000,
    }).click();

    cy.get("input[name=name]").type("John Doe");
    cy.get("input[name=email]").type("john.doe@example.com");
    cy.get("input[name=address1]").type("3671 Garfield Road", {
      force: true,
    });
    cy.get("input[name=city]").type("Neponset");
    cy.get("input[name=country-target]").type("United States", {
      force: true,
    });
    cy.get("input[name=province-target]").type("IL", { force: true });
    cy.get("input[name=postalCode]").type("61345");

    cy.get("#snipcart-billing-form button")
      .contains("Continue to shipping", { timeout: 30000 })
      .click();

    cy.get("#snipcart-checkout-step-shipping .snipcart-button-primary", {
      timeout: 30000,
    })
      .contains("Continue to payment", { timeout: 30000 })
      .click();

    // check if :nth-child(1) > .snipcart-payment-methods-list-item__button is visible
    cy.get(":nth-child(1) > .snipcart-payment-methods-list-item__button", {
      timeout: 30000,
    }).click({ timeout: 30000 });

    cy.get("form .snipcart-button-primary", { timeout: 30000 }).click();

    expect(
      cy
        .get(".snipcart-flash-message__content h2", { timeout: 30000 })
        .should("contain", "Order couldn’t be processed.")
    );
}
Running the code should result in an error in the payment process, but that error is expected, as this is not a live store with a valid API key, we expect the message "Order couldn't be processed.".
This is the reason why we used the following expect() function since the page should contain that error message. If the error message is not there, the test will fail.
expect(
     cy
       .get(".snipcart-flash-message__content h2")
       .should("contain", "Order couldn’t be processed.")
   );
Conclusion
Cypress is a robust test automation framework. It represents a massive leap in productivity and innovation for testing, with features like time travel, diffing, headful/headless mode, synchronous code execution, etc. It comes with many benefits you would get from other testing tools like Selenium. And best of all, it is easy to add to your own project and start using it immediately.
Have you tried Cypress? What are your thoughts about the tool? Let us know in the comments.


