5 Best Angular Tutorials for Beginners
According to the State of JavaScript survey, Angular is one of the most used JavaScript frameworks, and not without a good reason. It’s a full-featured, opinionated framework that also offers developers several libraries to build complex web applications.
And, since Google backs it, chances are it will keep growing and improving.
To help you learn about this JavaScript framework, I surveyed the Angular communities and developers at Snipcart and came up with the best tutorials.
In this article, I share my findings with you, along with everything you need to know before you learn this framework.
Let’s dive right into it!


How to get started with Angular
Angular is a frontend component-based framework. Therefore, it offers developers a collection of integrated libraries and a suite of tools to develop, test, and update their code, making it a robust option for building and deploying web applications.
If this isn’t your first rodeo and you already know how to get started, feel free to skip to the tutorials section.
For those not familiar with it, here are some things you want to know before you get started with the framework:
Prerequisites
This is what you need to get started with Angular:
Basic understanding of HTML, CSS, JavaScript, and TypeScript
A code editor like Visual Studio Code
Node.js installed on your machine
npm installed on your machine
If you’re not familiar with Node.js and npm, here’s a guide on .
How to Install Angular
Once your development environment is set up, use npm to install the Angular command-line interface (CLI) locally or globally.
The CLI enables you to generate your application, access the library, perform tests, and build and deploy apps.
To install Angular CLI, open your terminal or console window and enter the following command:
npm install -g @angular/cliQuick side note: In this case, g stands for “global”. If you don’t add the -g, you will install Angular only in the directory you’re in and you won’t be able to access it from other terminals or computers.
How to create an Angular application
Keep in mind that Angular development occurs in the context of the workspace. Your workspace allows you to organize your application into smaller projects.
A typical workspace contains your project files, including libraries, end-to-end tests, and assets.
To set up your workspace, run the command ng new. For the name of your app, let’s use my-app. Like this:
ng new my-app
The ng command asks you to select the features you want in your initial project, since this is our first time, let’s keep the default options.
The Angular CLI will install the necessary npm packages and other dependencies. This may take a few minutes, so you may want to drink a glass of water or do something else while it loads.
Before we run our app, let’s go over Angular’s file structure.

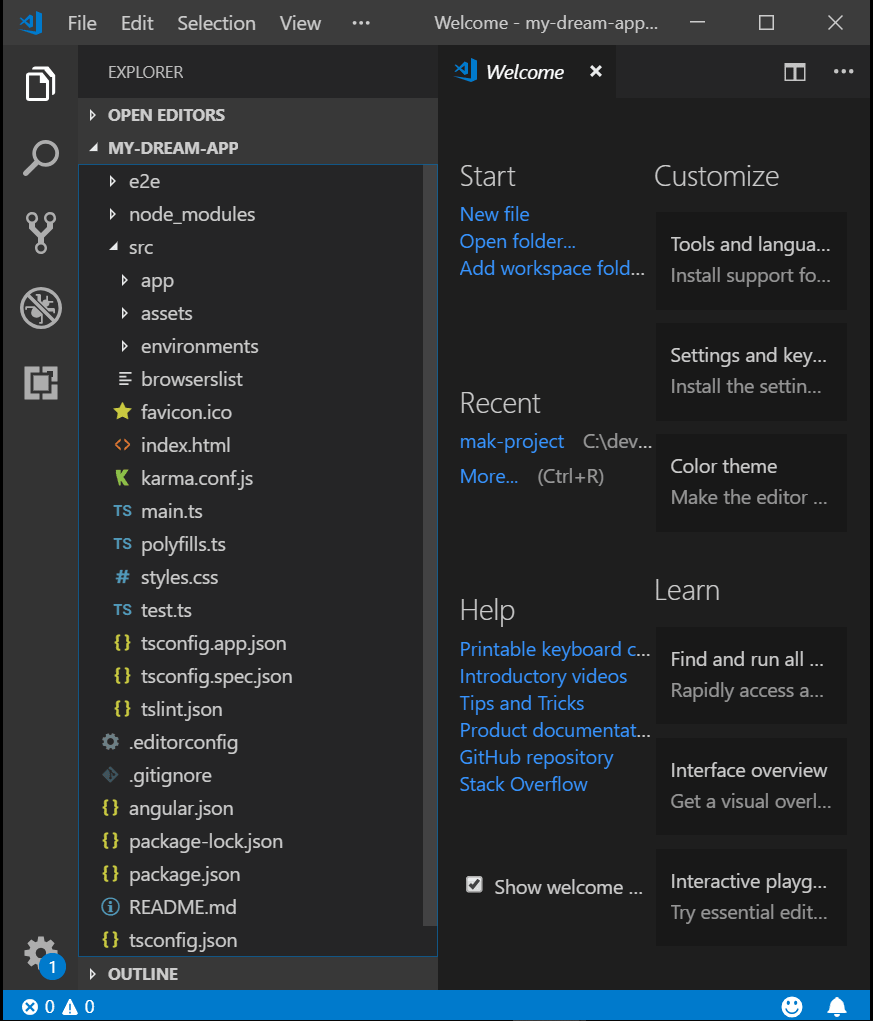
A typical Angular workspace contains the files for one or more projects composed of a standalone application or a shareable library. While we won’t go over every folder, let’s stop for a moment at the most important ones.
src: Contains the main code and source files of your application
app: Contains the files you’ve created for your app components
assets: Houses your images and other files to be copied as-is.
environments: Contains your build configuration options.
Index.html: This page serves the main HTML people see when visiting your site.
e2e: Contains your testing files.
node_modules: Provides npm packages to the entire workspace.
For a deeper look into Angular file structure, you can learn more here.
How to run an Angular application
We have created a new workspace and a simple welcome app by this point. We’re ready to rumble. But let’s not get too ahead of ourselves; we still need to serve our application.
Luckily, the Angular CLI includes a server to help us serve and build our application locally.
To run our app, let’s go to our terminal and use the command ‘ng serve’ like this:
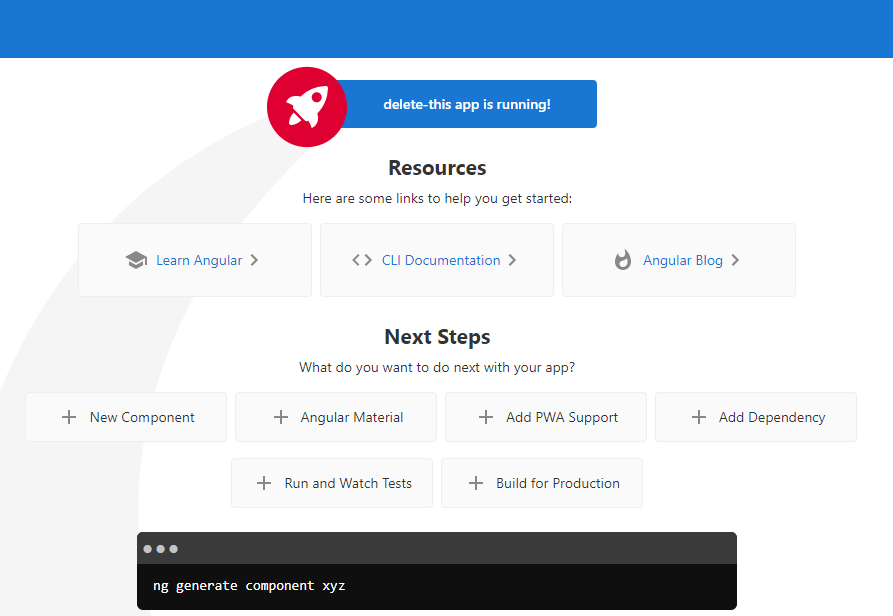
ng serve --openThis command launches the server and rebuilds the app as you change your Angular components. If you’re feeling bold, you can substitute the --open with -o. The open command should open your browser to http://localhost:4200/.
If your installation was successful, you should see a page like this:

5 Best Angular tutorials for beginners
Now that we’ve covered the basics and know how to get started with Angular, let’s jump right into the tutorials.
To make things simpler, I organized each training session by difficulty level so we’ll start with the easiest one and progress our way through this framework together.
Ready?
Here’s my curated list:
1. Tour of heroes Angular tutorial

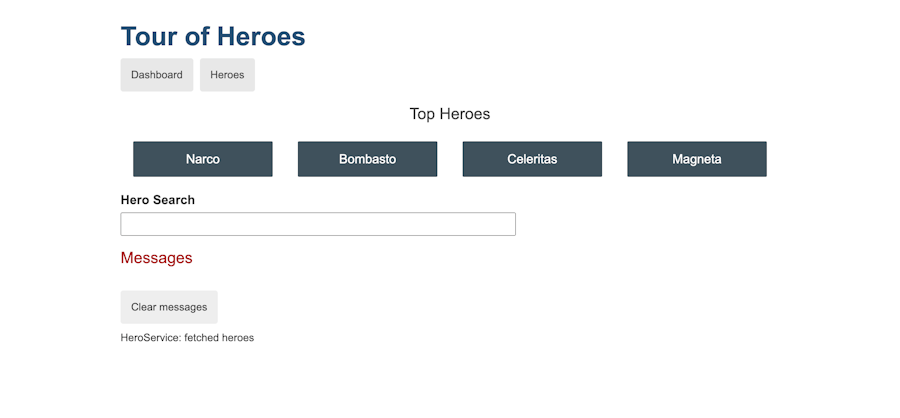
Most people in the different Angular communities pointed me to the Tour of Heroes. It makes sense because this is a written step-by-step resource created by the developers at Angular to guide people who are just getting started.
The Tour offers a hands-on exercise that introduces beginners to the application development process using the Angular CLI. It also walks you through the fundamentals and helps you gain a solid foothold on how it works.
By the end, you should be able to:
Format data with pipes
Create Angular components
Add editable files to update a model
Bind component methods to user events
Use one-way data binding for read-only data
Use Angular directives to show and hide elements and lists
Use routing to navigate among different views and components
2. Angular crash course

Many people from the Angular Discord community suggested the Traversy Media's Angular Crash Course. It’s a 2-hour course that goes through all the basics, including using the CLI and setting up a new application.
After watching it, I realized that it’s a lot to handle in two hours, but it's pretty comprehensive. So my advice would be to take your time and go slow on this one because if you watch it in one sitting and you're fresh from the Tour of Heroes, you may struggle with some concepts. Other than that, it's the best under-two-hour resource I found.
By the end of this tutorial, you should be able to:
Create events
Use file routing
Apply global styles
Use files and folders
Set up a JSON server
Set up the Angular CLI
Create header and button components
Understand the Angular component structure
3. Angular university

Angular University is an online course portal that offers up-to-date resources for all skill levels. It has plenty of free educational materials and offers a beginner’s course separated into different short videos for easier consumption.
This tutorial is a tad more advanced than the Angular Crash Course and offers eBooks and written material that serves as a study guide. The only caveat to this website is that it also provides premium –or paid– content. Still, you can watch most course materials, especially the beginner ones, without getting your credit card out.
By the end of this beginner’s tutorial, you should be able to:
Create components with
@Inputand@Output, and Event EmittersUse
ngFor,ngIf,ngClass,ngStyle, andngSwitchUse GET, POST, PUT, and DELETE HTTP methods
Create custom components with
@ComponentUse
@Injectableand Custom ServicesCustom pipes
Built-In pipes
Async pipes
4. Angular tutorial for beginners – freeCodeCamp
This is another commonly recommended tutorial that is worth a look. While it covers the same essential topics as other videos, it’s a very visual course that's scaffolded and easy to digest.
This tutorial also shows some advanced Angular functions and features, but, honestly, it lacks depth. It’s a good resource to get a solid first glance at Angular’s routing, binding, and directives, but it’s surface-level. I’d suggest you follow up with specific tutorials for each concept after this one.
By the end of this tutorial, you should be able to:
Establish communication between components
Structure directives to structure HTML layouts
Perform dependency injection
Create template-driven forms
Execute lifecycle hooks
Use two-way binding
5. Angular for beginners – Programming with Mosh
While this is a beginner's course, it's the most advanced on this list. You’ll learn how to create an eCommerce application using Angular, Firebase, and Bootstrap. This tutorial is a bit complex, but the pace is gradual, and you won't feel behind.
The course is well structured, and while it feels like a lot, you will find that it gets easier as you progress through it. However, I'd recommend you pause every once in a while and make sure that you understand the concepts rather than powering through them. Another thing I liked about this guide is that it has a test at the end to help you assess your knowledge in a real-life situation.
By the end of this tutorial, you should be able to:
Access modifiers
Use webpack with Angular
Perform dependency injection
Understand single-page applications
Generate services using Angular CLI
Talk about the fundamental of TypeScript
Perform CRUD actions using HTTP methods
Bonus
Let's build a Tic-Tac-Toe PWA
This one isn’t for beginners, and it requires we learn about Angular and CLI extensions, it’s a good course to learn how to augment it using Angular plugins. I also liked that instead of yet another app, we’re building a simple game of Tic-Tac-Toe.
However, it’s a bit abstract and would benefit from some images rather than just code. Still, it’s not hard to follow and the end result is worth it.
By the end of this tutorial, you should be able to:
Style an Angular component
Use Angular extensions
Deploy an application
Angular eCommerce with Snipcart

With the previous tutorial, I felt like I needed one last challenge, and I’m sure you do too. That’s why I chose this eCommerce course, where you can build an online store and offload your shopping cart and back-office tasks to Snipcart.
This is a great one to master CLI commands and try something different than what we’ve been using in the previous materials. It’s also a solid exercise if you want to understand stylesheets and finally create mock products.
By the end of this tutorial, you should be able to:
Use Angular routing to navigate among different views and components
Use the CLI to run other website starters
Customize HTML stylesheets
Create components
Introduce directives
Conclusion
I have to tell you, my journey to learn Angular was steeper than I had anticipated. For instance, I wasn’t as experienced with TypeScript as I thought and that made it hard for me to grasp the framework to its full potential. But don’t let my personal setbacks hold you back, learning this JavaScript framework is definitely worth it.
On its own, every course on this list has enough content to get you up and running, my two favorites were the Angular Crash Course and Programming with Mosh. The teachers were not only knowledgeable but also explain things slowly.
Angular is alive and kicking despite what some developers say. It's still a solid tool to develop a single-page application and offers a one-stop solution for people who don't want to fiddle with complex libraries like React.
If you’re a novice developer, you can still benefit from learning Angular, especially if you want to build cross-platform applications, native mobile apps, and progressive web applications.
I hope that after these tutorials you’re ready to crush it and build your own web applications. If you find new resources that you think would help beginners, let me know in the comments.


