Stackbit: Friendly Jamstack Websites & CMS Management
In a rush? Skip to step-by-step tutorial or live demo
One of the most significant challenges the Jamstack faces going forward is gaining a wider adoption and boosting accessibility.
Many indicators suggest that 2020 is the year where the community reaches this goal.
Take, for example, what Stackbit is currently developing to bring the management of Jamstack websites built with a static site generator and CMS to a whole new level.
In this post, I want to highlight the new features the Stackbit team has been rolling out lately:
Inline editing
Viewing & sharing site previews
Realtime site status
If it sounds like what’s been missing in your Jamstack setup and CMS, the following demo should be helpful.
Oh, and for team collaboration, these are game-changers. Jamstack projects that are user-friendly for developers and non-technical folks alike? Bring it on!
Let’s see what it’s all about.
What is Stackbit?


If you’re an avid reader of our blog, you might be asking yourself: “Haven’t you already introduced Stackbit as a building tool for Jamstack websites?”
You would be absolutely right.
The site builder still is up and running. However, the team behind Stackbit has been focusing on new features for its product in the last few months. The end goal of easing the access to the Jamstack to non-technical users still persists, though.
Going the Jamstack route and using a headless CMS offers many benefits in aspects like security and performance. However, the decoupled architecture means that users often struggle with simple tasks like updating text on pages or previewing edits they’re making.
Stackbit solves this by offering them a quick and easy means of editing content directly on the page and the ability to preview and share edits being made.
This kind of offering is pretty unique in the Jamstack space. For the moment, at least. Alternatively, TinaCMS is building something similar for the on-page editing experience.
On a broader scope, though, Stackbit sees itself competing more with the likes of Webflow or Squarespace. Even there, Stackbit distinguishes itself by integrating with the variety of services and open source tools that comprise the Jamstack rather than being a walled garden.
Who is Stackbit for?


We’ve praised the many benefits of static websites and the Jamstack relentlessly—enhanced security, high performance, low development times & costs. Until now, it sometimes came with the downside of dev-oriented setup that left content creators and marketing teams behind.
By making it easy to create, edit, and preview changes for Jamstack websites, teams can finally enjoy these benefits, while also offering a smooth content editing experience to their non-technical members.
For the same reasons, Stackbit is the perfect introduction to newcomers in the Jamstack space who wants to get started quickly. They can get a site running in no time with minimal coding knowledge.
Compatible with multiple Jamstack-ready CMS
There are two ways to access these new Stackbit features:
1. Start a project from scratch using Stackbit’s site builder
For the additional features we’re talking about, you’ll have to choose Gatsby as the static site generator. Support for Next.js is coming soon as well.
You can bundle your new static site with these headless CMS:
Later this month, users will also have the ability to leverage the content editing and previewing features on sites without a CMS, simply using a GitHub repo.
Other headless CMSs are available in the site builder, without supporting the additional editing/previewing features yet.
If you’re still choosing your stack, I can assure you that both solutions mentioned above are solid options. We’ve tried them, and many others, and listed resources here that can help you compare them.
In the demo below, I’ll use the Stackbit’s site builder to bundle Gatsby as SSG with Contentful as the headless CMS to get started.
2. Add Stackbit to an existing Jamstack project
In this case, it’s available for projects built with Contentful or Forestry for the moment. Integrations for additional CMS are planned for the near future.
Stackbit is ready to be integrated into projects using Gatsby or Next.js at the moment. If this isn’t your case, stay tuned as integrations for more SSGs are on the roadmap for later this year.
If this available stack applies to your current project, you can get started right here.
Okay, time to see all of this in action.
Managing a Jamstack website with Stackbit (Live editing & previews demo)
As I mentioned, my first step here will be to create a new project using Stackbit’s site builder. If you come in with an existing website, the later steps still are relevant to understand how to use the editing and previewing features.
Pre-requisites
[Optional] Basic understanding of static site generators and headless CMS
1. Generating a Stackbit project
Creating a static website with Stackbit is very straightforward. Their site builder allows you to create a website from a pre-existing theme in a matter of a few clicks. An impressing feat, considering it connects an SSG, a headless CMS, and deploys it all automatically for you.
In this demonstration, I'll create a website that uses Gatsby as the static site generator, Stackbit's Azimuth theme, and Contentful as the CMS. Nothing is stopping you from using the tech stack or the theme of your liking as long as Stackbit supports it.


After following the steps of the site builder, your website should start building and deploying.

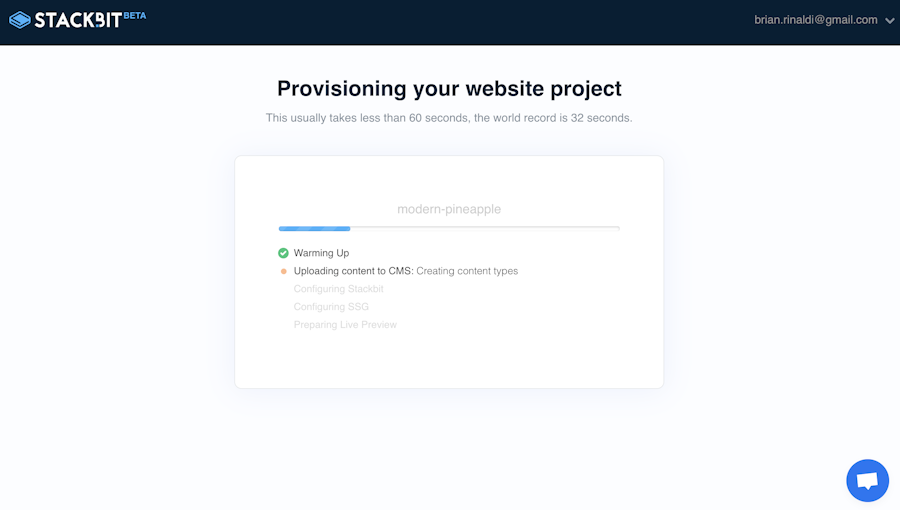
Once you’re done setting this up, you'll be redirected to your newly created website.
2. Editing the site's content
At this stage, you'll most likely want to edit the content of the page to fit your needs. For instance, in this demonstration, I've edited the default template to replicate a simple website for an Aquarium.
First, click on the View Site button, which links you to your deployed website. From there, you'll have access to Stackbit's overlay on the top right corner of the screen.

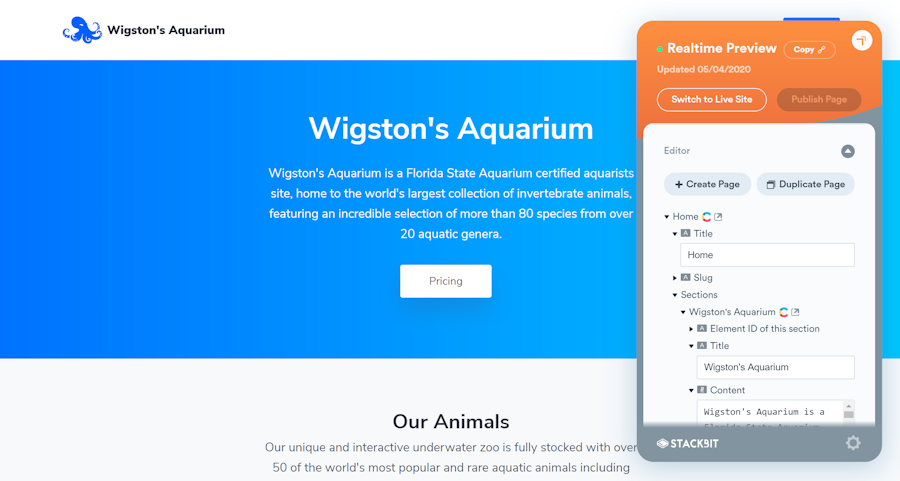
Previously, this widget could only show you the status of your website and link to either GitHub, your CMS, or Netlify. The updated one now allows you to modify the content of your website.
Clicking this button will send you to a live preview of your editable website.
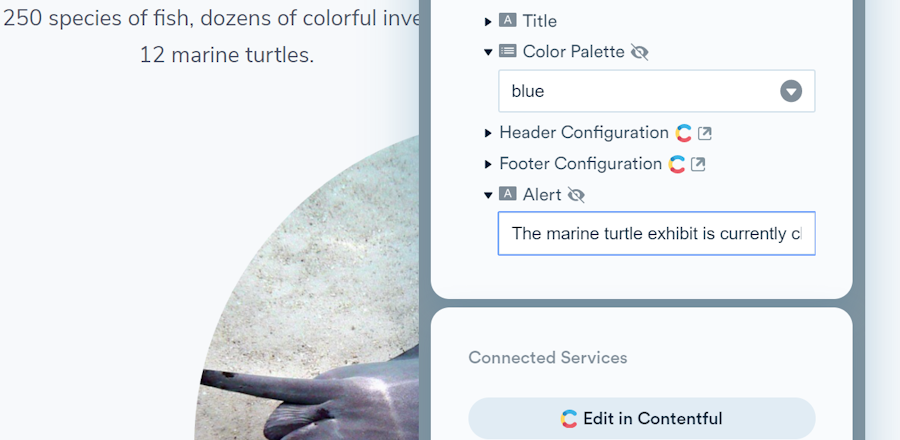
To make any changes, you'll find an object representation of the page's content retrieved from the CMS under the Editor drop-down.

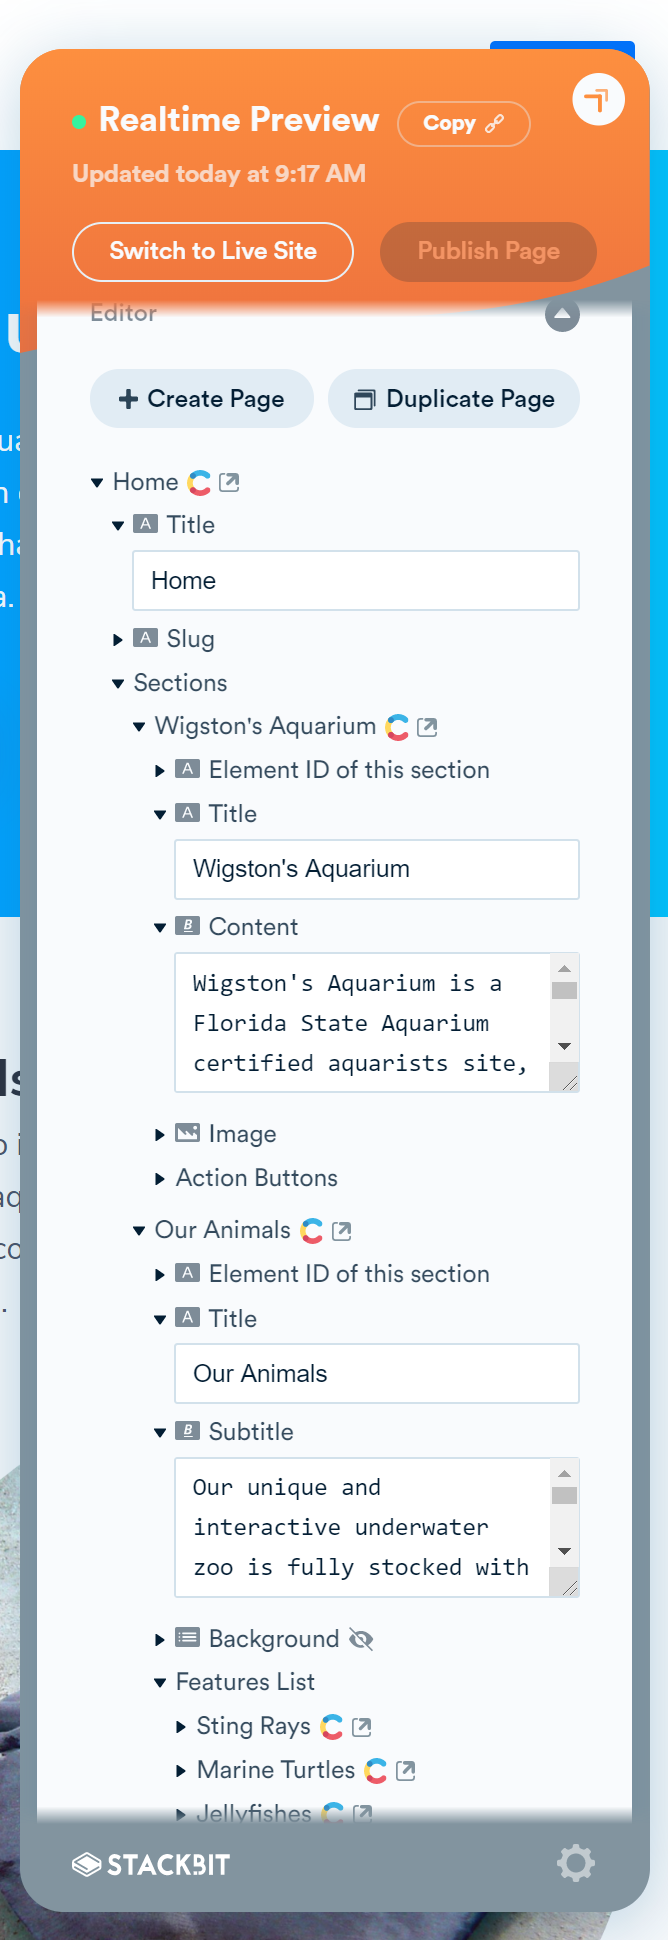
From there, you can change the value of almost any field, add more pages or rearrange the position of certain content through the grabber icon.
If something is not editable through the editor, a handy link redirects you directly to the entry of the CMS, where you'll be able to apply the changes there.
Furthermore, clicking on any field to edit its content will scroll to and highlight the section on the preview.

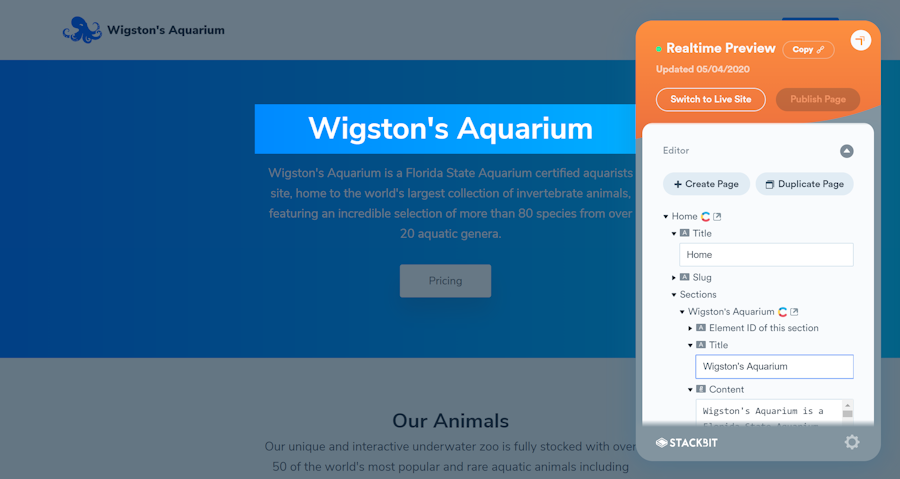
Keep in mind that any changes you make are not applied to the website as long as you haven't clicked the Publish Page button, so feel free to experiment with different content or configuration!
2.1 Collaboration links
Another useful feature of Stackbit's widget is that you can share the preview environment through a collaboration link.
To do so, you can click on the gear icon at the bottom right of the screen and copy the collaborator link.

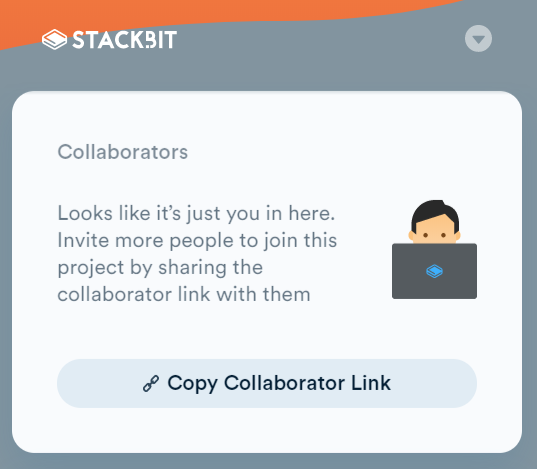
Alternatively, if you want to share the preview without giving access to editing, there is a Copy button at the top right of the widget.
3. Editing the template locally
Content editing is handy in most cases, but it doesn't mean we're limited to Stackbit's editor menu or the functionalities that were pre-built inside the theme. In fact, the project generated by the site builder is modifiable like any regular project built with the static site generator you chose.
To demonstrate this, I'll edit the generated Gatsby project to add an optional alert feature that warns our visitors of anything we'd like at the bottom of the page.
3.1. Setting up the development environment
Before getting started, we'll need to clone the generated GitHub repository on our local machine.
git clone https://github.com/<GITHUB_USERNAME>/<PROJECT_NAME>.gitOnce cloned, we can install the project's npm dependencies.
npm installIf you're using the same tech stack as me (Gatsby paired with Contentful), you'll also need to assign Contentful's CONTENTFUL_DELIVERY_TOKEN and CONTENTFUL_SPACE_ID environment variables. Since this step entirely depends on your operating system, you can refer to the instructions in Gatsby's documentation.
At this stage, running the following command will get the development environment up and running:
npm run developYou'll find the local website at the following URL http://localhost:8000.
Additionally, a GraphQL server is also available at the following address: http://localhost:8000/___graphql. This tool can be very useful to build your GraphQL queries before inserting them inside your code. Once again, more details about this can be found in Gatsby's docs.
3.2. Creating a new component
Now that our application is up and running, we can start adding new components.
Here, I'll add an Alert.js file inside the components folder. This file contains our React component that displays whatever message it receives as a prop.
import React from 'react';

export default class Alert extends React.Component {
    render() {
        return (
            <div className="alert">
                {this.props.message}
            </div>
        );
    }
}
3.3. Updating Contentful's content model
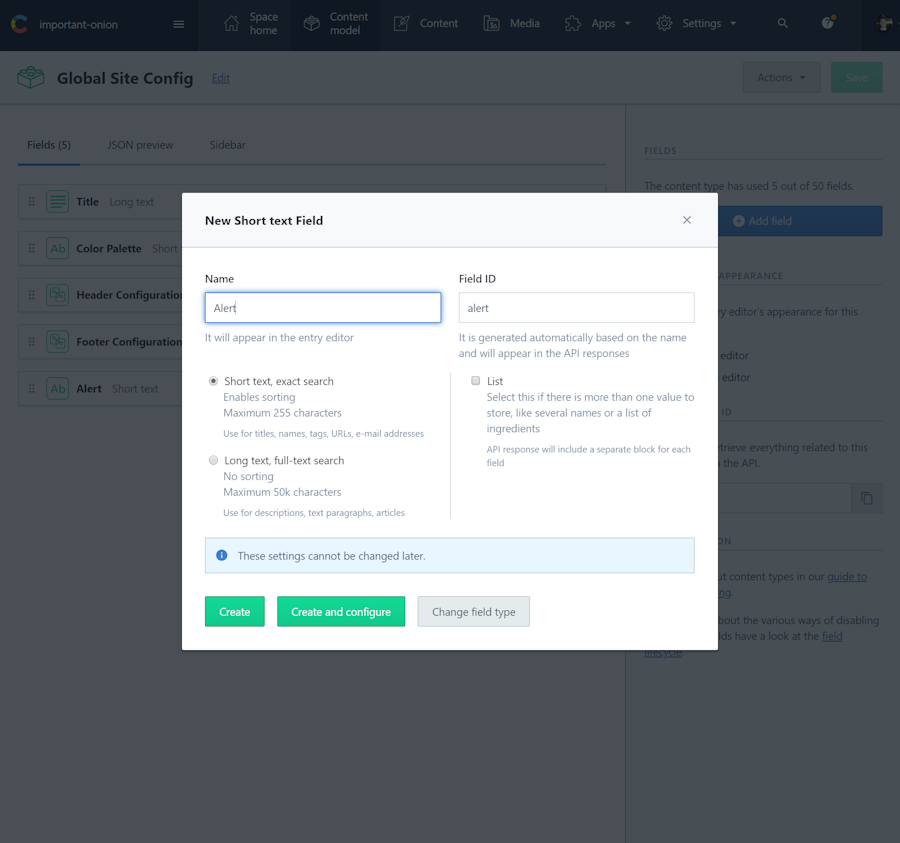
To add whatever alert message we want, it needs to be editable from our CMS. To do so, we can update Contenful's content model by visiting the Contentful space of your project and click the Content model tab a the top of the screen.
For the sake of simplicity, I'll add a new text field to the pre-existing Global Site Config content type and name it Alert.

Updating the content type in Contentful changes the GraphQL schema, so we'll also need to also update our schema.gql file in the gatsby app to include out new Alert field:
type ContentfulConfig implements Node @derivedTypes @dontInfer {
  palette: String
  alert: String
  header: ContentfulConfigHeader @link(by: "id", from: "header___NODE")
  footer: ContentfulConfigFooter @link(by: "id", from: "footer___NODE")
  title: contentfulConfigTitleTextNode @link(by: "id", from: "title___NODE")
  spaceId: String
  contentful_id: String
  createdAt: Date @dateformat
  updatedAt: Date @dateformat
  sys: ContentfulConfigSys
  node_locale: String
}
Don't forget to restart your local development environment every time you make changes to the GraphQL schema by running the
npm run developcommand.
3.4. Updating the page's layout
We'll want to display this component on every page on our website; therefore, we'll add it to the Layout component.
To do so, we'll include the alert field to our Query and conditionally render our Alert component only if an alert message is found in the website's configuration.
...
export const query = graphql`
  fragment LayoutFragment on ContentfulConfig {
    title {
      title
    }
    palette
    alert
    ...HeaderFragment
    ...FooterFragment
  }
`;
...
render() {
    const page = _.get(this.props, 'page');
    const title = (_.has(page, 'title') ? _.get(page, 'title.title') + ' - ' : '') + _.get(this.props, 'config.title.title');
    const alertMessage = _.get(this.props, 'config.alert')

    let alert;
    if (alertMessage) {
        alert = <Alert message={alertMessage} />
    }

    return (
        <React.Fragment>
            <Helmet>
                <title>{title}</title>
                <meta charSet="utf-8"/>
                <meta name="viewport" content="width=device-width, initialScale=1.0" />
                <meta name="google" content="notranslate" />
                <link href="https://fonts.googleapis.com/css?family=Nunito+Sans:400,400i,700,700i" rel="stylesheet"/>
            </Helmet>
            <div id="page" className={'site palette-' + _.get(this.props, 'config.palette')}>
                <Header {...this.props} />
                <main id="content" className="site-content">
                    {this.props.children}
                    {alert}
                </main>
                <Footer {...this.props} />
            </div>
        </React.Fragment>
    );
}
...
Once this is done, we should now be able to commit these changes to the Github repository, and the website should automatically redeploy itself with the new changes!
Also, since Stackbit's editor retrieves the fields from the CMS, the notification can be changed or removed, by leaving the content empty inside the Stackbit widget.
It’s worth highlighting that Stackbit doesn’t require developers to do anything special, like tagging fields, for all this to be editable via the Stackbit UI.

GitHub repo & live demo

See GitHub repo here.
See live demo here.
Closing thoughts
Working with Stackbit was an interesting experience and a friendly reminder on how easy it has become to create and deploy performant and optimized web applications nowadays.
In a previous post, where we featured Stackbit's custom theme functionality with Unibit, we've concluded that Stackbit wasn't yet a complete tool for maintaining a site. However, with the addition of their editing tool, it looks like Stackbit now fits this use case quite nicely.
You can have a look to the Snipcart-integrated theme Planty here.
That being said, there’s still room for improvement; I think it would be useful to have an element picking tool as searching through each field can take some time depending on how large the page is.
All in all, I think Stackbit can be a very exciting tool for any newcomers that want to get a small project up and running quickly or for larger teams that want to make content editing for non-developers possible using the Jamstack.
If you've enjoyed this post, please take a second to share it on Twitter. Got comments, questions? Hit the section below!


