JAMstack Templates: How to Launch Fast, CMS-Powered Static Sites
If chance rather than intent brought you to this post, I suggest reading our JAMstack introduction first.
A month ago, looking at my calendar, I realized that 75% of Snipcart developers would be off on vacation on the same week in August.
Yikes
After freaking out over our poor management skills, I decided this would be the perfect opportunity for us marketing n00bs to take over the technical blog.
So I challenged our marketers to create JAMstack sites and explain how they managed in a post.
This experiment also serves to prove the point that the JAMstack is becoming more accessible and is now a fun playing field for beginners & experts alike.
As for the real experts, they also wrote a ton of advanced JAMstack-related content on this blog. It’s all here.
Here are the projects we’ve come up with:
Nathan’s e-commerce site for digital products (Jekyll + DatoCMS)
Math’s static blog imported from Medium (Gatsby + Netlify CMS)
Harder than we expected? Sure. Happy with the results? Absolutely.
Let’s dive into each of our individual use cases.
Franck’s JAMstack blog template

For my demo, I’ve created a JAMstack version of an old personal blog of mine I’ve been revamping.
Now, I do not code. Well, I try to code as little as possible. I like it, but I’m honest enough to admit I’m much better at other things.
Given the statement above, you won’t be surprised to learn that my first attempt at this JAMstack challenge was a disaster. I tried to set up Ghost as a headless CMS with a static Gatsby frontend deployed on Netlify.
Four tutorials and one late night in, I thought I had everything running smoothly. Turns out I had just managed to fully install Ghost on a DigitalOcean droplet: my CMS wasn’t decoupled at all, and my frontend was far from static. ¯_(ツ)_/¯
Here’s my coupled but revamped blog:
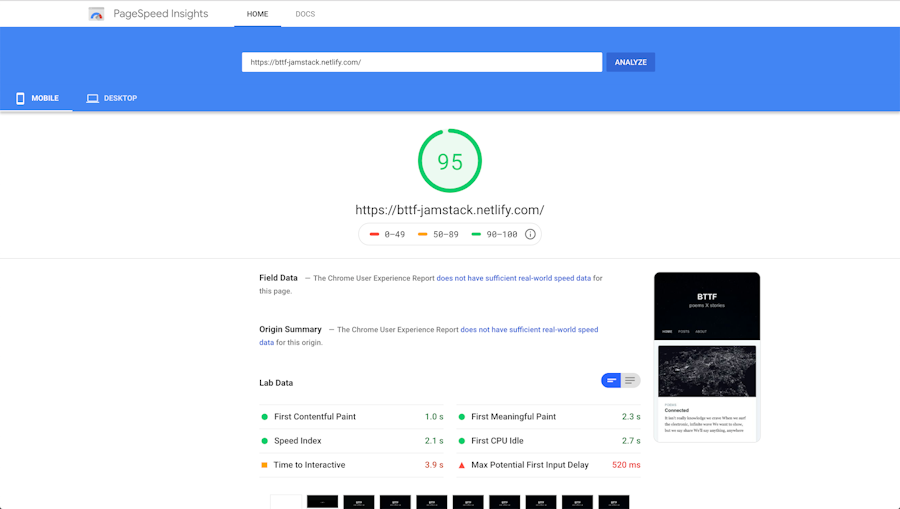
Performance-wise, here’s what it looked like:

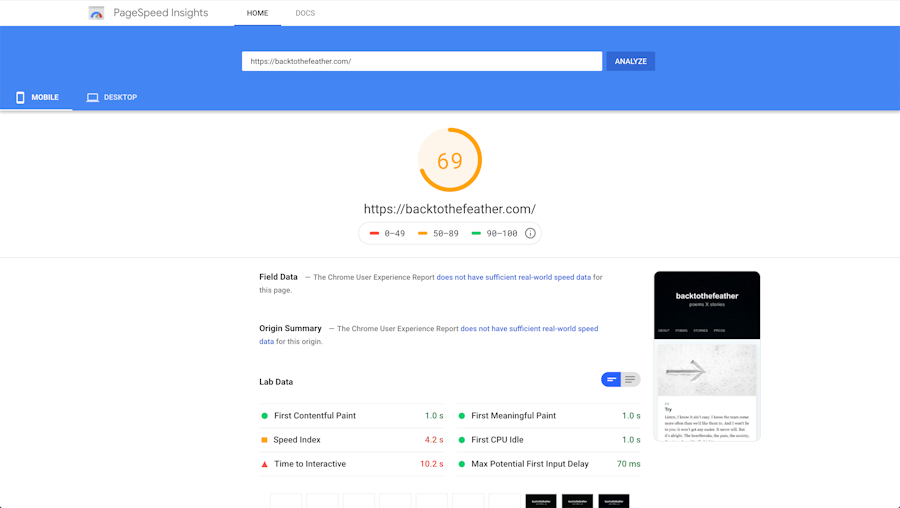
Not that bad, but I knew a statically-generated site could do much better.
Unfortunately for me, time was running out; our deadline drew closer.
At that point, I opened Twitter and stumbled upon this timely tweet.
For those who aren’t familiar with Stackbit, it is a modern site builder filled with JAMstack templates. In a nutshell, it lets you easily pick and bundle any static site generator + headless CMS. They also have a bunch of cool JAMstack themes available. So when I saw that custom VuePress theme using the same, clean design as my Ghost blog, I jumped on the occasion.
Let me show you how easy it was to launch a fast, VuePress/Forestry blog deployed on Netlify.
1. Create a Stackbit account
It’s free! You can do that here.
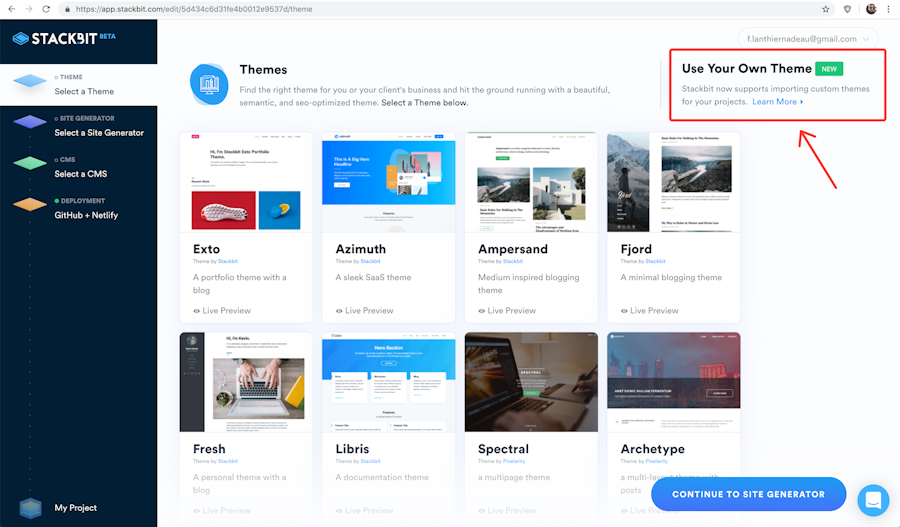
2. Import a custom JAMstack theme
I used Stackbit’s custom themes feature here, i.e. I didn’t pick from their existing theme gallery.

Instead, I simply copy-pasted a GitHub repo URL here:

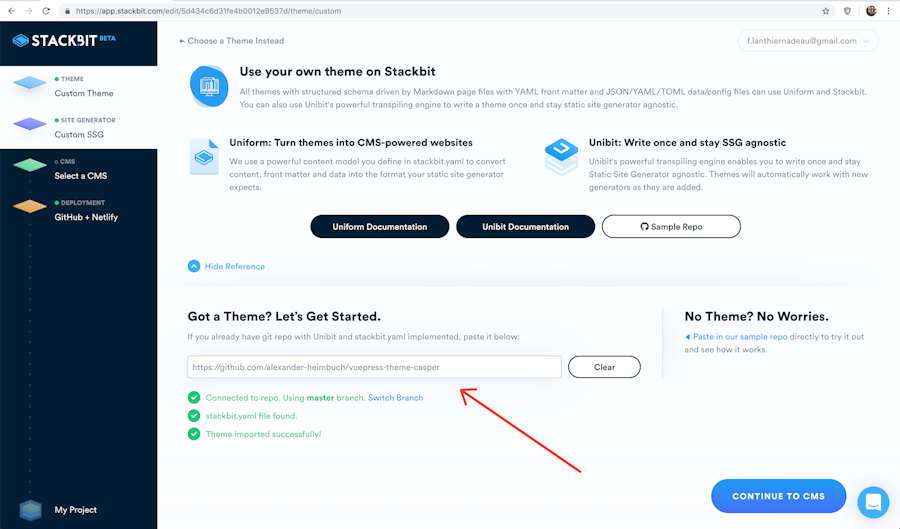
If you’d like to get that same look, make sure you use this theme repo by Alexander Heimbuch.
This custom theme works with VuePress, so I didn’t have to choose a static site generator here.
If you’re confused about what static site generators are, and which one to pick, read this guide.
3. Choose a CMS for your static site
The one I picked, Forestry, is a neat, Git-based CMS perfect for any static site. It works with key static site generators in the space: Hugo, Jekyll, Gatsby, VuePress.

DatoCMS is also a solid product. Sanity, if you need more control on CMS customizations, is another excellent pick.
4. Connect GitHub and Forestry to deploy on Netlify
If you don’t already have accounts on these services, Stackbit will walk you through either the creation or authentication process. Super simple.

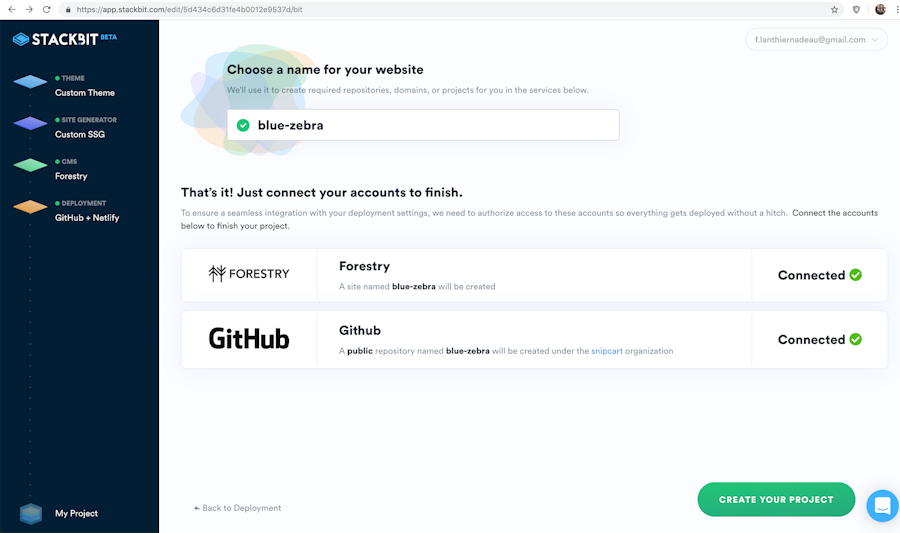
And that’s it—your site is live!
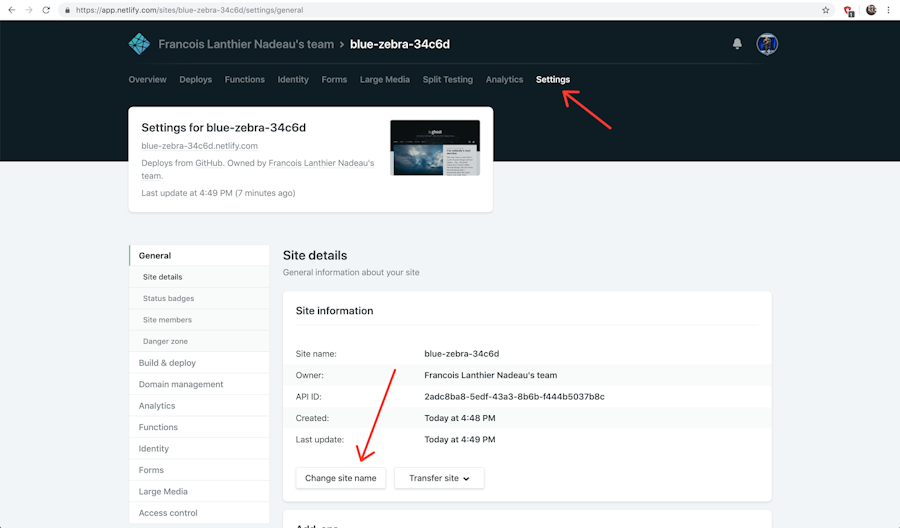
5. Put the finishing touches
Next, you’ll want to head over to Netlify to pick a custom domain name. You can use their free subdomains (yoursitename.netlify.com) or buy your own unique domain name directly within their user interface.
Last but not least, you’ll want to update your site’s content to make it your own! Log in to Forestry to start doing so.
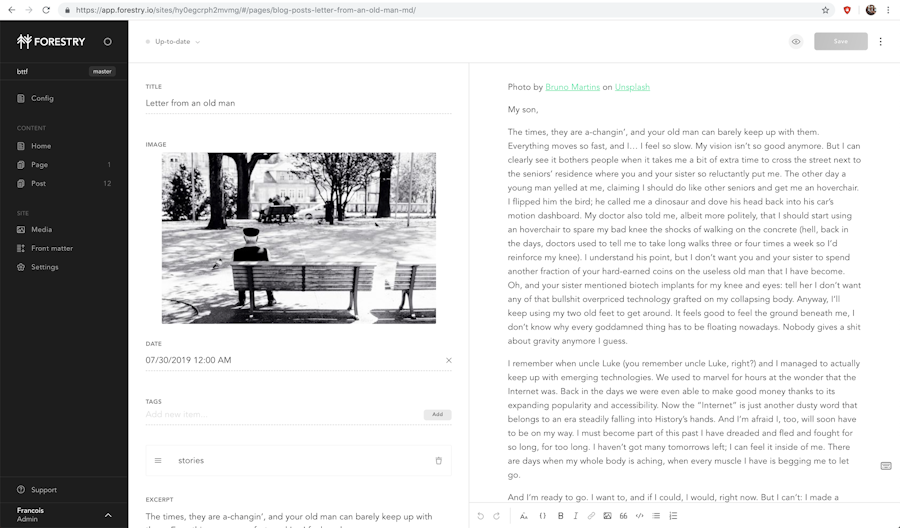
Here’s what mine looked like after fiddling around a bit:
Oh, and JAMstack-ing this blog was definitely worth it!
Nathan’s JAMstack e-commerce template

My website is what we would call a “semi-success”—meaning it functions but could be made a lot better if some of the kinks were worked out.
Here was the goal: A simple music sharing blog with a shopping cart integration to sell whatever I want.
Easy, right? Probably for some; definitely not for techno-moron like myself.
So, here’s how I went about this.
1. Choosing the stack
Like Franck, I went ahead and used Stackbit because it seemed like the most approachable way to tackle this project. For my theme, I chose “Fresh” because I was looking for as minimal a concept as possible.

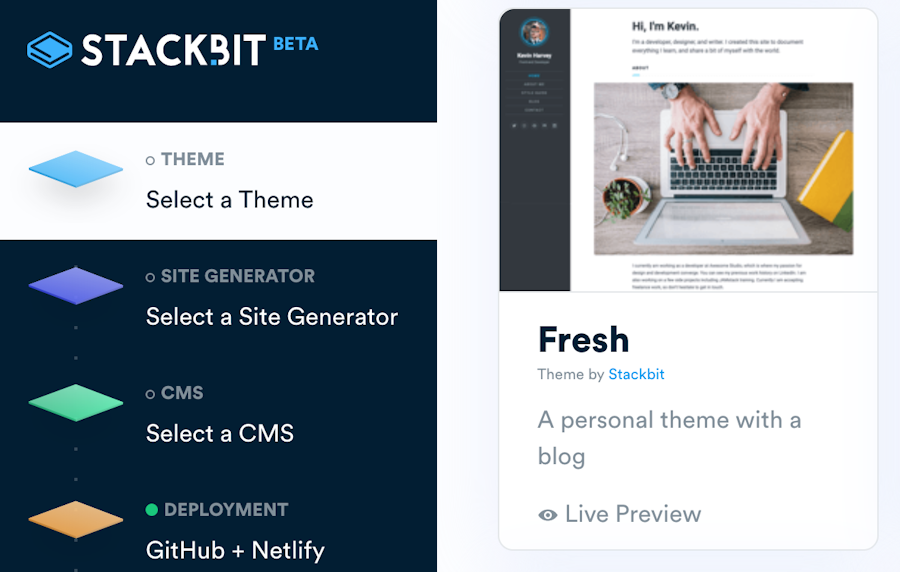
From there, I went ahead and used Jekyll (for no reason other than my love of Robert Louis Stevenson), DatoCMS, and deployed it on Netlify.
2. Adding content in DatoCMS
DatoCMS is fairly intuitive for someone with little coding skills, which is precisely what a CMS should be. It allows devs and non-techies to work together on a site without getting in each other’s way.
This was my first time with DatoCMS, but I was impressed.
Importing audio content
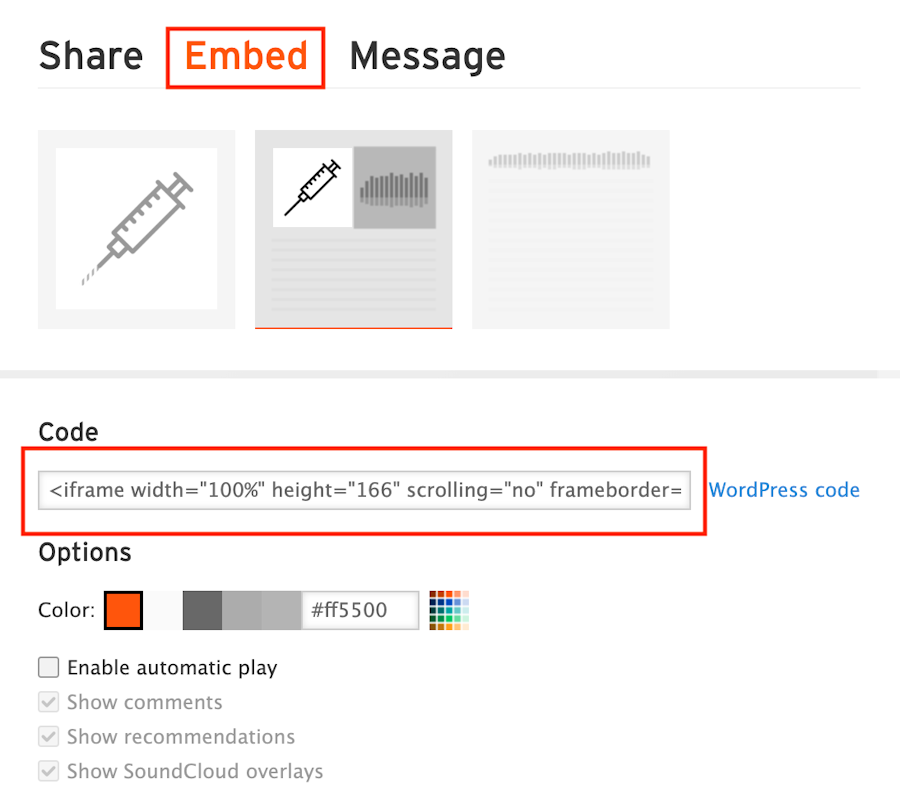
Because my goal was to share music I need to record and host my audio files somewhere externally. For this, I used the popular (and free) recording tool Audacity and hosted them on SoundCloud.
When my audio file was fully uploaded to SoundCloud, I simply extracted the embeddable code to insert into my blog post:

Then I moved over to DatoCMS, went to the menu “Post” and modified an existing “stock post” that comes with the theme. The great thing about DatoCMS is that I was able to put the HTML directly into the content block, like so:

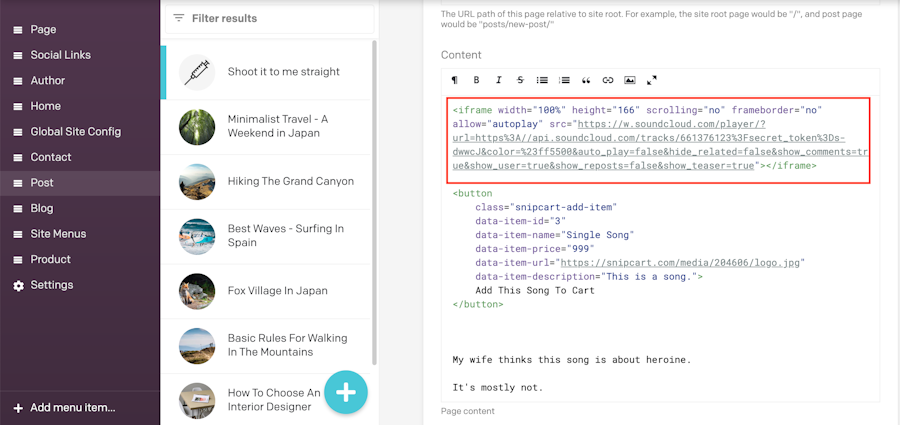
And just like that, my audio file was live! I could also add more content underneath including lyrics or descriptions of the song. Then, it was just a matter of “rinse-and-repeat” with all the audio files I wanted to share.
Next came the tricky part… the e-commerce portion of this project.
3. Adding Snipcart to sell digital files
I was fortunate that my colleagues agreed to a rule: we each get 1-hour of developer time. I was also lucky that one of our developers, Michael, hadn’t taken his vacation yet and has infinite amounts of patience (thanks again, man!).
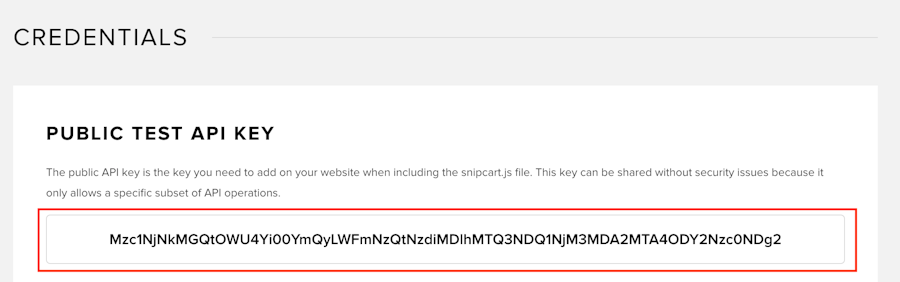
My goal was to add Snipcart to the site, so the first thing I did was to sign up for a free Snipcart account. This would give me access to my API Key, which I would later need:

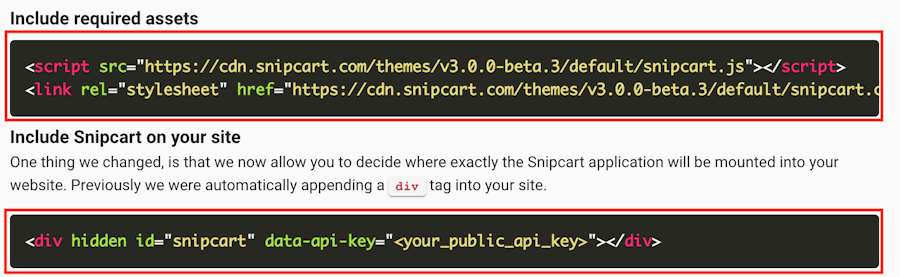
I then went to Snipcart’s v3.0 documentation to figure out how to integrate into my site. In terms of the code snippets I would need, this was incredibly clear, even for a non-programmer like me:

Now the trouble was knowing where to insert this code (this is where Michael came in). Because we’re both new to DatoCMS, it took some time to find the appropriate place, but it was finally easiest to do in the GitHub repo’s _layouts > base.html folder.
I inserted Snipcart’s code snippets into my base.html file and came out with the following:

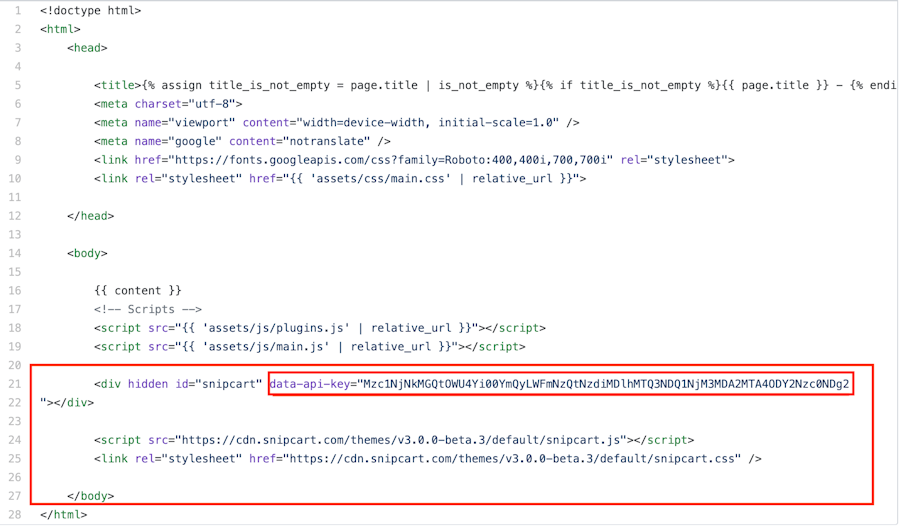
And :fire: ... just like that, Snipcart was up-and-running on my site!
Defining my products
The next (and last) step was to create the appropriate buttons to sell my products. This is where things started to break down. Adding and defining the product buttons was easy. Like I mentioned above, DatoCMS lets you type HTML directly into their content blocks, so it was just a matter of copying/pasting Snipcart’s “Product Definition” code snippet wherever I wanted it:

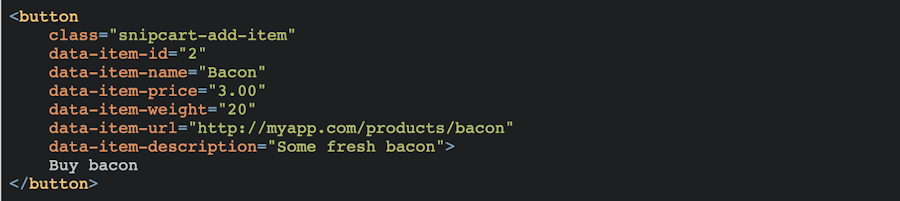
Note: I used Snipcart’s older “Buy Bacon” button because I didn’t have many custom attributes for my product and this was just a more concise code snippet.
That was cool because I was able to make a “Concert” section or a “Buy Album” button on the homepage and side menu, respectively. I was even able to add a “Buy 1 Song” on each blog post that hosted the music. In theory, musicians could easily sell anything from any part of their page.
But here was my real problem: Once I added the product button, it would work once and automatically take me to the cart for checkout. But when I returned to “continue shopping,” the button would simply update the cart without redirecting me to checkout.
And this is why I call this project a “semi-success.” Because what I did to solve this problem is totally like putting duct-tape on a leaky pipe.
That said, I totally understand now why we describe our product as “developer-centric.” The problems I ran into are the type of things that someone with even basic skills could fix in a matter of minutes but would take someone like me days to sift through.
Here’s what I did:
I added a “Checkout” button that would always and only go straight to the cart using the following snippet:
<button class="snipcart-checkout"> Checkout (<span class="snipcart-items-count"></span>)</button>
So, in the end, I have a bit of a break in my e-commerce flow: I have product buttons that will update the cart and a checkout button that will lead to the cart itself.
Sure it works, but it’s not ideal and will likely cause someone some trouble in the near future.
Again, a “semi-success.”
In the end, I am happy with the result and may take more time in the future to replace my digital duct-tape with something more professional. All in all, I got a better understanding of our product and way more appreciation for our team of developers!
Here it is:
Math’s blog migration from Medium to the JAMstack
This small experiment allowed me to go forward with a project that was at the back of my mind for a while now. I’m pretty sure it showcases a use case that many content creators and writers eventually face.
I’m a huge movie buff. A few months ago, I started writing cinema-related articles on Medium. Movie lists, recommendations, reviews; you get the idea. First of all, Medium is a great platform for blogging; it boasts a neat design and an efficient content editor. Above all, it already has a readership.
But when publishing to Medium, you don’t truly own your content. I decided it was time to make it my own by building a simple movie blog. This project hence presented a few requirements for the tools I would use:
Be built with the JAMstack—because that’s what this experiment is all about.
The ability to import Medium content—I didn’t want to spend hours importing existing blog posts on my new website.
Long-term maintenance by a coding newbie such as I—I want to keep this project going beyond the scope of this post without relying on help from devs.
Well, it should be no surprise to you by now that Stackbit answered all these concerns. Look, at the start, I was full of good intentions into building my JAMstack from scratch. I had Hugo installed and everything, but I quickly realized there were too many notions unknown to me to deliver this in time (without bothering my dev colleagues every 5 minutes).
So Stackbit saved my ass.
1. Importing Medium content to Stackbit
Luckily enough, Stackbit makes it incredibly easy to take Medium content and build a new website around it.
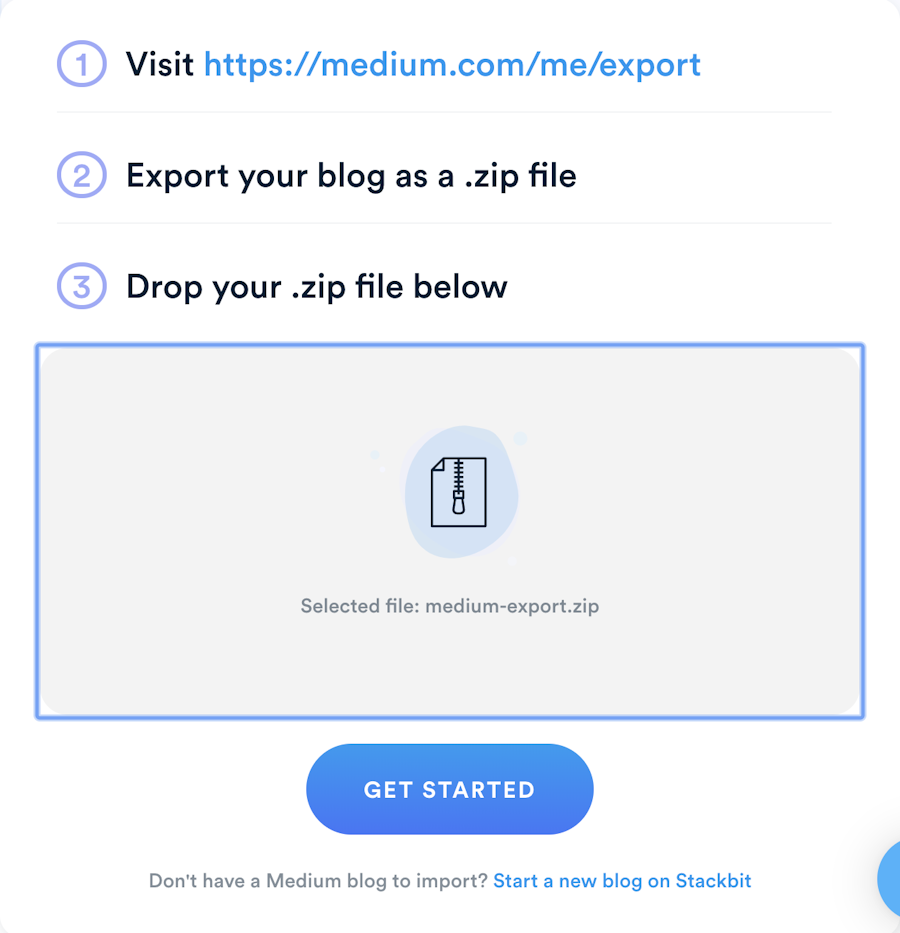
It’s actually the first step to accomplish here, even before building the site itself. Start by heading to https://medium.com/me/export.
Once you’re connected to your Medium account, click the “Export” button.
You’ll then receive an email where you can download your Medium archive under a .zip file.
Upload that .zip file to this page: https://www.stackbit.com/medium/. Take a deep breath and hit “Get Started”.

2. Building my JAMstack blog
You have now been redirected to the same Stackbit dashboard we’ve seen with the two previous projects.
I won’t go into how everything works once again, but I’ll try to justify the stack that I choose to build my website.
First, the choice of themes here is smaller when you use the Medium import function. It’s limited to blogging themes, which is what you probably want anyway.
You can still import a custom theme, though.

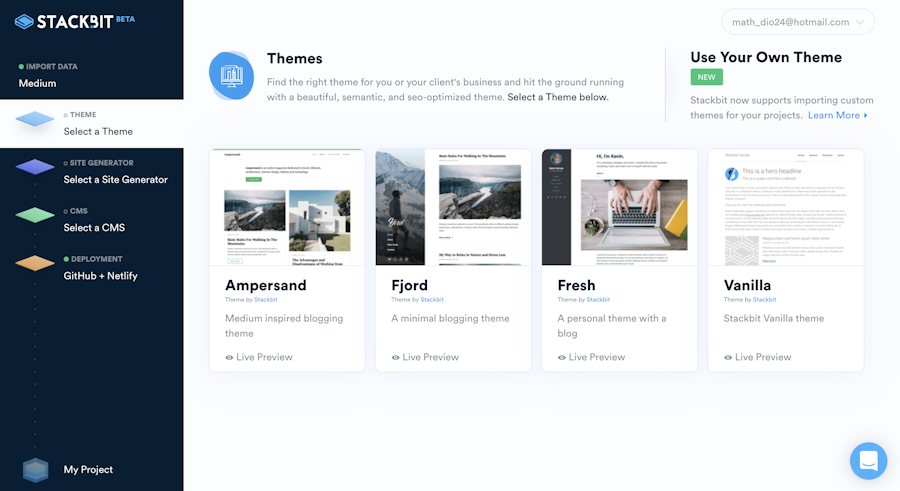
Then, I decided to go with Gatsby as the static site generator and Netlify CMS as the headless CMS. Why?
Gatsby represents the sure value. In this kind of setup where I won’t have to directly deal with the SSG a whole lot, I at least wanted the one that is continually getting better and maintained at the highest level. Don’t get me wrong, Jekyll & Hugo are in good shape, but Gatsby’s development has been through the roof in the last few months.
I count on updating my blog with new content fairly often. So, another characteristic that has an impact on my SSG choice here is its build times. Gatsby is pretty fast. Not as fast as Hugo you’ll tell me, but hey, Gatsby it is. ¯_(ツ)_/¯
Netlify CMS is harder to justify as my choice of CMS other than that I wanted to try out something else than my teammates. But one thing it has going for it is that it makes it very straightforward to connect with Netlify to deploy the website.
3. Editing content in Netlify CMS
As you might expect, the content you imported from Medium probably won’t be formatted 100% like you want it to look on your new website. But it does a pretty solid job.
You’ll waste less time editing small parts of your posts than copying the whole thing in new posts. Luckily, Netlify CMS text editor is intuitive and makes it easy to put on the last touch on your content.


Editorial Workflow
By default, all new entries you edit or create in Netlify CMS are committed directly into the main branch of your repository. It means that all changes go live instantly. Now, that can become bothersome.
If you’re like me, you probably want to be able to start drafts and import content without going live right away. To do so, you’ll need to enable the “Editorial Workflow”.
It’s pretty simple:
In your Github repo, find the config.yml file

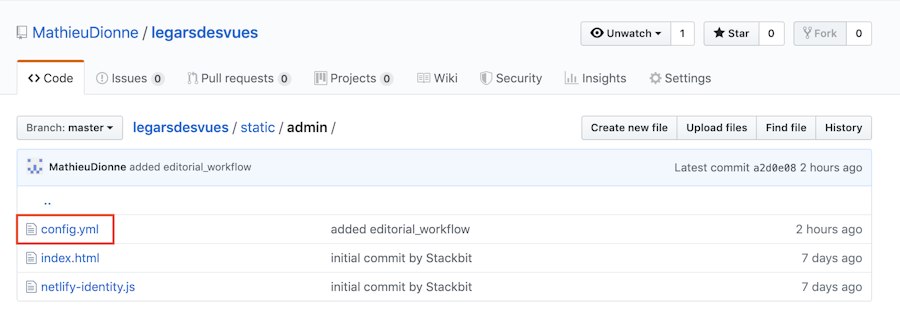
At the end of the file, add this line:
publish_mode: editorial_workflow
Save this, et le tour est joué!
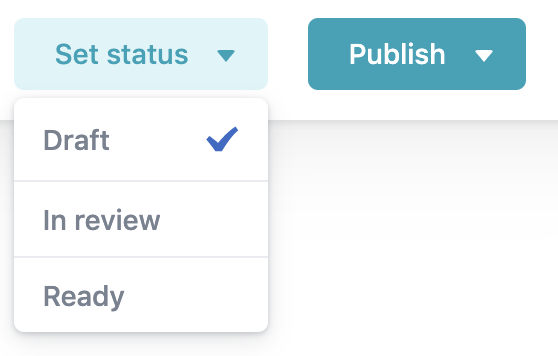
Once the changes are ready, you’ll see that a new column “Workflow” has appeared in the header of your CMS dashboard. This new function allows you to set different statuses to blog posts and keep them as drafts:

That’s it for me! In the near future, I’d like to add comment sections to my posts (probably using Disqus) and enable social sharing, but it’ll do the job for now.
Here’s my lovely movie blog:
Closing thoughts
Well, that was fun! I think this experiment convinced the three of us of two things:
We all have a long way to go before even thinking about calling ourselves “developers”.
We’ll learn more about the technical side of these tools and about how to improve our projects, because it’s a very rewarding process.
If you’re new to web development or the JAMstack, I strongly invite you to try it out. You’ll probably hit multiple obstacles along the way, as we did, but you’ll learn a whole lot.
In the end, our devs are still going to handle the rough parts of new JAMstack projects.
No delusions on our side, but hey, maybe we can now lend a hand as well!
If you liked this post, please, take a second to share it on Twitter. It’d mean a lot!


