Figma Tutorial: How (and Why) To Use It For Your Next Project
In a rush? Skip to the Figma Tutorial or the live demo.
I love Italy. Everything about it from the architecture to the pizza… it’s all good. And while there’s loads to love about the Bel Paese, one marvel tends to stand out:
The leaning tower of Pisa.


It took 199 years to build and was designed to be perfectly straight.
Oops.
But as a designer myself, I can totally relate. Working with project managers and getting requests from a team of developers can leave my projects feeling a bit lopsided, too.
That’s why, today, I wanted to share a special Figma tutorial to show developers why this tool is so much more than just another design tool… it’s an invitation to collaborate more efficiently across an entire team. This has become particularly necessary as web-based projects are increasingly fragmenting work by going the JAMstack route.
So, more specifically, in this post I will look at:
How Figma is closing the gap between designers and developers
How with Figma, developers can contribute more meaningfully—and more efficiently
By the end of this post, you’ll see why Figma is the perfect tool for making sure all your projects take less than two centuries to complete and come out looking like they should!
The (long and bumpy) road to Figma

To understand what Figma is, we first need to understand where it came from.
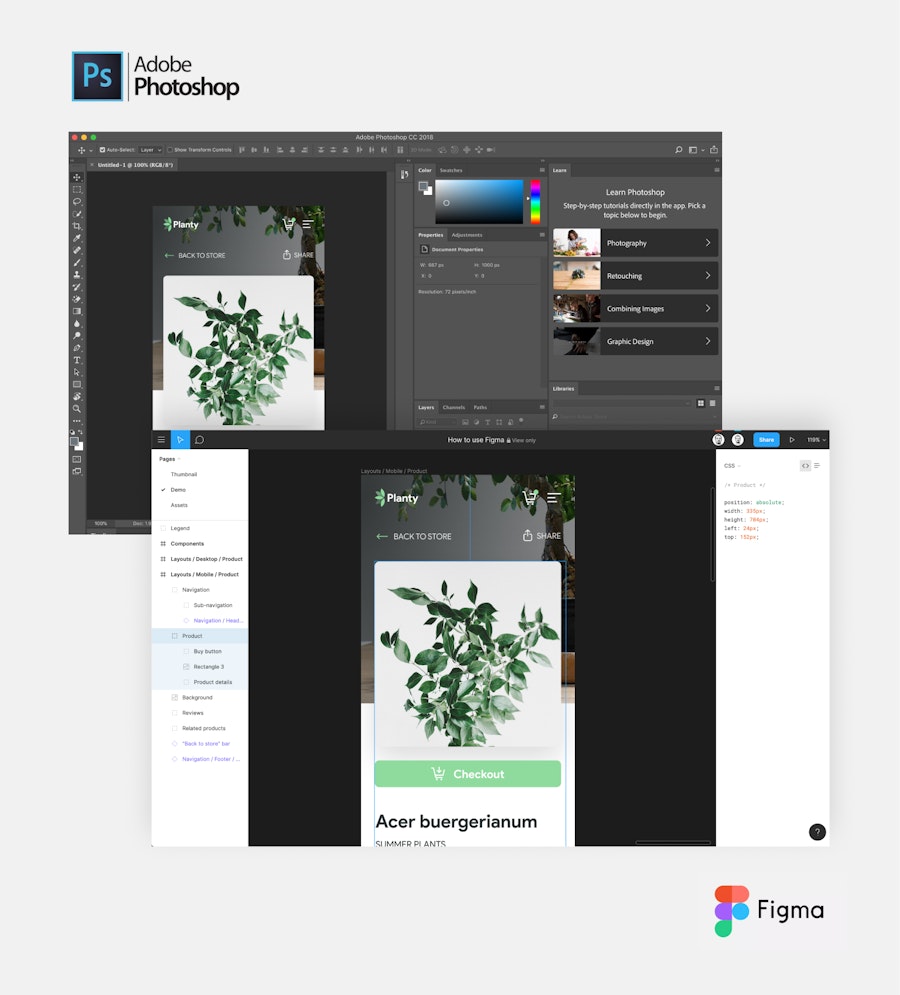
Back in 2014, new design tools started to emerge with interface design as their primary focus.
This was in direct opposition to Photoshop—still widely used at the time—which procured a myriad of options and features from photo and graphics editing to web design, animation, or even 3d!
But, Photoshop was still far from perfect.
The big issue at the time was that Photoshop wasn’t vector-based, and its performance wasn’t that good for the type of work UI designers needed to do. Anyone who tried to operate a 20 artboard psd knows what I’m talking about.
Designing a normal website was tricky enough with Photoshop, but designing an e-commerce site which relies on responsive experiences?
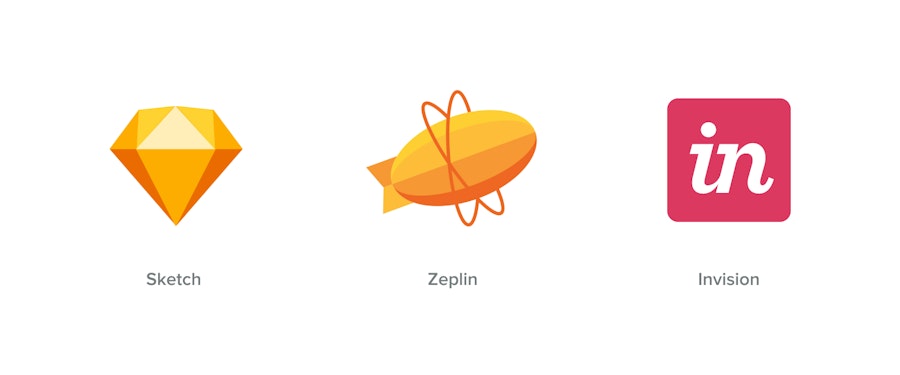
Then Sketch (and other tools like Zeplin and Invision) came along which helped things… a bit.

Sketch was the leader of the pack and introduced a simple, clear interface, where every feature was destined for UI design. It was a drastic change. It was light, vector-based, performant, and the tool quickly gained in popularity with the release of symbols in 2014.
To make a long story short, Sketch set new standards now followed by every major tool in the business and, 5 years later, Sketch is still the leader in the field.
But like everything in life, the more this tool was used, the more limitations have appeared, specifically regarding projects that require heavier collaboration from all parts of the team.
The difficulty collaborating across operating systems, the rise in third-party tooling, and new software allowing multiple parties to interact with designers (simultaneously) led to an iteration nightmare!
In short, projects became cluttered with “noise” from all directions, and the result of all these tools (aiming for more efficiency) was actually a decrease in productivity. And, after all, isn’t finding tools for increasing developer productivity what we’re all after for professional projects?
And thus, we came down to the real problem:
How do we encourage team-wide collaboration while making the workflow as lean and simple as possible?
That’s where Figma comes in.
How Figma closes the gap between developer and designer
First off, what is Figma?

People often compare Figma to a mix of Sketch, Zeplin, and Invision together. They think it’s “just another design tool.” But when you get down to it, Figma is so much more than that.
Why? Because it always keeps collaboration at heart.
You can open up your project in Figma from any operating system (Windows, MacOS, Linux) and your work is saved automatically.
This technology allows stakeholders to load the same project and work together with a smooth experience, whatever their technical constraints may be. A designer on MacOS can invite a developer on Linux to join in order to present a project to a client on Windows.
Plus, each person has their own named cursor (just like Google Docs) so it’s very clear to see who is doing what.

Also, because it is cloud-based, everything is live. All the time. This means that everyone is working from the same source which is obviously a huge help at making sure each iteration is still relevant.
And like all good things in life, the advantages come from the little things:
If you have feedback to give to your designer, you can simply leave a comment.
If you need anything from the design, you just open it and inspect it.
If you need to see how a particular feature behaves, you can open a live prototype and click your way through until your question is answered.
All these capabilities may seem insignificant, but any developer/designer team knows they are invaluable to the creation of a sleek design.
Ok, so how does all this actually work in practice?
Figma Tutorial: A step-by-step breakdown
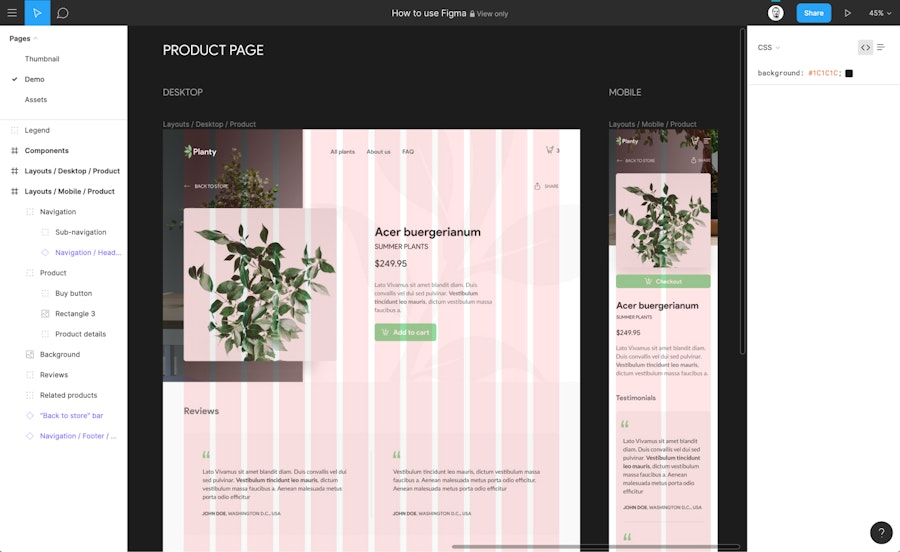
To demonstrate what it’s like to work with Figma, I have created a small demo for you to play around with.
Together, we will open this document in Figma, and explore the tool. Then, we will look at how, as a developer, you can use it to your advantage.
Step 1: Creating your free account

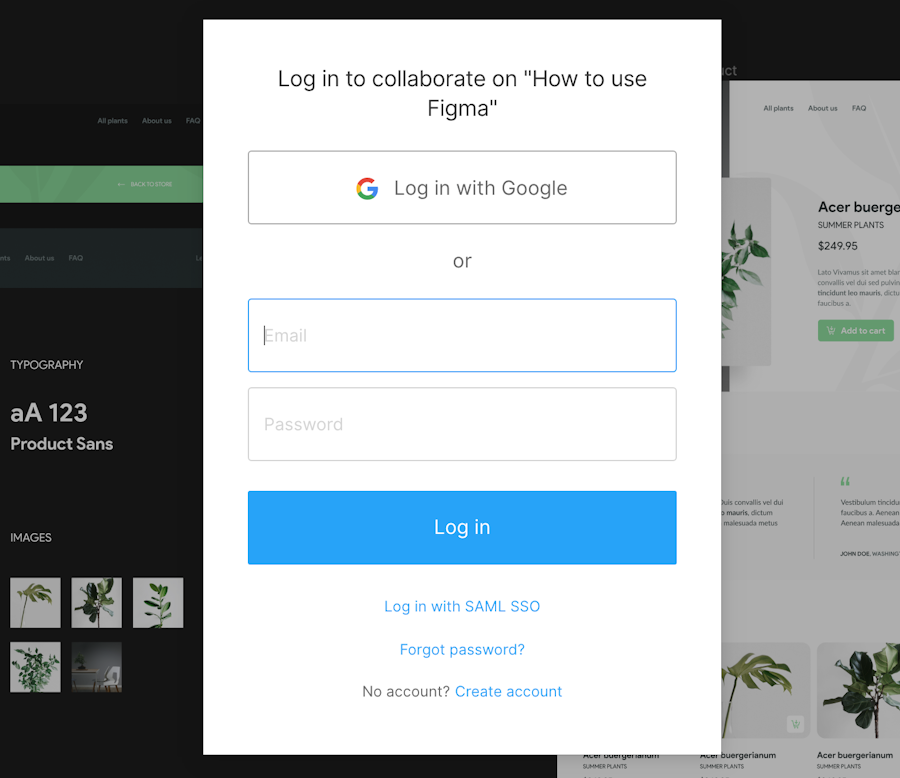
In order to be able to inspect a project, you need a free account. This allows you to see and be seen by others in the document so your teammates can interact with you.
Step 2: The interface
If you have ever tried to operate a design tool in the past, chances are you remember all those panels, options, and features. Chances are that if it was your first time with the tool, it all just looked like Greek (unless you are Greek… in which case it probably looked like Latin).
Even though it’s not exactly nuclear science, design tools can be intimidating at first.
Fortunately, when it comes to learning Figma, it’s incredibly simple: what you see is what you get. Let’s take a look.
1. The top bar.
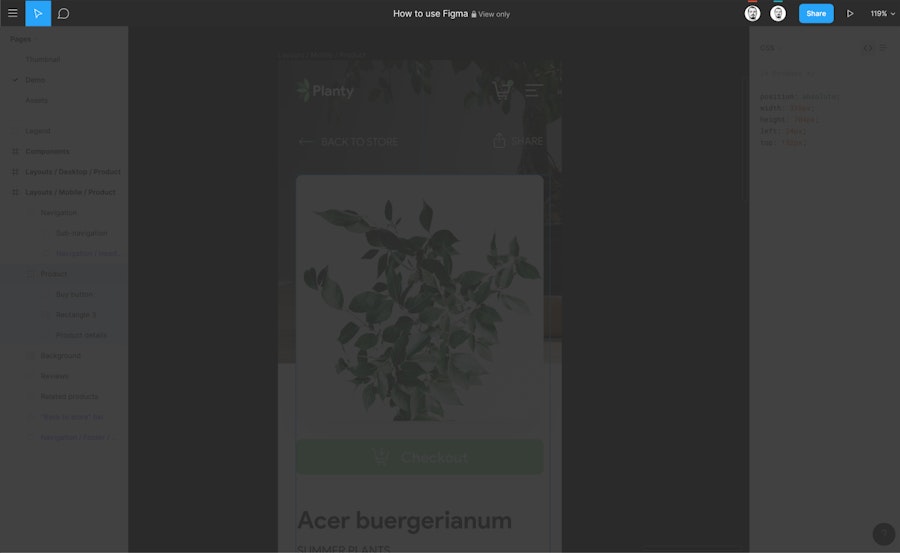
As stated above, in Figma, if you don’t need a tool, it won’t be shown. As a viewer (opposed to being an Editor), you will have “read only” access to the document—perfect for looking around without breaking anything.
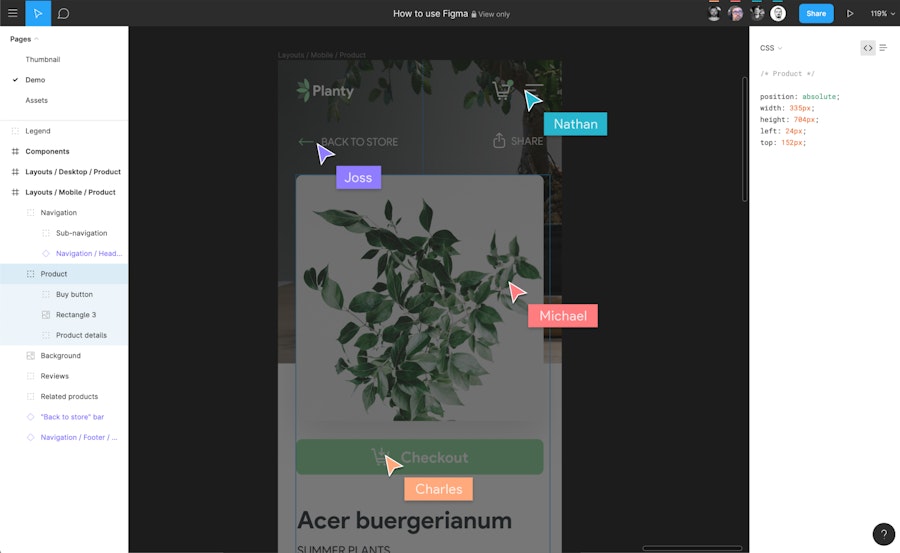
From this sidebar, you can also go back to the dashboard and select the pointer tool or the comment tool (more on that later). You can see the name of the document right in the middle of the screen, and the project the document is attached to,
On the right, you can see who is present in the document and even follow them around to get an idea of what they’re working on live.
Then you have a Share button, which displays a popup where you can see the people who have access to the doc, and where you can invite others to join. Like I said above, collaboration really is at the heart of this tool.
Finally, on the extreme right of the top bar, you can either run a prototype (this will open a new tab) or play with display options for a more comfortable browsing experience.
2. The left sidebar.
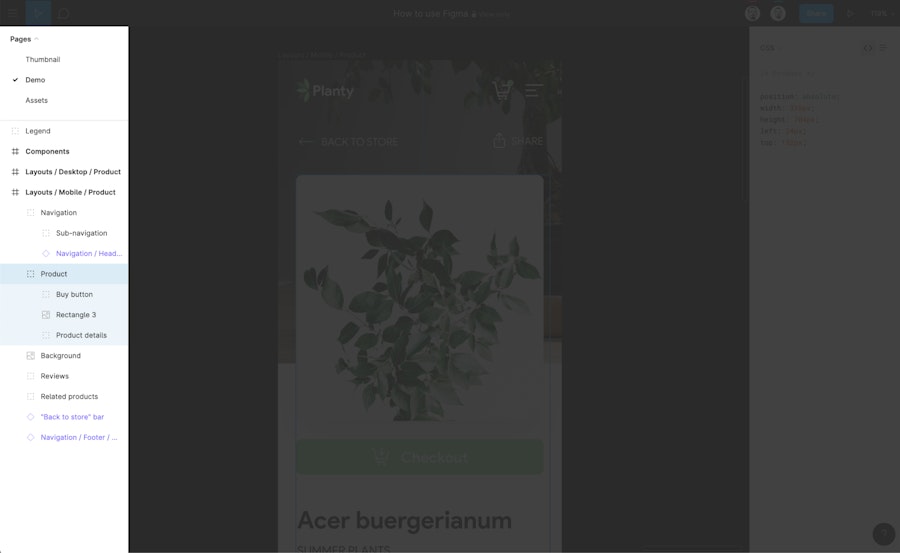
There are two elements here: the “pages list” and the “layers list.”
A Figma document can be broken down into several pages. It can be useful when designers don’t want to overload their document with hundreds of iterations or flows. Pages are a perfect way to get a document better organized.
Then you have the layers list. If you don’t manage to click on a particular element in the design to export it, it might be easier for you to find it here.
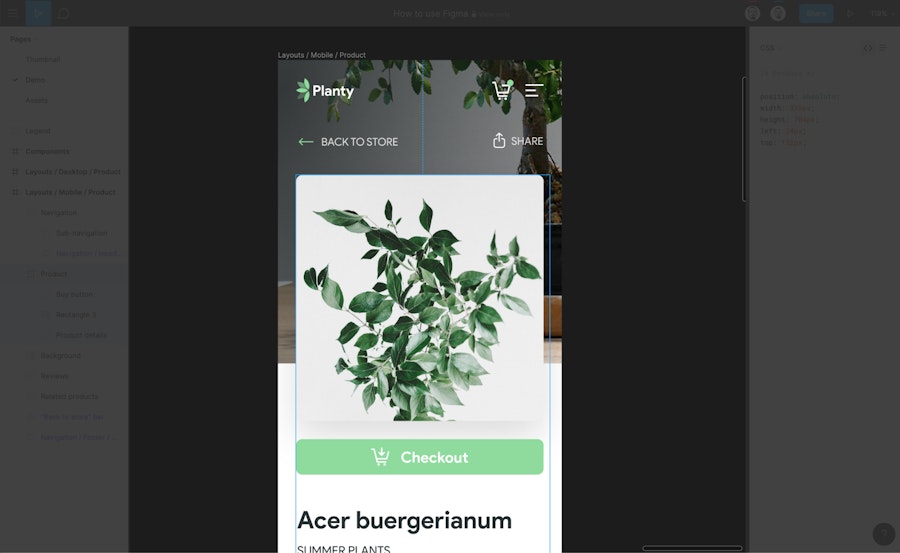
3. The canvas.
This is where all the magic happens! It’s where you’ll spend most of your time, browsing artboards and designs, measuring spaces and dimensions, clicking on icons to export, commenting, etc.
4.The right sidebar.
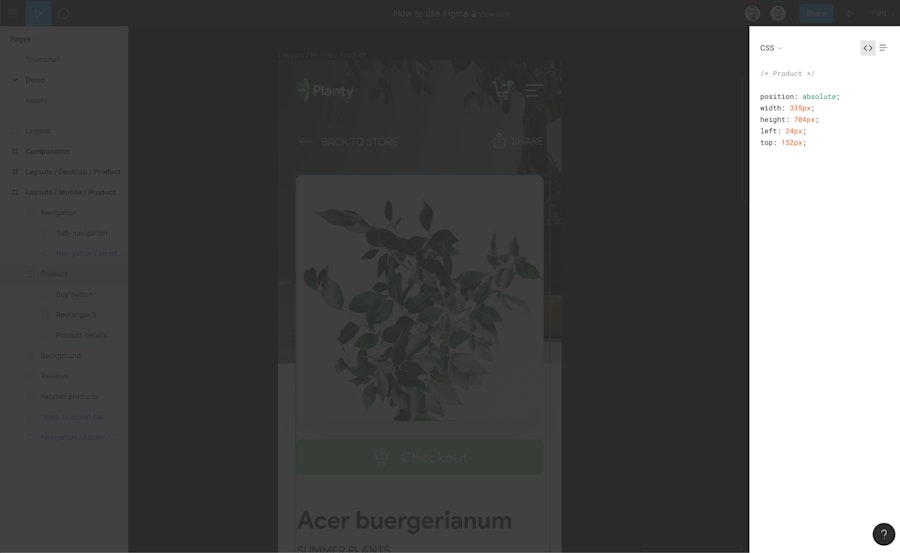
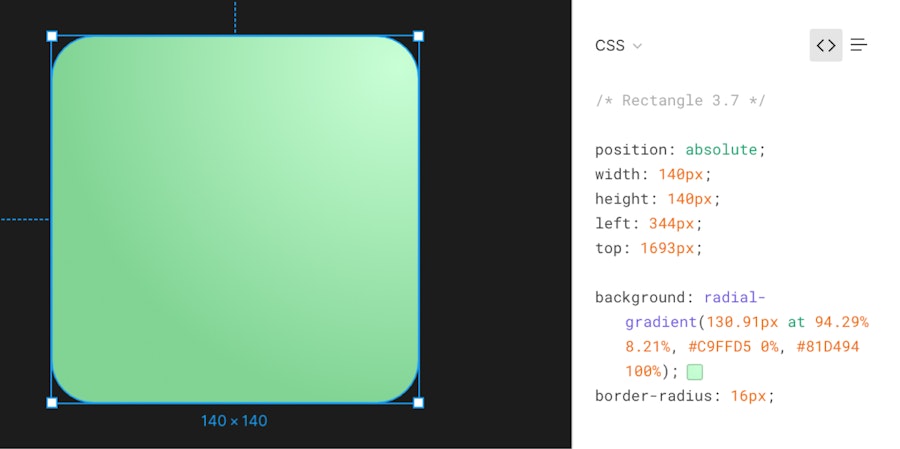
The code panel

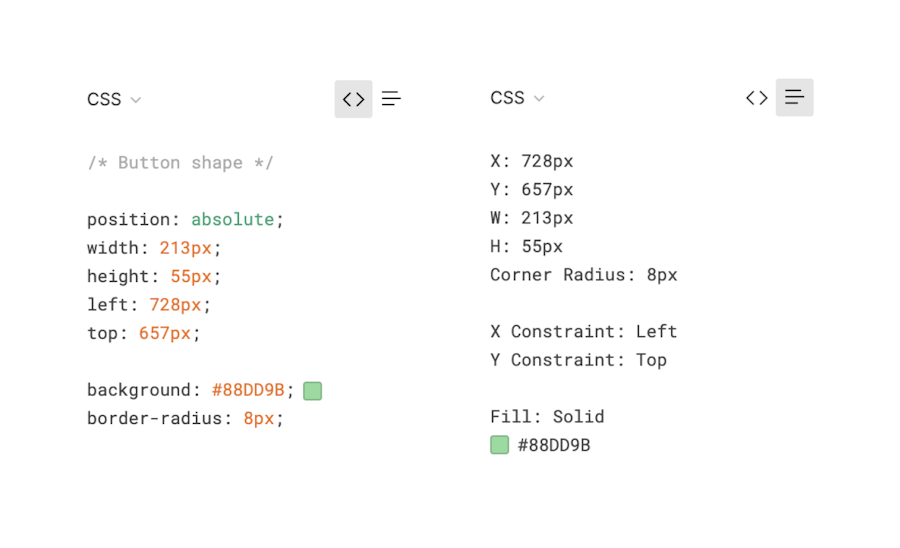
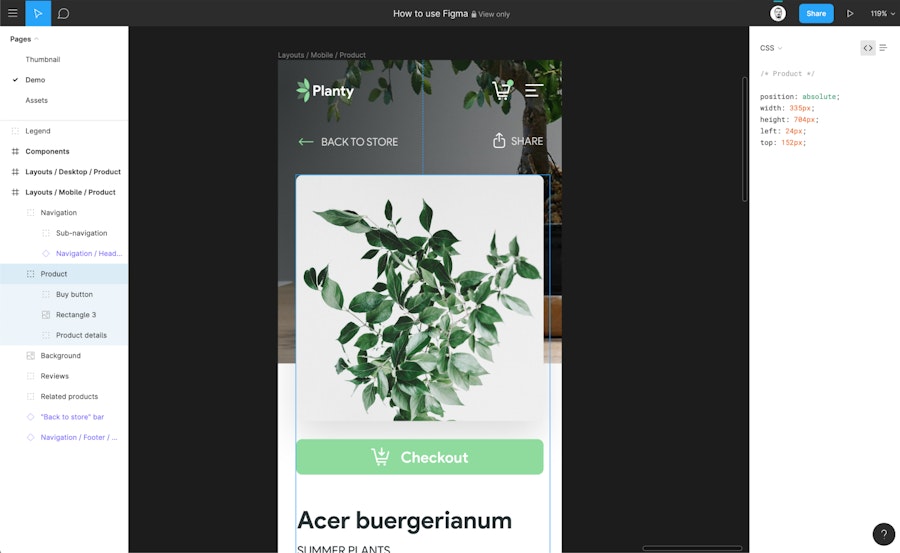
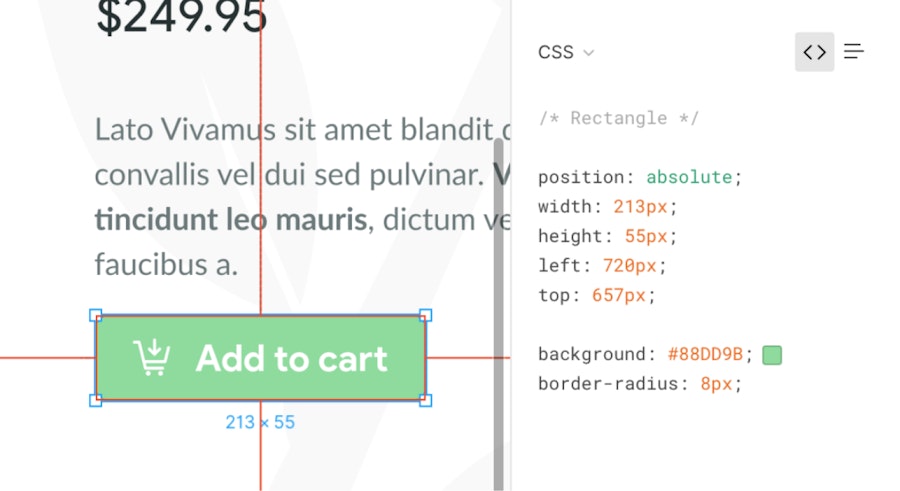
If you select any element, you will see a CSS interpretation of this element. Dimensions, coordinates, background, color, font size, weight, everything is there, depending on the element you selected. You can select two different views, whether you want to copy/paste entire CSS lines or just the values.
Do you have a particular gradient you’d like to get right? This is where the CSS line will be.

After that, you have the Export panel. If you click on an element in the canvas, you will be able to use this panel to export it in several formats. JPG, PNG, SVG, PDF, etc.
Inspecting the document
If you work with a designer, chances are you’re going to do some front-end stuff at some point. You’ll need your work to be precise and consistent with the design. To achieve that, Figma allows you to dive into the designs, to measure precisely, and get exact values.
Let’s see how this works:
Measuring distances

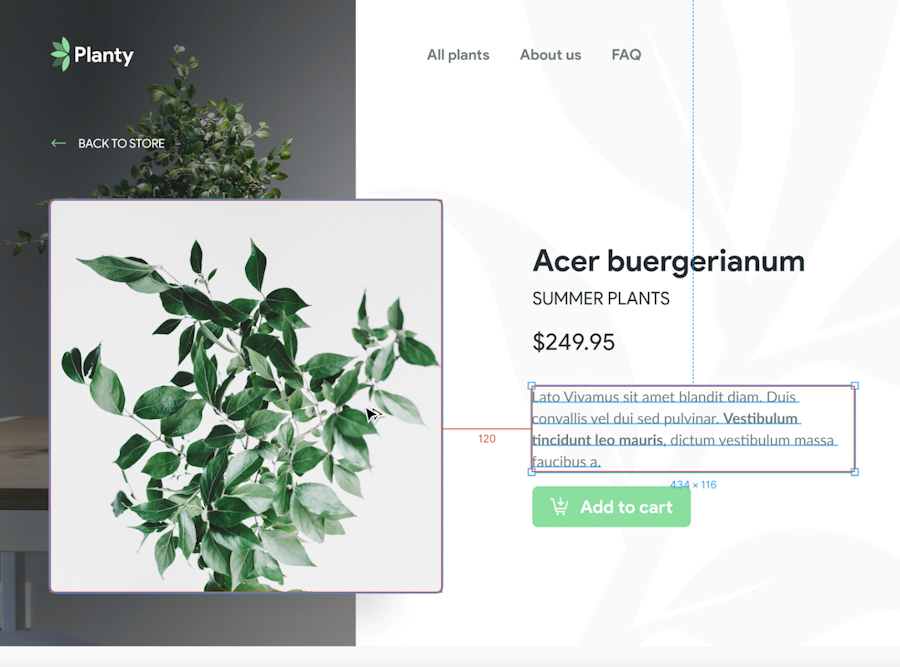
When you click on an element and try to hover another element next to it while pressing ALT: a measurement line will appear, giving you the exact distance between those two. This ensures that your designs are exactly the way you want them to look. In fact, it’s how we personalized our Planty Theme for Stackbit to be exactly to our liking!
Small side note: If you haven’t checkout Stackbit but you’re interested in the JAMstack, you should probably do that. Our Stackbit Intro is a good place to start!
Using code inspect to get colors

Similar to gradients, colors can be inspected and their hex code copy / pasted.
Using code inspect to get values (weight, size)

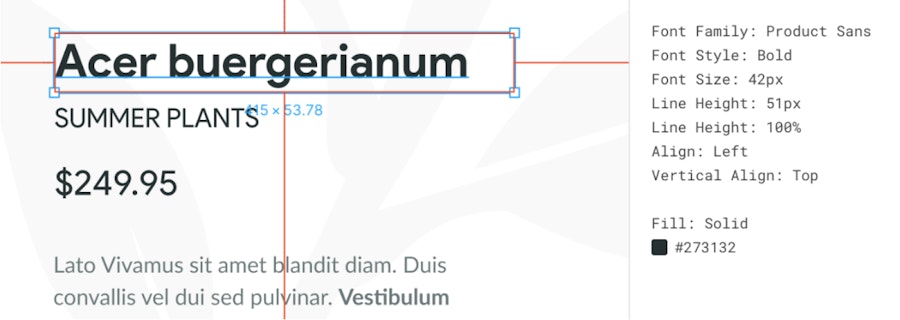
When inspecting a text element, you get additional information : size, weight, line-height, everything you need.
Display grids
Grids are the cornerstone of any consistent interface. To hide/show grids in Figma, just hit ctrl+g (MacOS & Windows).
Note that for this to work, your designer must have added a grid to the selected frame beforehand.
Export assets
If you’ve been using Invision or Zeplin in the past, you must be familiar with exporting assets during your implementation. Opposed to Sketch, where assets have to be flagged as exportable by a designer in order to appear in third party tools, exporting assets in Figma is made easy.
Just click on any element and head over the sidebar on the right. You’ll see an export button. You can choose which format you want to export your asset in.

If you have several assets you would like to export together, you can select them all at once and hit “export.”

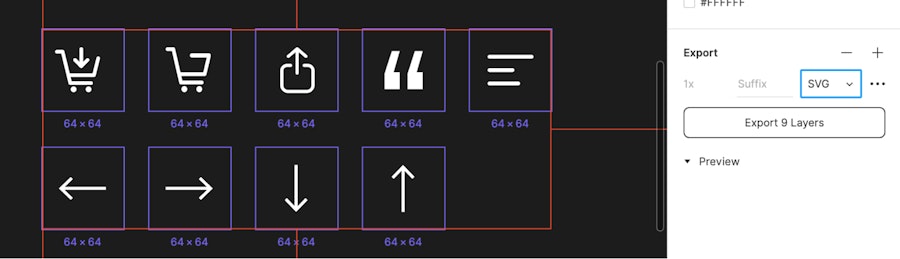
When Files are named with “/”, Figma actually builds a file structure when batch exporting, which is very handy:


With Figma, developers can contribute more meaningfully—and more efficiently
Without feedback, there is no collaboration. Figma allows anyone who has access to a document to comment anywhere and tag others.

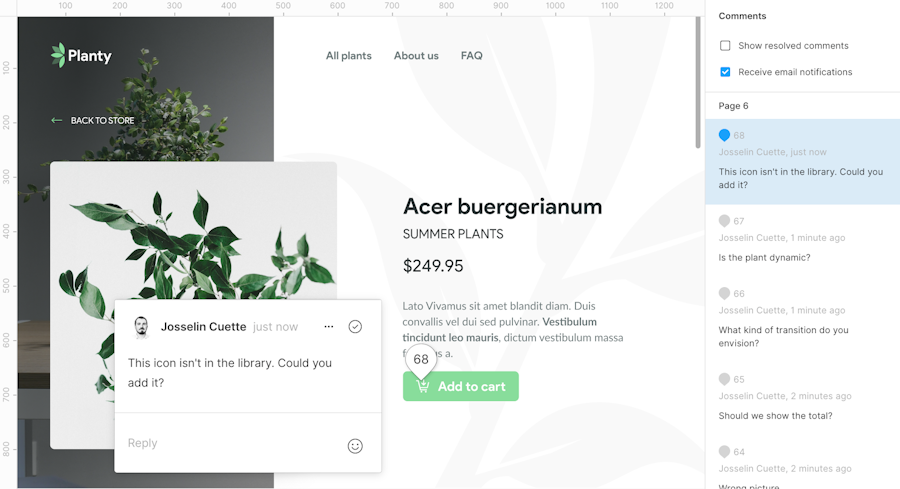
Note: A bit off-topic but good to know… Figma integrates in Slack. So you can sync your comments and be notified in the channel of your choice when someone leaves a comment
There isn’t just one way to structure a Figma document. In fact, there may be as many ways to organize a doc as there are teams using them!
Ok, at this point, you get it. Easy, right? Maybe you’ve even been using Figma for a while and you’re feeling comfortable with the tool. But, for some reason, your designer’s file is harder to inspect than usual, and some images/icons are harder to export.
What can your designer do about it and how can you both work simultaneously on this?
Create a good file structure to ensure autonomy

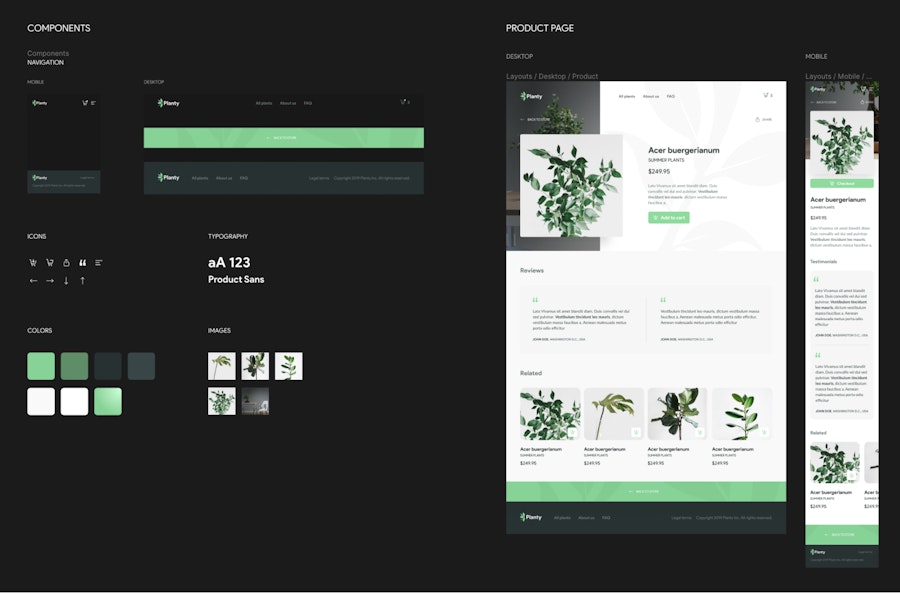
One of the biggest ways a designer and a developer can work on a project a the same time (without getting in each other's way) is by taking the time to create a clear file structure. Typically, a good file structure has the following elements:
Clearly identified pages, artboards, and elements: This prevents miscommunication and make finding a particular element much easier.
Well structured components: Figma is very powerful when it comes to components (watch this video if you’re curious about it) and a well-structured document will ensure a more flexible environment, facilitating discussions and iterations.
Well documented elements and features: Because being forced to halt implementation because a feature isn’t just clear enough to proceed is never fun.
Consistent spacing and dimensions: Figma gives designers the ability to use systems like the 8pt grid (you can learn more about that here) to ensure their spaces and dimensions are closer to what they would be when coded.
Like any relationship, it all comes down to clear communication. With the tips mentioned above, you'll make sure that you and your designer go on to lead a long, beautiful relationship (totally professional though... of course).
Want to play around on Figma for a bit? Check out the live demo
Conclusion
There’s no doubt that Figma’s popularity is growing—and for good reason. While Figma may not be particularly revolutionary, it definitely knows how to get a team to work together. Everyone in the project is able to have a voice without the process getting too “noisy.” In the end, Figma is the best design tool for making sure your team is working efficiently, effectively, and that the final product won’t come out...well...lopsided.
If you’ve enjoyed this post, please take a second to share it on Twitter. Got comments or questions? Hit the comment section below!


