A Guide to Golang E-Commerce (w/ Go-Powered CMS Tutorial)
In a rush? Skip to technical tutorial or live demo.
"We haven't played with Go in a while."
Our lead developer, reflecting on our content roadmap.
"I haven't worked with Go at all" I think to myself.
Today, I'll give it a go (yeah, I know 🤦♂️) by exploring the Golang ecosystem and the e-commerce possibilities it offers.
I'll then show you how to craft your own Go-powered online shop with the help of Ponzu CMS.
Tutorial steps:
Setting up Ponzu CMS.
Creating the store frontend with a Go static site generator.
Deploying the website to Netlify.
Enabling e-commerce capabilities with Snipcart.
Let's first take a step back and immerse ourselves in the Golang universe.
Is Golang any good for e-commerce?


What’s Go?
I think it’s still legitimate to call Go an up-and-coming programming language, since the developer community defines it as one of the languages it most wishes to learn. It also ranks as the fifth most loved one, higher than JavaScript and C# amongst others.
This post isn't about learning the language. If you feel like you need a proper introduction to Golang's strengths & weaknesses, read this excellent Hacker Noon post.
Take Hugo for instance, one of the most popular static site generators out there. Widely recognized as the fastest of its kind, it'll generate a neat blog or e-commerce frontend in no time.
Go e-commerce backend solutions
Some of these tools are specifically made to generate online shops and e-commerce backends:
QOR - A Golang SDK for e-commerce and CMS development. It's comprised of modules that abstract common features for such systems. Build by Go developers, for Go developers.
Ottemo - A mobile-first platform, marketed as "next generation" e-commerce for small and medium companies.
Looking at these e-commerce solutions, you'll quickly get that they're mostly massive platforms which might not give you lots of freedom as developers to craft custom shopping UX.
So, are there alternatives here? Two come to mind:
Writing your own custom Go e-commerce API—time-consuming option obviously, but if you have the time and skills to do it right, hats off to you!
Using a third-party solution to integrate with the Go-powered CMS/app of your choice—precisely what I'll do in the following demo!
If none of these solutions seem to fit your needs, maybe Golang isn't the right language/framework for your e-commerce backend. Have you thought about trying Node.js, Python/Django or PHP/Laravel?
Technical tutorial: Golang e-commerce with Ponzu CMS
Introduction to Ponzu: a Golang CMS
I'll use Ponzu CMS to manage the content of my e-commerce app here. In a nutshell, it is an efficient Go-powered open-source HTTP server framework and CMS.
In the words of its creator Steve Manuel:
"It's easy to use, JSON friendly, and with a fast and concurrent API server. I wanted to pick the parts of other platforms that I liked: take a great CMS backend from WordPress, a developer-first CLI to generate code for me from Rails, and a blazing fast JSON API from Netty."

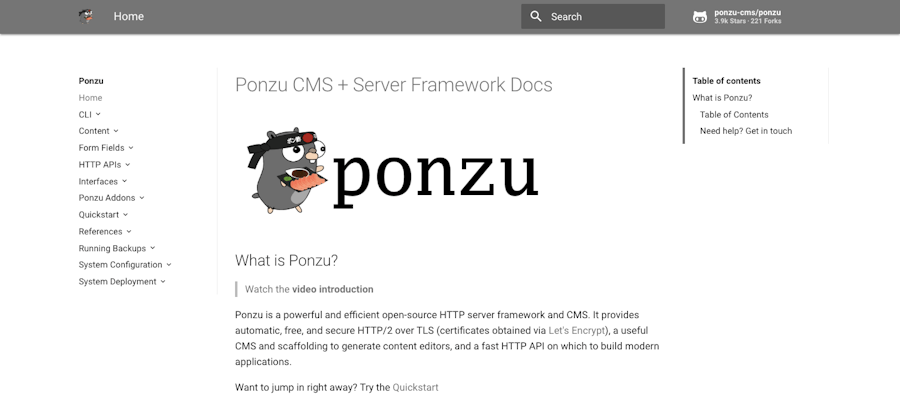
It looks like a neat minimalist framework; an excellent choice for small use cases with crazy fast installation and setup, automatic HTTPS configuration, and top-notch performances.
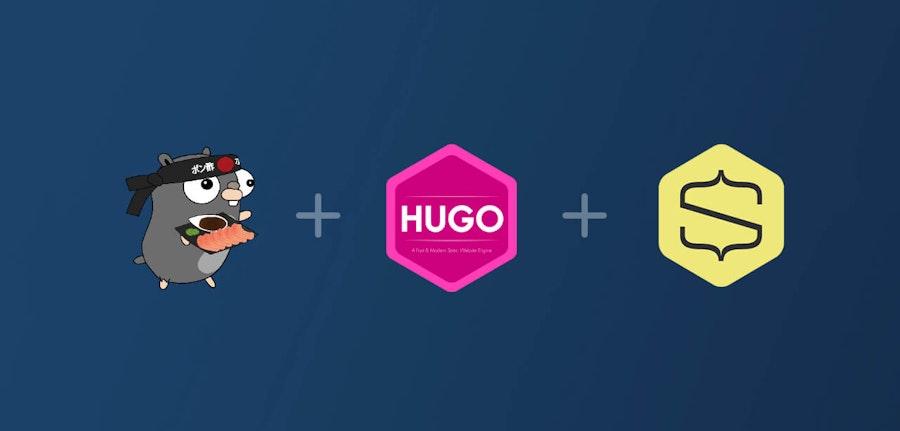
As a headless CMS it allows me to take a JAMstack approach.
The stack will be Go all the way down to the store website: I'll throw Hugo in the mix as my static site generator.
So, let's get on with it!
A bit of context for my demo
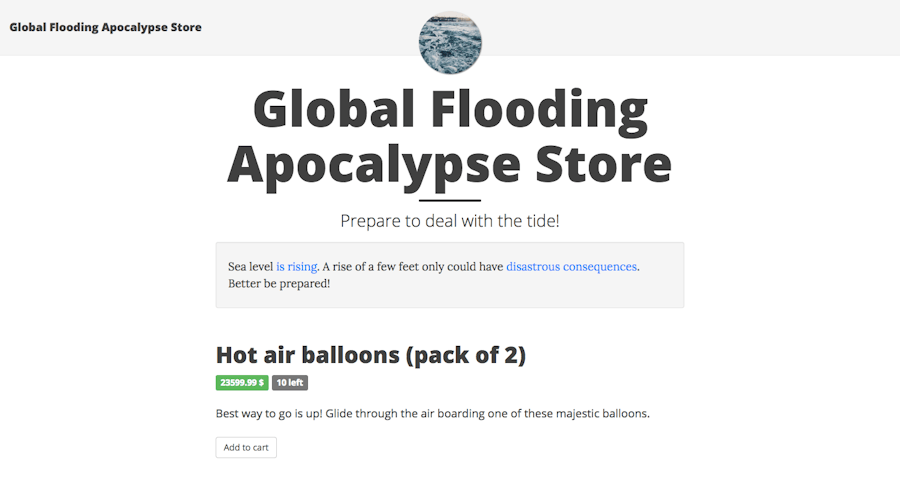
Sea level is rising. A rise of a few feet only could get some people's feet wet. Better be prepared! So let’s start a simple store selling some goods to help people deal with these floods. We’ll have limited stocks, so it will be crucial to keep track of our inventory.
Prerequisites
Basic knowledge of Go
Having Go installed and available in your PATH
A Snipcart account (forever free in Test mode)
1. Setting up Ponzu CMS and the products API
Having an instance of Ponzu running amounts to executing a few terminal commands:
$ go get -u -v github.com/ponzu-cms/ponzu/...
$ ponzu new snipcart-ponzu
$ cd $GOPATH/src/snipcart-ponzu
$ ponzu build
$ ponzu run --dev-https

Enabling self-signed HTTPS... [DEV]
Server listening on https://localhost:10443 for requests... [DEV]

If your browser rejects HTTPS requests, try allowing insecure connections on localhost.
on Chrome, visit chrome://flags/#allow-insecure-localhost

Server listening at localhost:8080 for HTTP requests...
Visit '/admin' to get started.
Once you’ve done the above, head over to https://localhost:10443/admin.
There'll be a one-time configuration step before you can get your hands dirty:

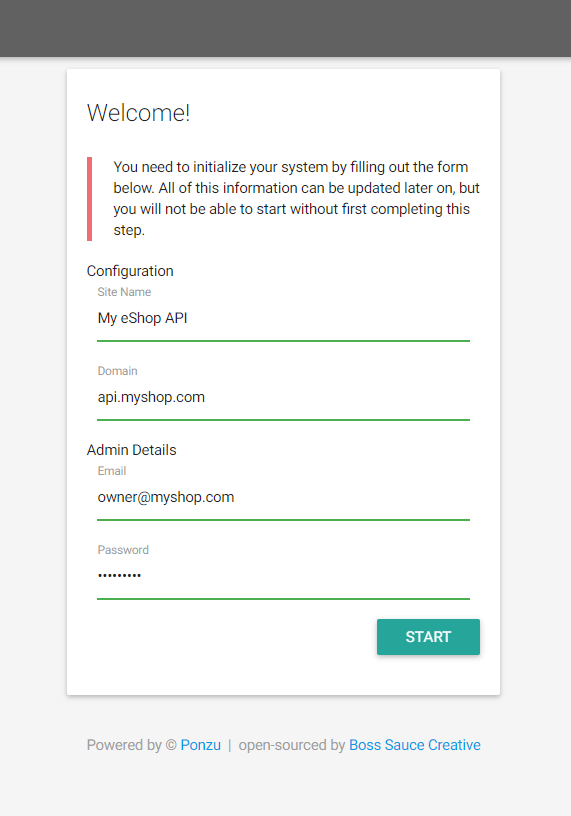
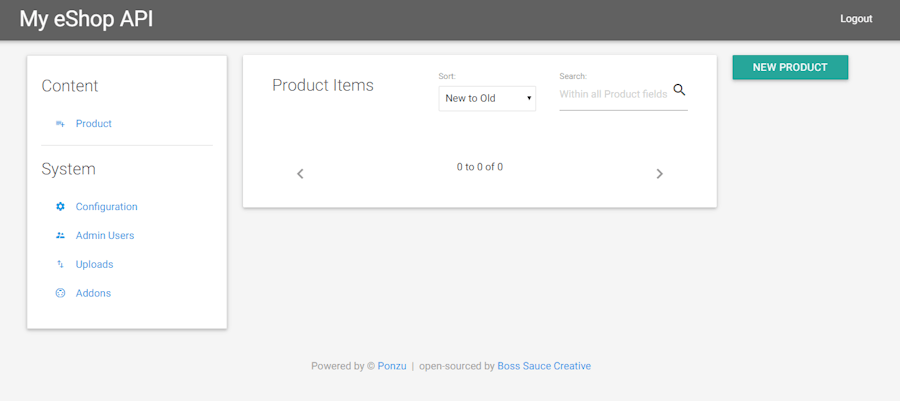
You’ll end up in the admin interface. Looks a bit empty, right?
That’s because there still isn’t any content type available. Ponzu provides a command line generator for this.
Let’s create a product content type. Stop the app (CTRL+C) and run the following:
$ ponzu generate content product name:"string" price:"float32" description:"string" image:string:file
$ ponzu build
$ ponzu run --dev-https
When executing the command above, Ponzu creates a product.go file under the content directory of your app. This is the base of this content type definition. You can extend it to make it fit your needs (we’ll get back to that).
Right now, just let it as-is, restart the app, and go back to the admin dashboard.
You’ll notice that the Product content type is now available in the navigation bar. By clicking it, you access the list of product entries:

Create your first product:

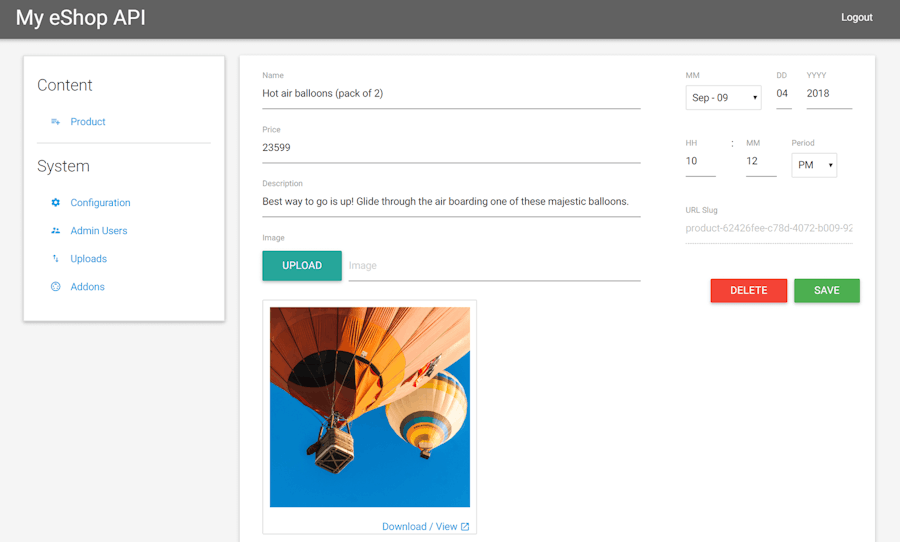
Bam!
Once created, your new product will instantly be available through Ponzu’s API endpoint:
// https://localhost:10443/api/contents?type=Product

{
    "data": [
        {
            "uuid": "62426fee-c78d-4072-b009-92e2d19795c0",
            "id": 5,
            "slug": "product-62426fee-c78d-4072-b009-92e2d19795c0",
            "timestamp": 1536113556000,
            "updated": 1536150096023,
            "name": "Hot air balloons (pack of 2)",
            "price": 23599,
            "description": "Best way to go is up! Glide through the air boarding one of these majestic balloons.",
            "image": "/api/uploads/2018/09/hot-air-balloons.jpg"
        }
    ]
}
That last step wraps our basic headless CMS setup. Now, the crunchy part!
2. Creating the store website with a Golang SSG
The store will be a Hugo site hosted on Netlify.
You’ll have to install Hugo. Now let’s create your site.
You can do so using the Beautiful Hugo theme and tweaking it a bit.
I won’t go to great lengths explaining the customization since this isn’t our primary focus. A more in-depth walkthrough is covered in this earlier piece.
$ hugo new site myshop.com
$ cd myshop.com
$ cd themes
$ git clone https://github.com/halogenica/beautifulhugo.git beautifulhugo
$ cp ./beautifulhugo/exampleSite/config.toml ../config.toml
Now, you could add a product archetype and run a command like hugo new product/my-awesome-product.md to create content, but you remember this shiny Ponzu product catalog?
You want all of your products to be added automatically, right? Let’s do it this way.
2.1 Generating products for Hugo
What you’ll need to do is code a simple program that will read the products from your Ponzu API and generate Hugo Markdown content files for them.
Since there’s already Ponzu and Hugo in the mix, it just makes sense to use Go for that, doesn’t it?
Just create a simple Go package inside your Hugo site:
# I'm using VS Code here

$ code ponzuImport.go
Here’s the code:
package main
import (
    "bufio"
    "crypto/tls"
    "encoding/json"
    "io/ioutil"
    "log"
    "net/http"
    "os"
    "time"
)

type PonzuProductResponse struct {
    Data []PonzuProduct `json:"data"`
}
type PonzuProduct struct {
    UUID        string  `json:"uuid"`
    ID          int     `json:"id"`
    Slug        string  `json:"slug"`
    Timestamp   int64   `json:"timestamp"`
    Updated     int64   `json:"updated"`
    Name        string  `json:"name"`
    Price       float32 `json:"price"`
    Description string  `json:"description"`
    Image       string  `json:"image"`
}
type HugoProduct struct {
    ID               string    `json:"id"`
    Title            string    `json:"title"`
    Date             time.Time `json:"date"`
    LastModification time.Time `json:"lastmod"`
    Description      string
    Price            float32 `json:"price"`
    Image            string  `json:"image"`
    Stock            int     `json:"stock"`
}

func (dest *HugoProduct) mapPonzuProduct(
    src PonzuProduct,
    ponzuHostURL string,
    client *http.Client) {
    dest.ID = src.Slug
    dest.Title = src.Name
    dest.Price = src.Price
    dest.Description = src.Description
    dest.Image = ponzuHostURL + src.Image
    dest.Date = time.Unix(src.Timestamp/1000, 0)
    dest.LastModification = time.Unix(src.Updated/1000, 0)
}

func main() {
    ponzuHostURL, ok := os.LookupEnv("PONZU_HOST_URL")
    if !ok || ponzuHostURL == "" {

    }
    var productsEndpoint = ponzuHostURL + "/api/contents?type=Product"

    // Fetch products
    tr := &http.Transport{
        TLSClientConfig: &tls.Config{InsecureSkipVerify: true}, // this line should be removed in production
    }
    client := &http.Client{Transport: tr}
    request, err := http.NewRequest(http.MethodGet, productsEndpoint, nil)
    if err != nil {
        log.Fatal(err)
    }
    response, err := client.Do(request)
    if err != nil {
        log.Fatal(err)
    }
    defer response.Body.Close()
    body, err := ioutil.ReadAll(response.Body)
    if err != nil {
        log.Fatal(err)
    }
    // Parse response JSON
    var products PonzuProductResponse
    if err = json.Unmarshal(body, &products); err != nil {
        log.Fatal(err)
    }
    // Clear content/product directory
    dir, err := os.Getwd()
    if err != nil {
        log.Fatal(err)
    }
    if err := os.RemoveAll(dir + "/content/product"); err != nil {
        log.Fatal(err)
    }
    if err := os.MkdirAll(dir+"/content/product", 0777); err != nil {
        log.Fatal(err)
    }
    // Write product content files
    for _, sourceProduct := range products.Data {
        var destProduct = HugoProduct{}
        destProduct.mapPonzuProduct(sourceProduct, ponzuHostURL, client)
        entryJSON, err := json.MarshalIndent(destProduct, "", "  ")
        if err != nil {
            log.Fatal(err)
        }
        file, err := os.Create(dir + "/content/product/" + destProduct.ID + ".md")
        if err != nil {
            log.Fatal(err)
        }
        writer := bufio.NewWriter(file)
        writer.WriteString(string(entryJSON) + "\n")
        writer.WriteString("\n")
        writer.WriteString(destProduct.Description)
        writer.Flush()
        file.Close()
    }
}
The above is pretty simple; it reads through all products and creates a product content file for each one by mapping all relevant fields.
You can test this script by running go build ./ponzuImport.go
3. Deploying to Netlify
You’ll want to generate products on each build, so create the following build.sh script at the root of your website:
#!/usr/bin/env bash

go build -o ./ponzuImport ./ponzuImport.go
./ponzuImport
hugo
Then, configure Netlify to run this script when building your site. Just add this netlify.toml file at the root of your website:
[build]
  publish = "public"
  command = "./build.sh"
[context.production.environment]
# I'm fixing Hugo version to make sure my theme doesn't break
HUGO_VERSION = "0.47.1"
HUGO_ENV = "production"
You’ll have to set the PONZU_HOST_URL environment variable in your Netlify build configuration. It has to point to your live instance of Ponzu. Whether it’s a ngrok proxy of your local app (when still in development) or a cloud app, it’ll have to be set.
4. Adding e-commerce capabilities to the Go website
Let’s add required Snipcart markup under your layout’s <head> element:
<script src="https://ajax.googleapis.com/ajax/libs/jquery/2.2.2/jquery.min.js"></script>
<script src="https://cdn.snipcart.com/scripts/2.0/snipcart.js" id="snipcart" data-api-key="{{ .Site.Params.snipcartAPIKey }}"></script>
<link href="https://cdn.snipcart.com/themes/2.0/base/snipcart.min.css" type="text/css" rel="stylesheet" />
Then, render buy buttons like so in your template:
{{ if le .Params.stock 0 }}
    <span>Out of stock</span>
{{ else }}
  <button
    class="snipcart-add-item"
    data-item-id="{{ .Params.id }}"
    data-item-name="{{ .Title }}"
    data-item-price="{{ .Params.price }}"
    data-item-image="{{ .Params.image }}"
    data-item-url="/"
    data-item-max-quantity="1"
    data-item-description="{{ .Params.description }}">
    Add to cart
  </button>
{{end}}
Now, how about we handle this Stock field seen earlier?
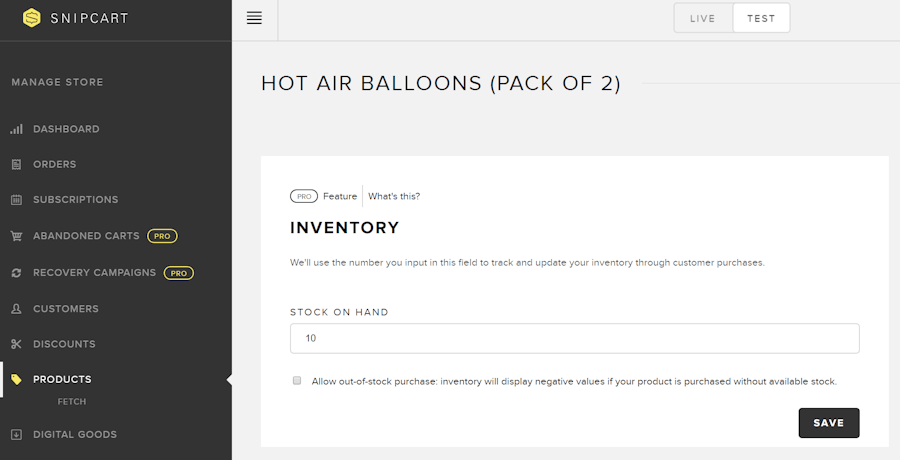
4.1 Enabling inventory management
Snipcart offers inventory management in your Merchant Dashboard.
You don’t want to wait for your products to be purchased before you see them in the dashboard, so let’s crawl them in advance:

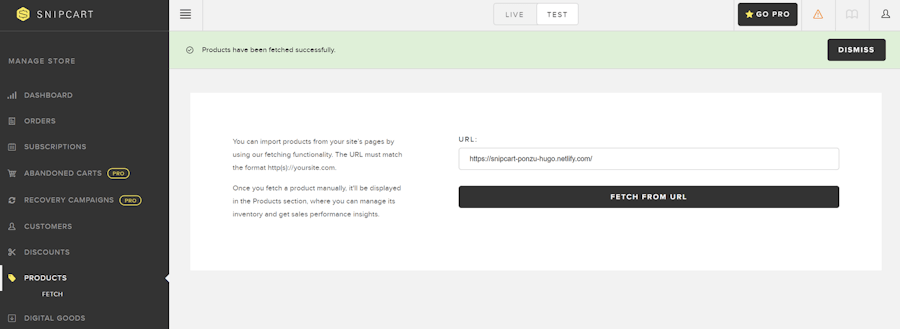
Your products are now available in Snipcart! Let’s set stocks for them:

Now, you have to adapt the import script to fetch your products stocks. To do so, you’ll have to use Snipcart’s API.
Open ponzuImport.go and add these two structs:
type SnipcartProductResponse struct {
    Items []SnipcartProduct `json:"items"`
}
type SnipcartProduct struct {
    Stock int `json:"stock"`
}
Next, add the following at the end of the mapPonzuProduct function:
// Fetch stock from Snipcart API
var url = "https://app.snipcart.com/api/products?userDefinedId=" + dest.ID
request, err := http.NewRequest(http.MethodGet, url, nil)
if err != nil {
    log.Fatal(err)
}
var apiKey = base64.StdEncoding.EncodeToString([]byte(os.Getenv("SNIPCART_PRIVATE_API_KEY")))
request.Header.Add("Accept", "application/json")
request.Header.Add("Authorization", "Basic "+apiKey)
response, err := client.Do(request)
if err != nil {
    log.Fatal(err)
}
defer response.Body.Close()
body, err := ioutil.ReadAll(response.Body)
if err != nil {
    log.Fatal(err)
}
var products SnipcartProductResponse
if err = json.Unmarshal(body, &products); err != nil {
    log.Fatal(err)
}
dest.Stock = products.Items[0].Stock
Note that your Snipcart private API key will have to be set in the SNIPCART_PRIVATE_API_KEY environment variable in your Netlify build configuration.
Neat! From now on, running your build will feed the Stock field as well.
There is one last piece missing to our grand scheme: triggering your Netlify build when data changes.
4.2 Generating build triggers
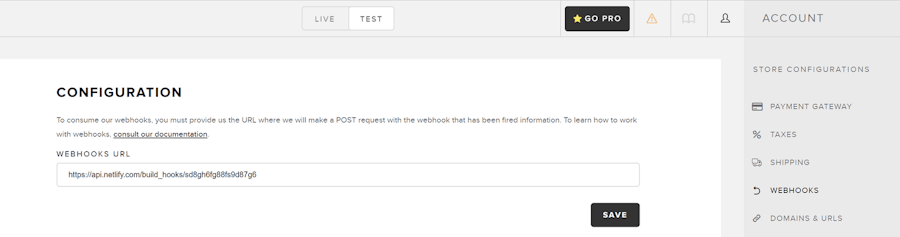
First, create a Netlify build hook for your website. Any POST request to this URL will trigger a new deployment.
Configuring webhooks in Snipcart is easy. Paste the URL in the Webhooks configuration page of your Merchant Dashboard:

You also want to call this webhook when a change occurs in your Ponzu data. Ponzu CMS offers a handful of extension points using interfaces.
Let’s extend your product content type definition by defining save hooks. Head back to your Ponzu app and add the following to content/product.go:
func (p *Product) AfterAdminCreate(res http.ResponseWriter, req *http.Request) error {
    sendWebHook()
    return nil
}
func (p *Product) AfterAdminUpdate(res http.ResponseWriter, req *http.Request) error {
    sendWebHook()
    return nil
}
func (p *Product) AfterAdminDelete(res http.ResponseWriter, req *http.Request) error {
    sendWebHook()
    return nil
}
func sendWebHook() {
    url := os.Getenv("NETLIFY_BUILD_HOOK_URL")
    resp, err := http.Post(url, "application/json", nil)
    if err != nil {
        log.Fatal(err)
    } else {
        log.Println("Webhook called successfully at " + url + " with result " + resp.Status)
    }
}
Aaaaaand you’re all set! You now have fresh Golang JAMstack e-commerce setup with inventory management. How cool is that?
Live demo & GitHub repo

See the live demo here.
See GitHub repo here.
Closing thoughts
Ponzu is great. The creator put a lot of thought into making the developer journey as simple as possible. Seamless HTTPS certificate setup through Let’s Encrypt is fantastic. The build process produces a native executable that you can run anywhere.
For the production environment, I faced an issue with Heroku’s buildpack for Go—wasn't playing well with Ponzu’s structure. I recommend running your Ponzu app in Docker.
With some hurdles here and there, I spent about two days building this demo, including the learning curve. A more seasoned Go developer should get through this way faster.
To push this tutorial further? Ponzu CMS supports HTTP/2.0, which comes with a cool feature named Server Push. When building an SPA backed by Ponzu, you can reduce the amount of remote calls you make to the backend by using Server Push to bundle multiple payloads of data that the client is likely to ask in the future!
If you've enjoyed this post, please take a second to share it on Twitter. Got comments, questions? Hit the section below!


